• Skip to primary navigation
  • Skip to main content
  • Skip to primary sidebar
  • About
  • Contact
Check out my cookbook

The Toasted Pine Nut

fun. flavorful. feel-good recipes.

  • Check out my cookbook!
  • Recipes
    • Dessert
      • Cookies
      • Bars & Brownies
      • Breads & Muffins
      • Cakes & Cupcakes
      • Pies & Crumbles
      • Candy
      • No Bake
    • Meal
      • Breakfast
      • Main Dishes
      • Appetizers
      • Sides
      • Snacks
      • Drinks
      • Salads
      • Sauces & Dips
      • Dessert
    • Diet
      • Gluten Free
      • Dairy Free
      • Vegan
      • Vegetarian
      • Egg Free
      • Kid Friendly
      • Low Carb
      • Nut Free
    • Meat
      • Fish & Seafood
      • Chicken & Poultry
      • Beef & Pork
      • Meatless
    • Method
      • Air Fryer
      • Slow Cooker
      • Instant Pot
      • Oven
      • Grill
      • Stovetop
    • Season
      • Spring
      • Summer
      • Fall
      • Winter
    • Recipe Filter
  • Shop
    • My Baking Mixes
    • Kitchen Essentials
    • Pantry Items
    • Kid Favorites
    • Photography
  • Cookbook
  • Videos
Home Recipes Desserts Candy

Rich & Creamy Microwave Peanut Butter Fudge (only 3 ingredients!)

5 min
GF Gluten-Free DF Dairy-Free V Vegan VG Vegetarian EF Egg-Free
Avatar by: Lindsay Grimes
February 16, 2023 (Updated: February 16, 2023)
Jump to Recipe
Leave a Comment

This post may contain affiliate links. Please read our disclosure policy.

This is a vertical image looking from the side at a stack of 4 peanut butter fudge squares stacked. The stack sits on a deep pink surface with more squares blurred in the white background.
3 ingredient microwave peanut butter fudge is so simple to prep in 5 min! It’s sweet and has that sink-your-teeth into texture you crave!

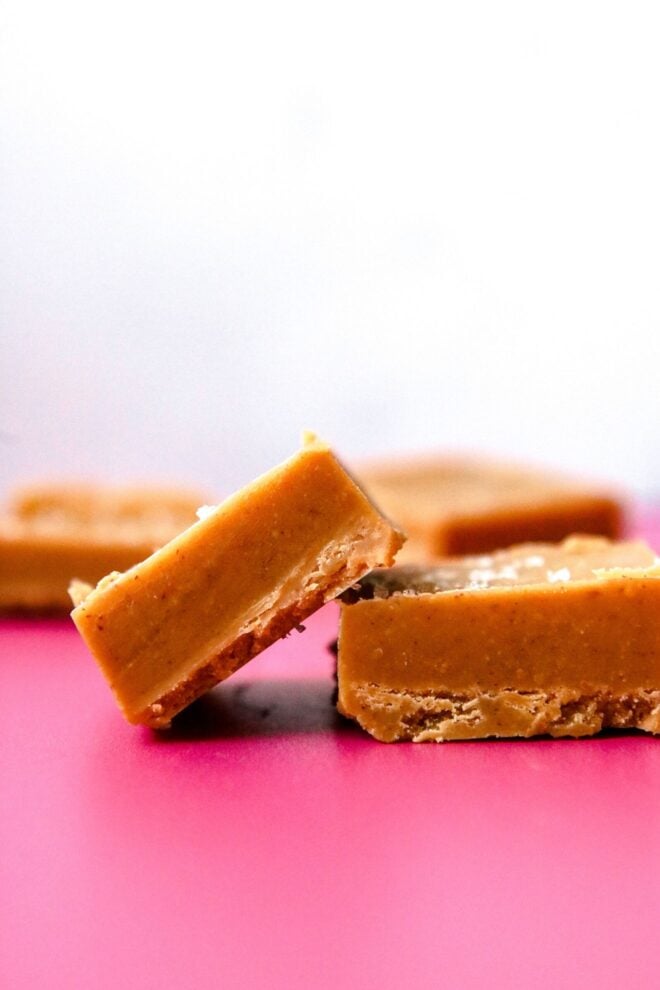
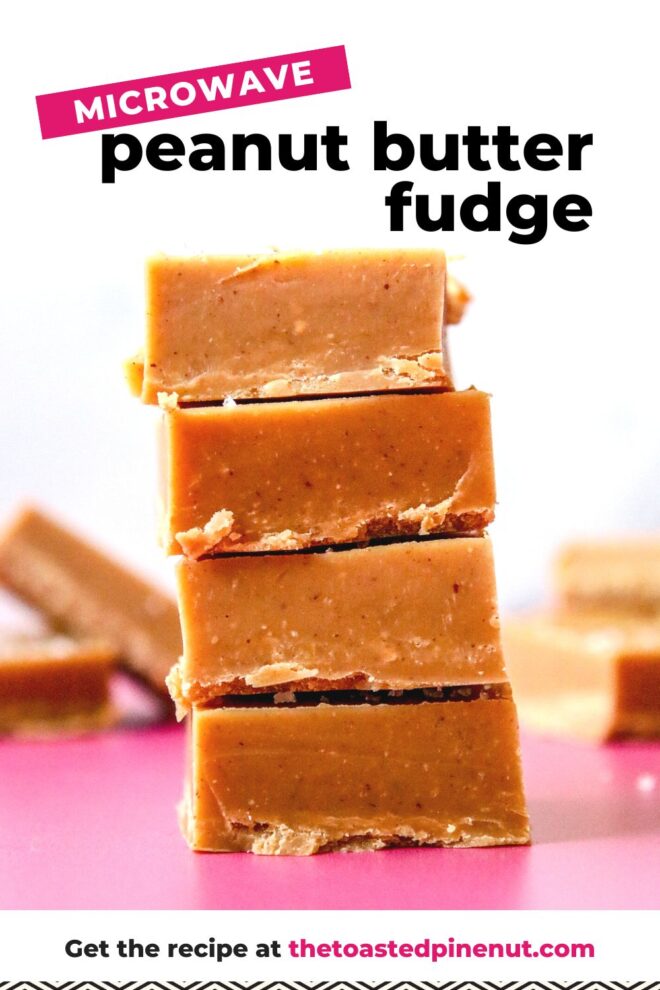
Microwave peanut butter fudge is a quick and easy treat that can be made in minutes. This fudge recipe requires only a few ingredients, including peanut butter, agave nectar, and coconut oil. Plus, we’re keeping it extra simple by making it in the microwave.

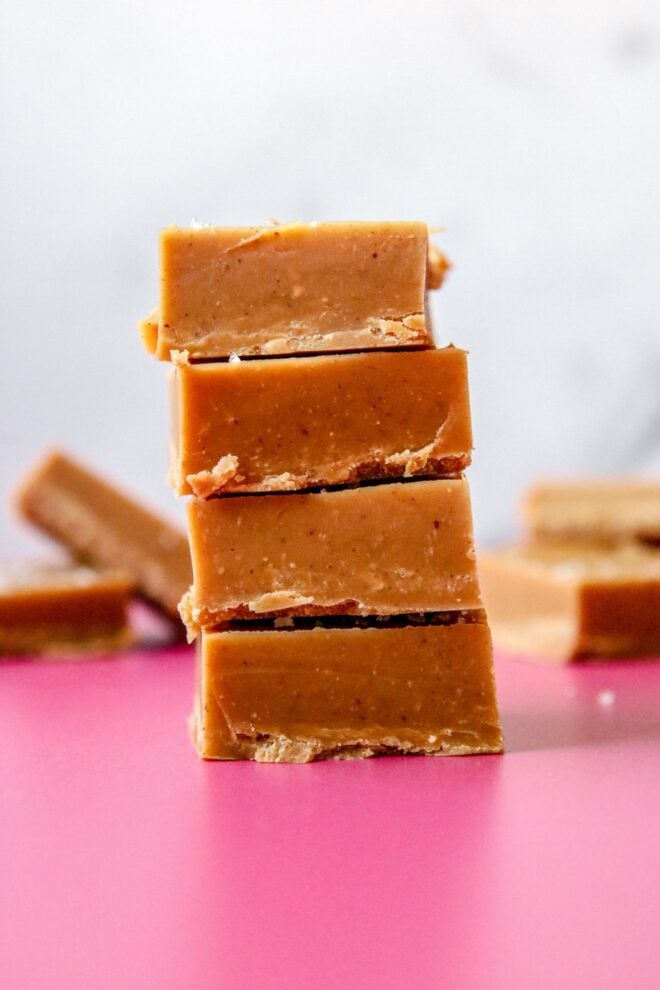
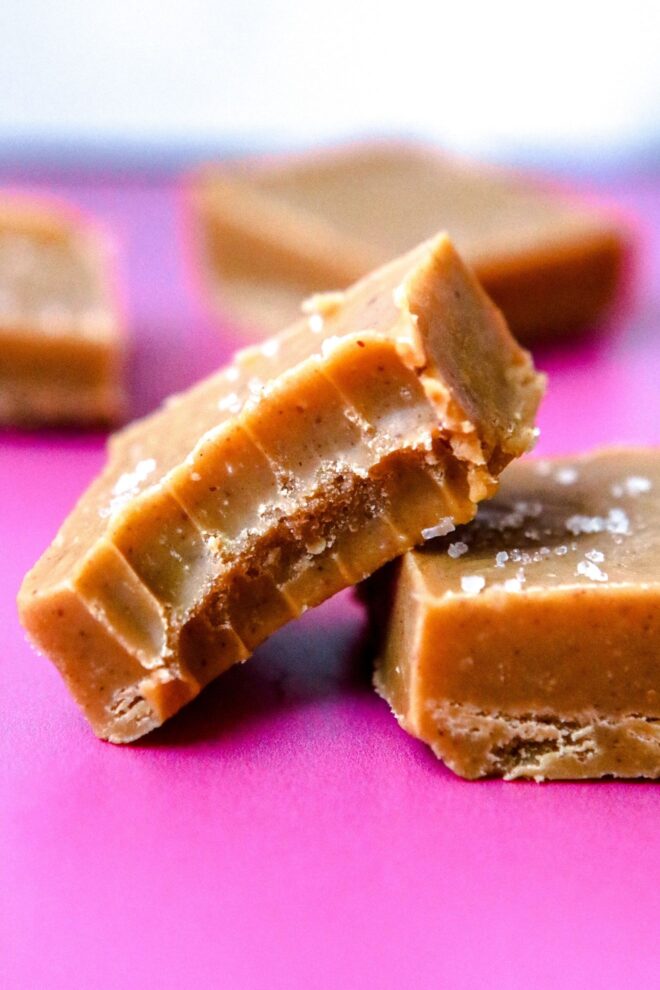
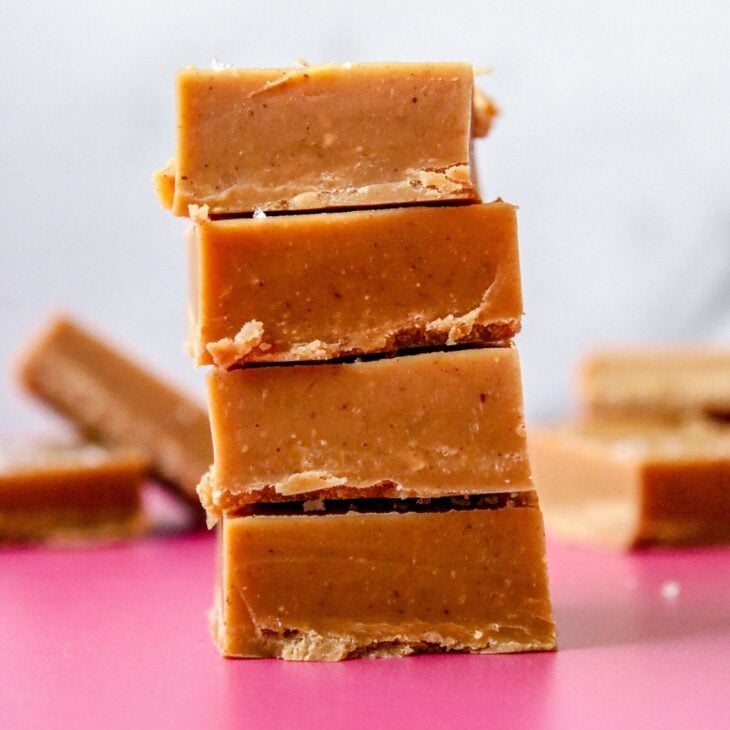
The texture of this fudge is soft and creamy, with a melt-in-your-mouth consistency that is both rich and indulgent.

It’s easy to make, and the microwave method ensures that the fudge is prepped quickly without the need for a candy thermometer or stovetop cooking.

This recipe is perfect for anyone who wants a delicious and satisfying treat without the fuss of traditional fudge making methods.

If you love desserts you have to check out my roundup of 50+ Gluten Free Dessert Recipes! And, if you’re looking for more fudge, you’ll love this Chocolate Tahini Freezer Fudge and Chocolate Peppermint Freezer Fudge!

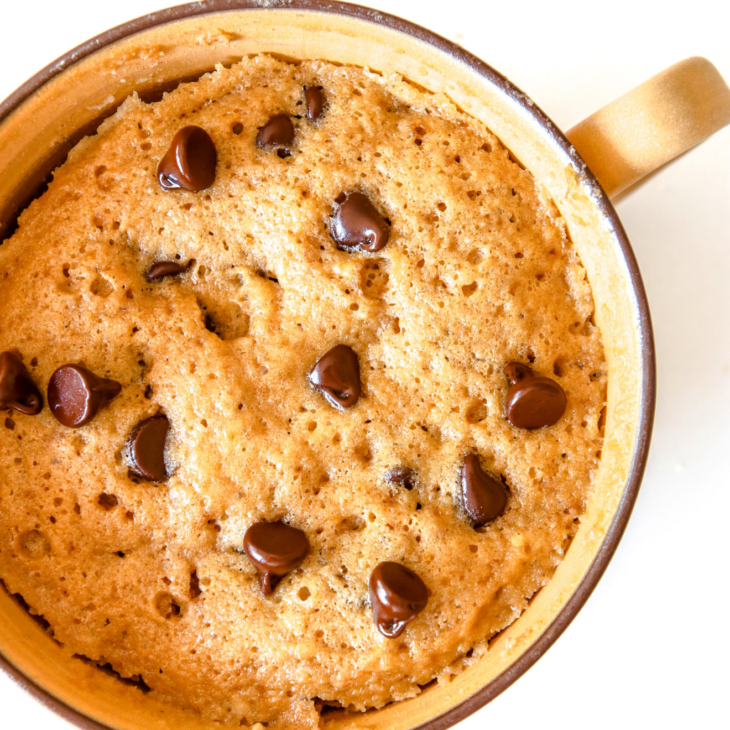
I’m all about easy microwave treats so try my 1-Min Microwave Chocolate Baked Oats (without banana) and 3-Min Moist & Fluffy Microwave Banana Mug Cake when you get a chance!

Why you’ll love this recipe

There are so many reasons why you’ll love this easy microwave peanut butter fudge recipe:

  1. Quick and easy: Because this recipe is made in the microwave, it is very quick and easy to make. It only takes five minutes (or less) to prep and then you just pop it in the freezer and wait for it to harden. It’s super approachable and perfect if you don’t have a lot of time or energy to devote to cooking.
  2. Minimal ingredients: With only three ingredients, this fudge recipe is very simple and straightforward. You don’t need to worry about buying a lot of different ingredients or following a complex recipe. Whether you’re a beginner or just like to keep things simple, you’ll love the ease of this recipe!
  3. Vegan and dairy-free: This recipe is vegan and dairy-free, which is great for people who follow a vegan diet or who are lactose intolerant. The peanut butter provides a rich and creamy texture that makes it feel indulgent and satisfying, even without any dairy.
  4. Delicious and satisfying: Peanut butter fudge is simply delicious! The combination of sweet and salty, nutty and creamy flavors is irresistible. The fudge is dense and rich, making it a satisfying treat that can help satisfy a sweet tooth.
  5. The texture! This fudge is dense, smooth, and creamy. It’s perfect from that first sink-your-teeth into bite to it’s delicious melt-in-your-mouth finish.
This is a vertical image of a side view looking at a square of peanut butter fudge with a bite taken out of it. The fudge square leans against another square to the right of the image. The fudge squares sit on a hot pink surface with more fudge blurred in the background.

Ingredients needed for Microwave Fudge

Peanut Butter. Peanut butter is a good source of protein, healthy fats, and fiber. It also has a rich, nutty flavor that can add depth to many dishes. If you can’t have peanut butter or just want to switch it up, try almond or cashew butter, sunflower seed butter or tahini.

Coconut oil. Coconut oil is high in healthy fats which are quickly metabolized for energy by the body.

Agave Nectar. Agave nectar is a popular alternative to refined sugar because it has a lower glycemic index, meaning it is less likely to cause a spike in blood sugar levels. If you want to sub in a different sweetener, try honey, maple syrup, or date syrup. Keep in mind that these substitutes may have slightly different flavors and sweetness levels than agave nectar, so you may need to adjust the amount used in your recipe accordingly.

This is an overhead horizontal image of a glass bowl with a peanut butter mixture in it. A whisk is in the bowl and leaning against the side of the bowl angled to the bottom right corner of the image. The bowl sits on a white marble counter.
Mix the peanut butter, melted coconut oil, and sweetener in a bowl until beautifully smooth.
This is an overhead horizontal image of a bread pan lined with parchment paper secured with light blue and green chip clips on the side. The pan sits on a white marble counter. A peanut butter mixture is being poured from a glass bowl coming from the right side of the image. The peanut butter mixture is being poured into the pan and a puddle of peanut butter mixture is in the bottom of the pan.
Pour the peanut butter fudge mixture into the pan lined with parchment paper.
This is an overhead horizontal image of a rectangle of hardened peanut butter sprinkled with salt. The peanut butter fudge sits on a crinkled white piece of parchment paper.
Allow the fudge to harden in the freezer at at least 1 hour. Then, sprinkle with flakey salt.
This is an overhead horizontal image of a rectangle of hardened peanut butter fudge sprinkled with salt. The peanut butter fudge is cut into 18 squares and sits on a crinkled white piece of parchment paper.
Cut into squares and enjoy! These are best stored in the fridge.

How to make Peanut Butter Microwave Fudge

Microwave. It’s always best to melt the coconut oil before measuring. Place the coconut oil in the microwave for about 1 minute until liquid-y. 

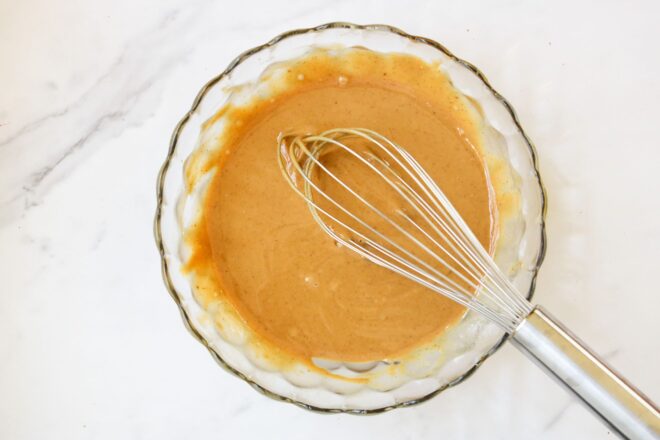
Mix. Measure all the ingredients and add them to a large bowl. Whisk until the ingredients are smooth. 

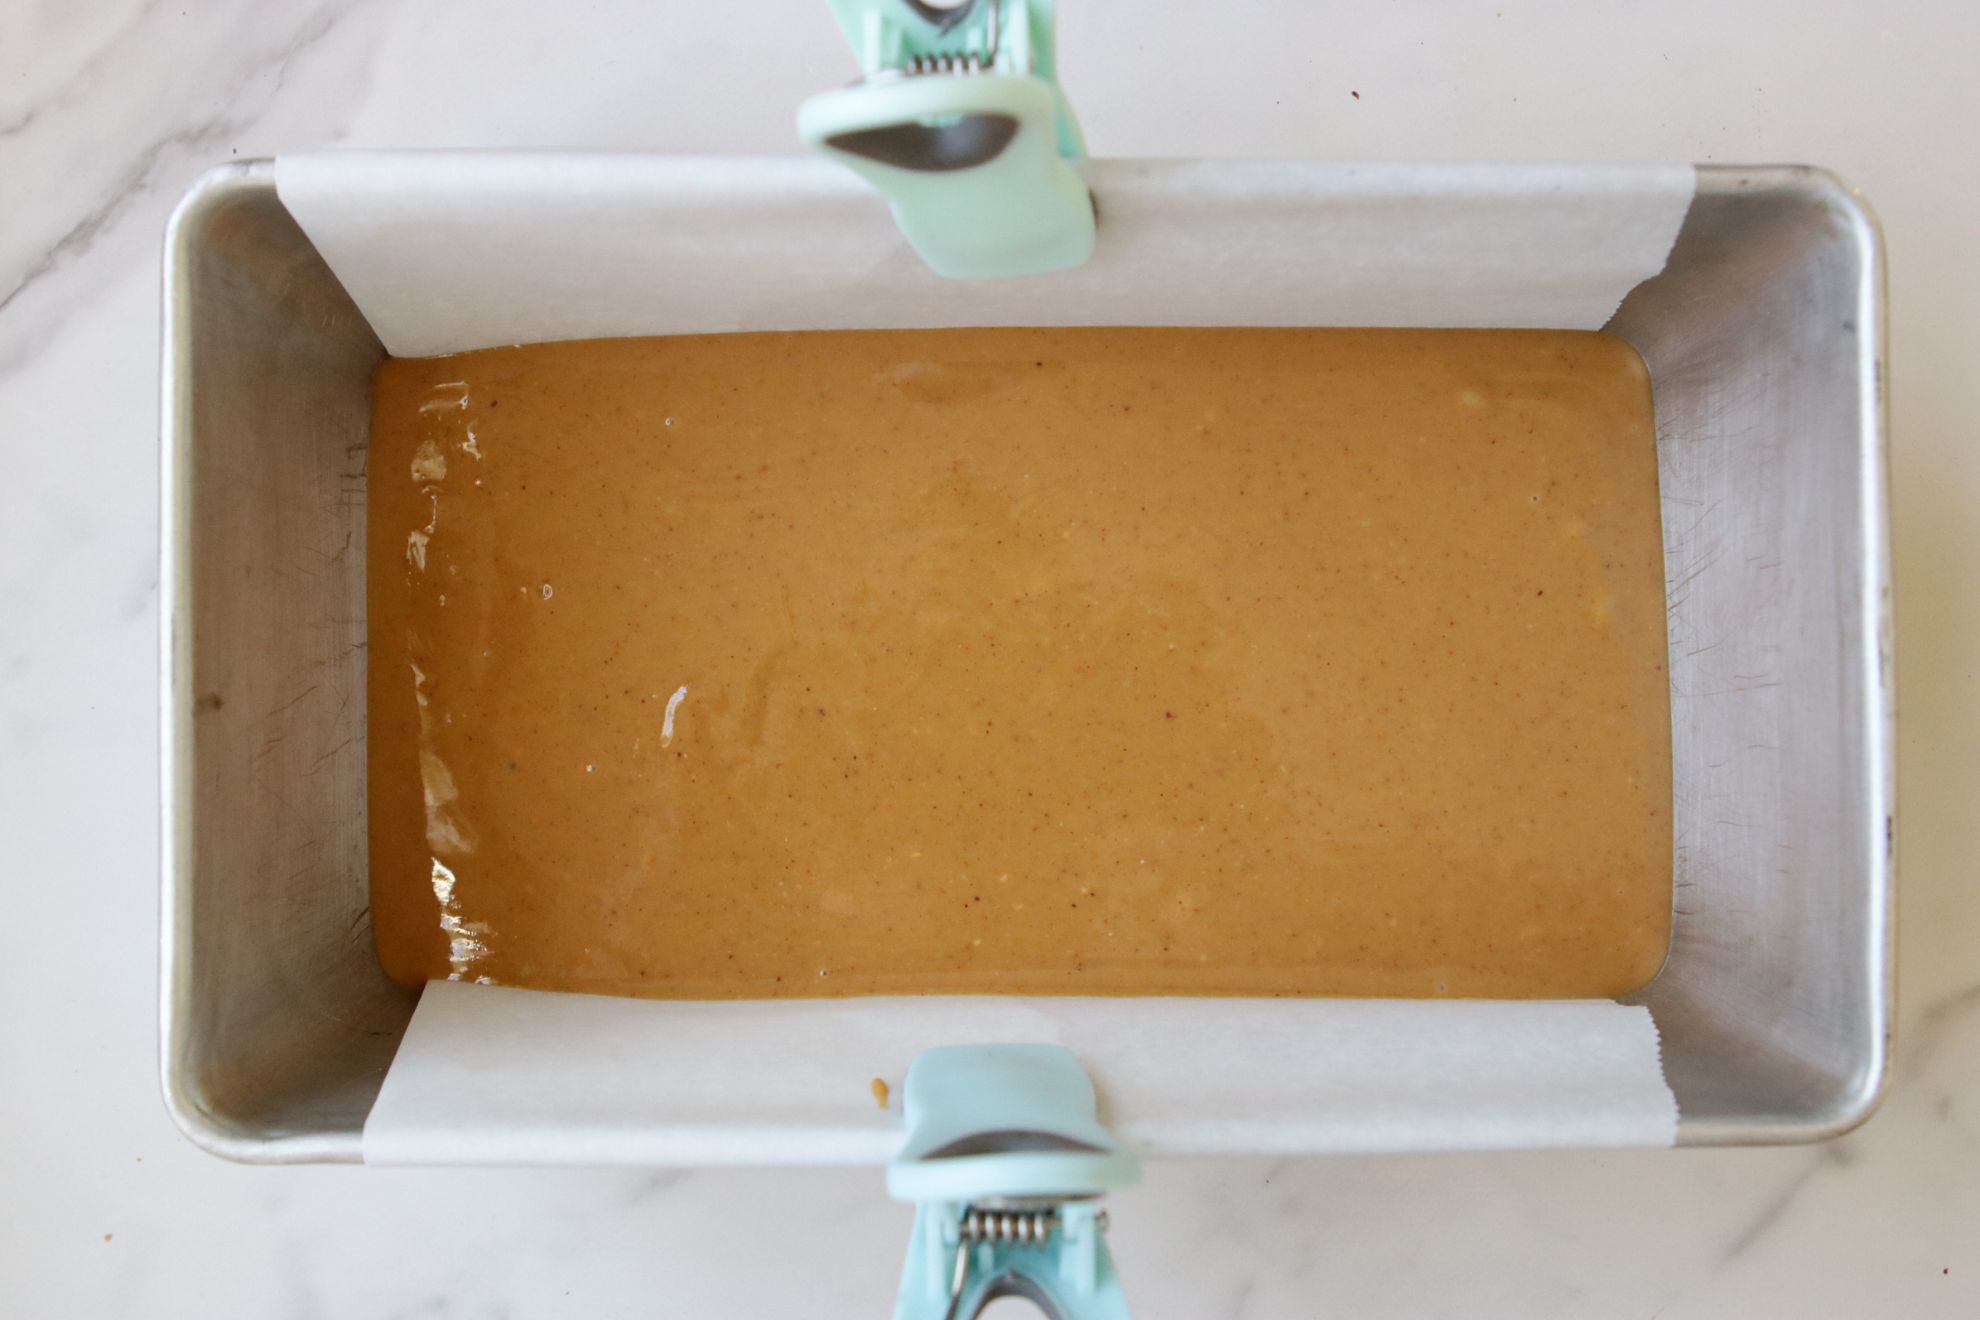
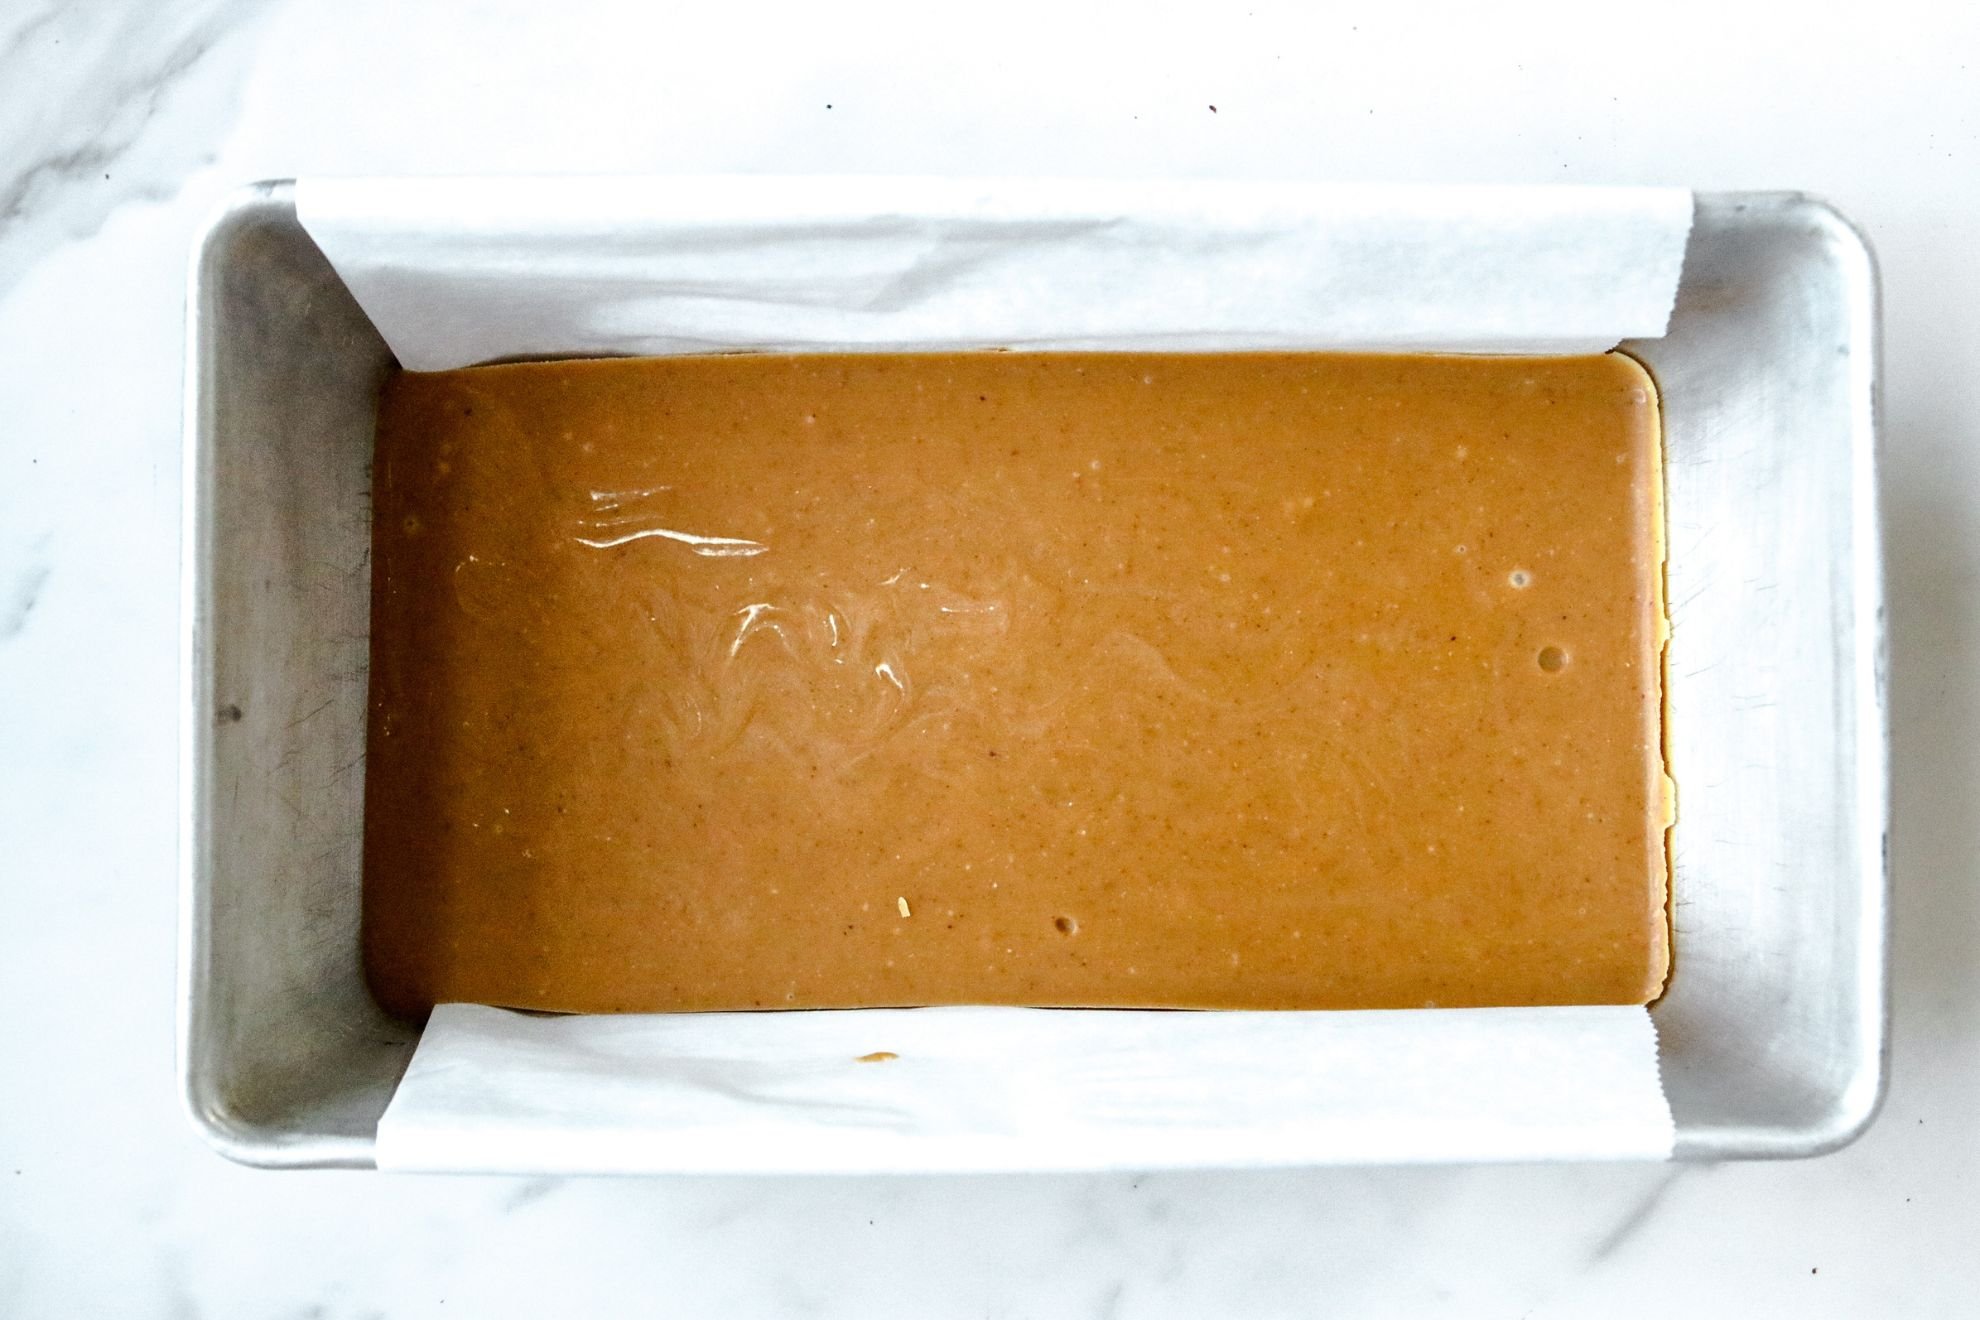
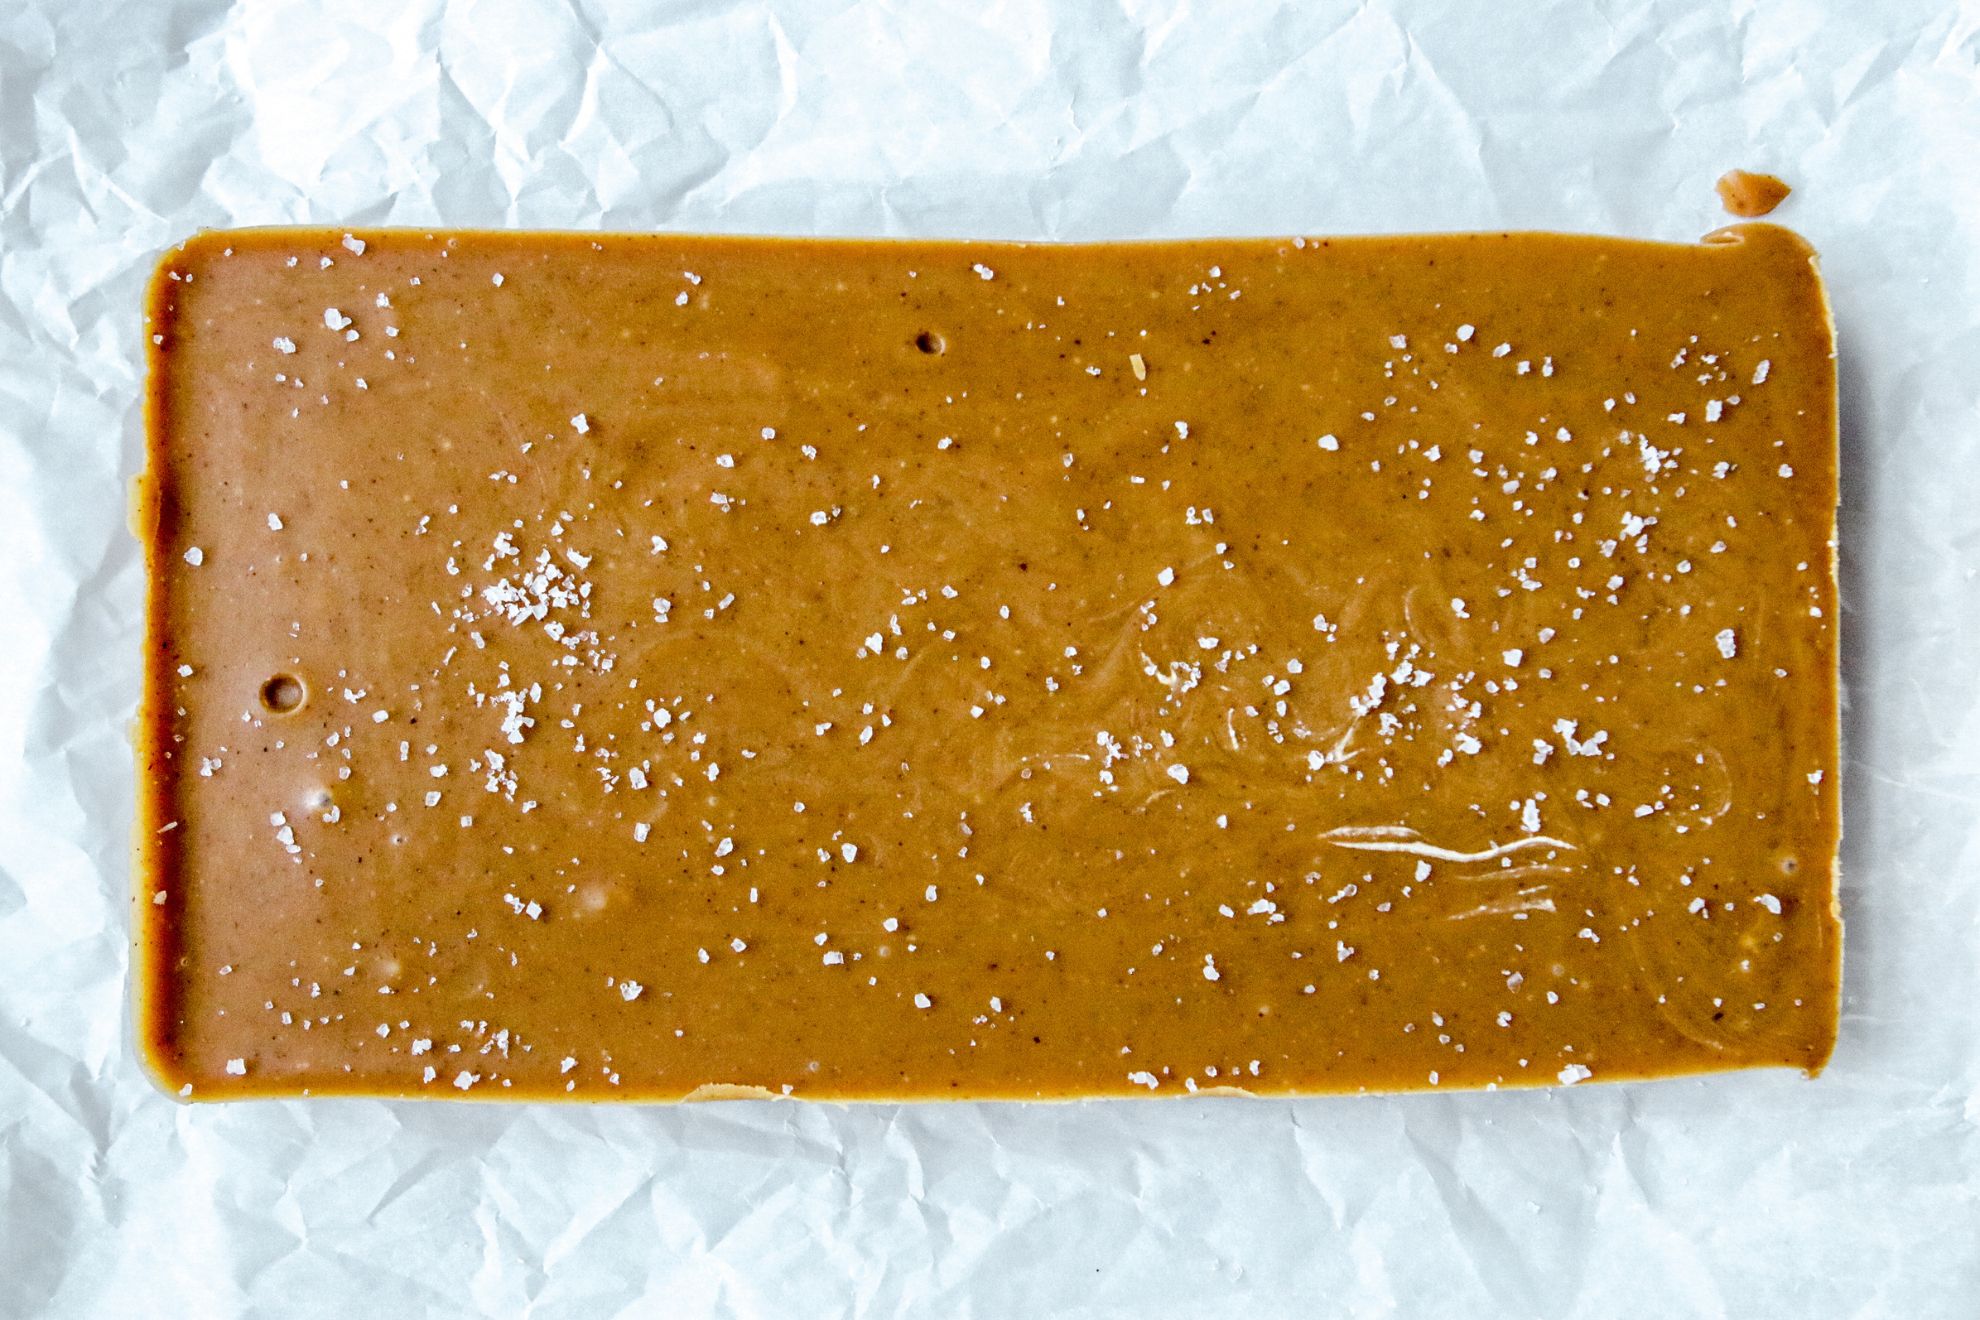
Transfer. Line a bread pan with parchment paper. I like to fold the parchment so it hangs over the two long sides of the pan and I clip them in place with paper clips or chip clips. Pour the peanut butter mixture into the pan. 

The contents should settle itself into the edges and corners but if it needs some help, give the pan a little jiggle so it settles into an even layer. 

Chill. Place the pan in a freezer on a flat surface so the fudge sets evenly. 

Chill for about 1 hour or more until the fudge is set. 

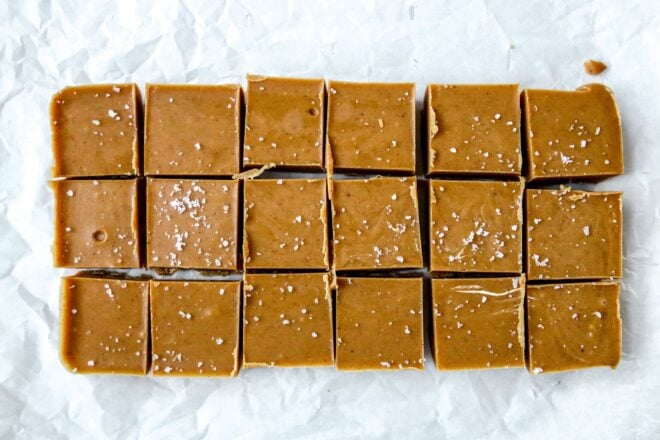
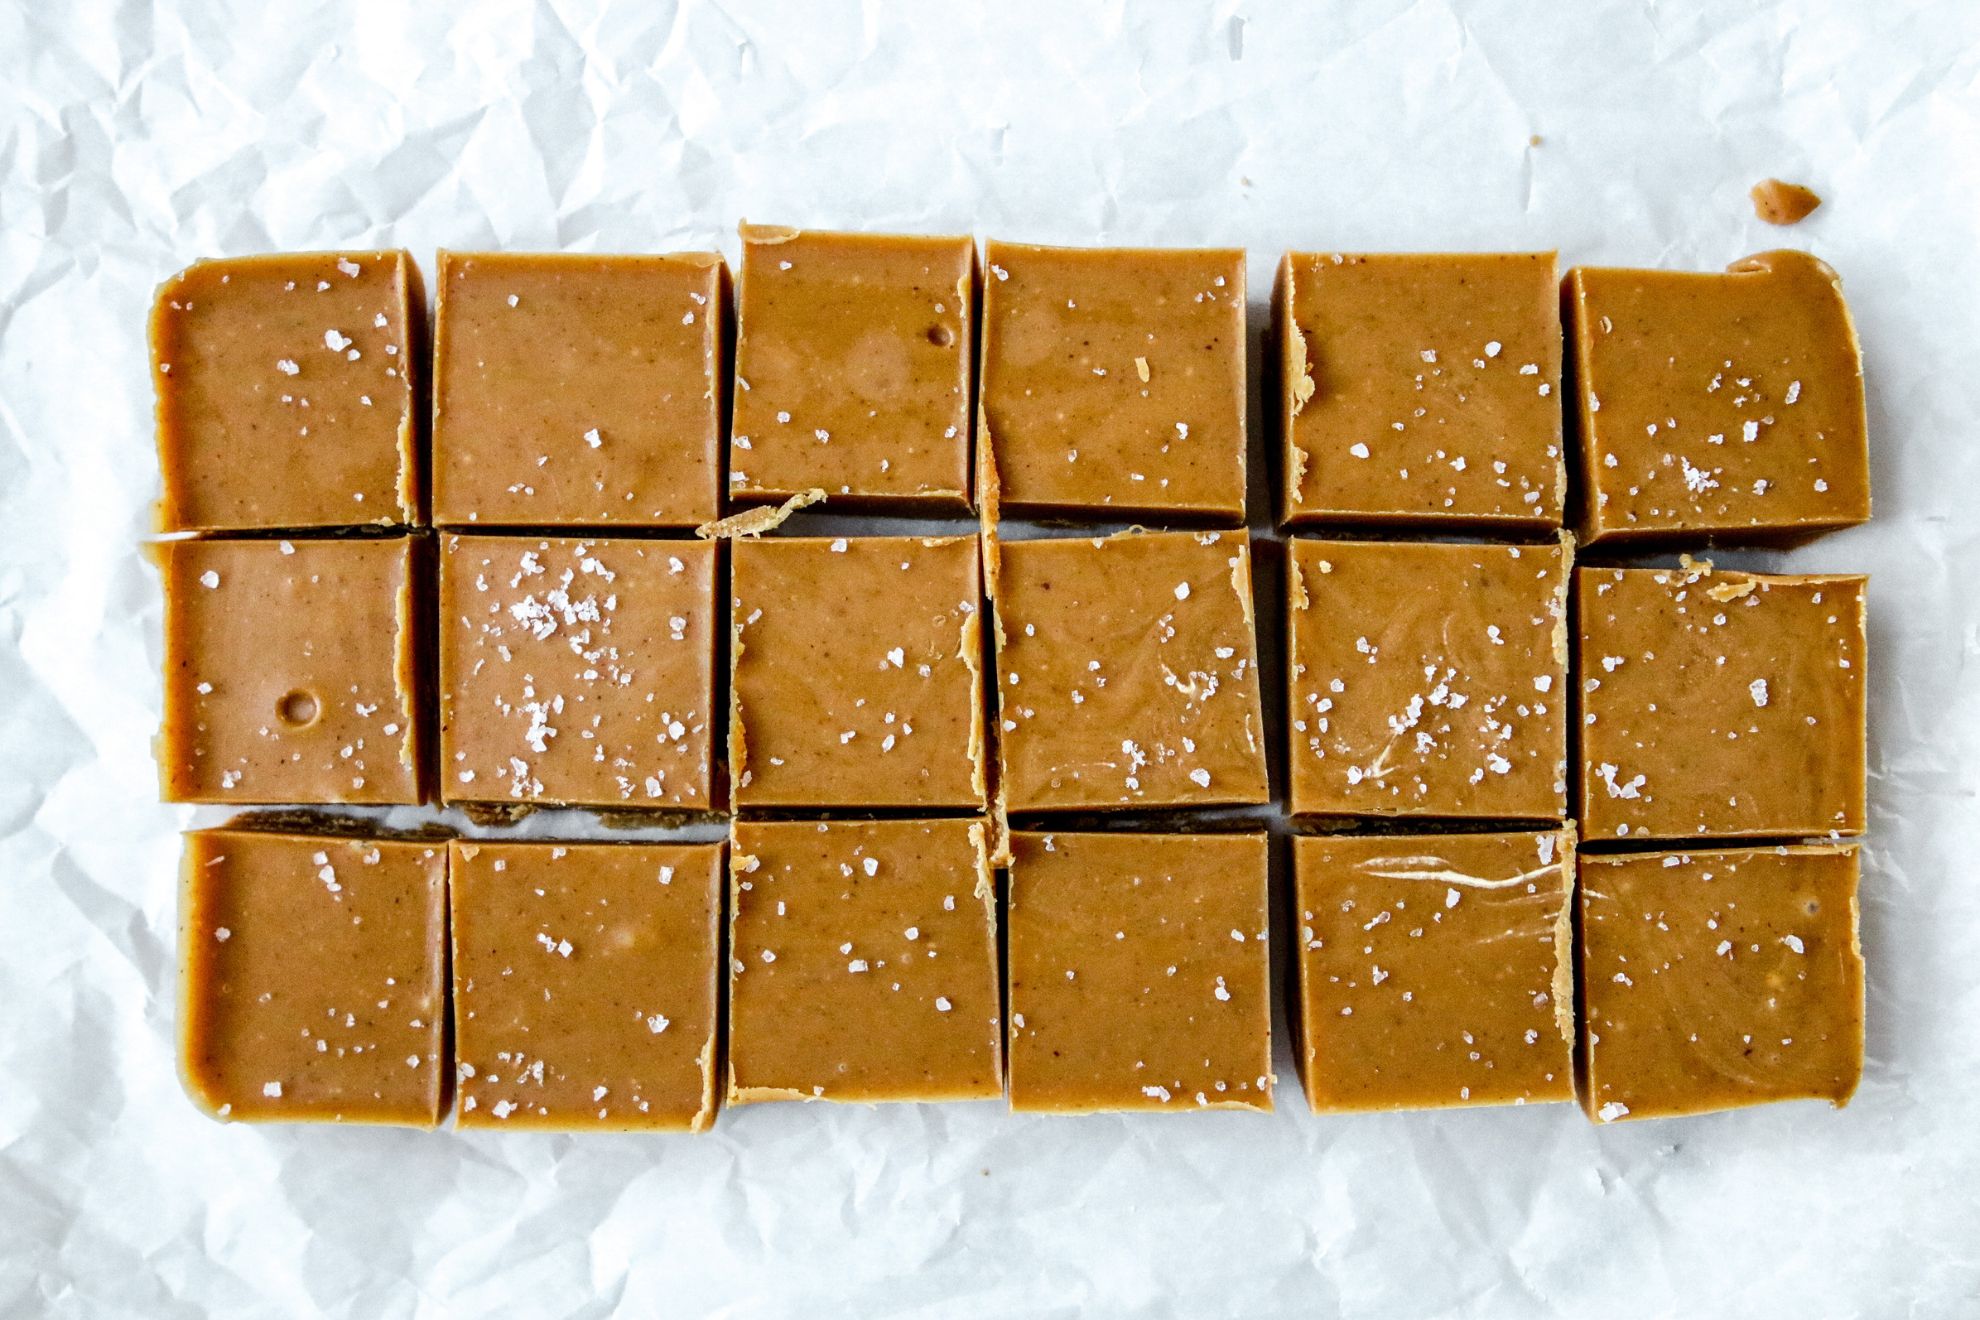
Cut. Glide a knife around the edges of the fudge that are touching the sides of the pan and pull the parchment edges to remove the fudge from the pan. 

Cut the fudge into squares. I cut mine into 18 squares. Sprinkle with flakey salt for the most delicious sweet and salty combo. 

Enjoy! Store in an airtight container or large plastic bag in the fridge. 

Tips for Success

Here are some tips for making a successful peanut butter fudge recipe in the microwave:

Use delicious peanut butter: Because this recipe has only three ingredients, it’s important to use a peanut butter you love! All the rich, creamy flavor and texture comes from the peanut butter so make sure to grab a brand you love.

Line the dish with parchment paper: To make it easier to remove the fudge from the pan, line it with parchment paper before adding the fudge mixture. Using parchment paper will allow you to lift the fudge out of the pan and cut it into squares more easily.

Keep it chilled: After allowing the fudge to firm up in the freezer, make sure to store it in a cool place. I like to keep mine stashed away in the back of my fridge. The fudge will melt if kept in a warm place so make sure you store it chilled.

This is a vertical image looking at two peanut butter fudge squares from the side. One square is leaning against another square to the right. The pieces of fudge sit on a deep pink surface with more peanut butter fudge pieces blurred in the white background.

Variations on this Microwave Peanut Butter Fudge

Peanut butter fudge is delicious on its own, but there are many ways to add additional flavors and switch it up. Here are some flavor variations you can try for peanut butter fudge:

  1. Chocolate peanut butter fudge: Melt some chocolate chips and swirl them into the peanut butter fudge mixture before chilling. You can also sprinkle chopped chocolate on top of the fudge before it sets.
  2. Nutty peanut butter fudge: Add chopped peanuts, almonds, or other nuts to the fudge mixture before chilling.
  3. Cinnamon peanut butter fudge: Add a pinch of cinnamon to the fudge mixture for a subtle kick.
  4. Maple peanut butter fudge: Use maple syrup instead of the agave nectar called for in the recipe to give the fudge a warm, maple flavor.
  5. Coconut peanut butter fudge: Stir in some shredded coconut to the fudge mixture before chilling. You can also sprinkle shredded coconut on top of the fudge before it sets.
  6. Marshmallows: stir in some mini marshmallows or sprinkle them on top before you set the fudge in the fridge.

How to Store them

To store fudge, it’s important to protect it from moisture and to keep it at a cool temperature. Here are some tips for storing your peanut butter fudge:

Store in an airtight container: Place the fudge in an airtight container or wrap it in plastic wrap. This will prevent air and moisture from getting in and keep the fudge fresh for longer.

Refrigerate or freeze: Fudge can be stored in the refrigerator for up to two weeks, or in the freezer for up to three months. If you’re storing it in the freezer, wrap it in plastic wrap to prevent freezer burn.

Keep away from heat: Fudge can become sticky and lose its shape if it is exposed to heat. Store it in a cool, dry place away from direct sunlight and sources of heat, like ovens or stovetops.

More Microwave Recipes!

1-Min Microwave Chocolate Baked Oats (without banana)

1-Min Quickie Microwave Funfetti Mug Cake

1-Min Quickie Chocolate Chip Cookie in a Mug

3-Min Moist & Fluffy Microwave Banana Mug Cake

Did you make this? Leave a review below and tag me on Instagram, Facebook, or Pinterest!

This is a vertical image looking from the side at a stack of 4 peanut butter fudge squares stacked. The stack sits on a deep pink surface with more squares blurred in the white background. Recipe
GF Gluten-Free DF Dairy-Free V Vegan VG Vegetarian EF Egg-Free

Rich & Creamy Microwave Peanut Butter Fudge (only 3 ingredients!)

3 ingredient microwave peanut butter fudge is so simple to prep in 5 min! It’s sweet and has that sink-your-teeth into texture you crave!

AvatarRecipe by:Lindsay Grimes
Prep: 5 minCook: 1 hour chillTotal: 5 min
Print recipe Rate recipe Pin Save recipe
Servings: 18 squares 1x

Ingredients

  • 1 cup natural peanut butter
  • 1/4 cup refined coconut oil, melted then measured
  • 1/4 cup agave nectar, honey or maple syrup
  • flakey salt for topping

Instructions

  1. It’s always best to melt the coconut oil before measuring. Place the coconut oil in the microwave for about 1 minute until liquid-y. 
  2. Measure all the ingredients and add them to a large bowl. 
    This is a horizontal overhead image of a glass bowl on a white marble counter. Melted coconut oil, peanut butter and agave nectar are in the bowl.
  3. Whisk until the ingredients are smooth. 
    This is an overhead horizontal image of a glass bowl with a peanut butter mixture in it. A whisk is in the bowl and leaning against the side of the bowl angled to the bottom right corner of the image. The bowl sits on a white marble counter.
  4. Line a bread pan with parchment paper. I like to fold the parchment so it hangs over the two long sides of the pan and I clip them in place with paper clips or chip clips. Pour the peanut butter mixture into the pan. 
    This is an overhead horizontal image of a bread pan lined with parchment paper secured with light blue and green chip clips on the side. The pan sits on a white marble counter. A peanut butter mixture is being poured from a glass bowl coming from the right side of the image. The peanut butter mixture is being poured into the pan and a puddle of peanut butter mixture is in the bottom of the pan.
  5. The contents should settle itself into the edges and corners but if it needs some help, give the pan a little jiggle so it settles into an even layer. Place the pan in a freezer on a flat surface so the fudge sets evenly. 
    This is an overhead horizontal image of a bread pan lined with parchment paper and secured on the long side of the pan with light blue and green plastic chip clips. In the pan is a melty peanut butter mixture. The pan sits on a white marble counter.
  6. Chill for about 1 hour or more until the fudge is set. 
    This is an overhead horizontal image of a bread pan lined with parchment paper. In the pan is a hardened peanut butter mixture. The pan sits on a white marble counter.
  7. Glide a knife around the edges of the fudge that are touching the sides of the pan and pull the parchment edges to remove the fudge from the pan. Sprinkle with flakey salt for the most delicious sweet and salty combo. 
    This is an overhead horizontal image of a rectangle of hardened peanut butter sprinkled with salt. The peanut butter fudge sits on a crinkled white piece of parchment paper.
  8. Cut the fudge into squares. I cut mine into 18 squares. 
    This is an overhead horizontal image of a rectangle of hardened peanut butter fudge sprinkled with salt. The peanut butter fudge is cut into 18 squares and sits on a crinkled white piece of parchment paper.

Tips

Store in an airtight container or large plastic bag in the fridge. 

Nutrition Info:

  • Serving Size: 1 square
  • Calories: 131
  • Sugar: 4.4g
  • Sodium: 3mg
  • Fat: 10.2g
  • Saturated Fat: 4.2g
  • Unsaturated Fat: 0g
  • Trans Fat: 0g
  • Carbohydrates: 6.2g
  • Fiber: 0.9g
  • Protein: 4.4g
  • Cholesterol: 0mg
© The Toasted Pine Nut

Did you make this?

I love seeing what you made! Tag me on social @thetoastedpinenut

Rate recipe Tag me on Instagram
This is a vertical image looking from the side at a stack of 4 peanut butter fudge squares stacked. The stack sits on a deep pink surface with more squares blurred in the white background. Text overlay reads "microwave peanut butter fudge" at the top and "get the recipe at thetoastedpinenut.com" at the bottom.
20 shares
  • Share
  • Tweet
  • Save
  • Email
overhead image of a gluten free sprinkle cookie with a bite taken out on a white counter

Never miss a recipe!

Join our pine nut family and get recipes delivered right to your inbox.

Join now!
15 no bake desserts

You May Also Like...

  • Creamy Crunchy Peanut Butter Bars
  • Peanut Butter Quinoa Crisps
  • Chocolate Peanut Butter Almond Milk

Reader Interactions

Leave a Comment & Rate this Recipe Cancel reply

If you love this recipe it would mean SO MUCH to me if you give it a star rating and leave a comment about it. Not only do I love basking in the glory of your recipe love, but (perhaps more importantly 😋) it helps other readers find my recipes online. Thanks so much for your feedback!!

Have a question? Submit your question or comment below. Your email address will not be published. Required fields are marked *

Recipe rating ★☆ ★☆ ★☆ ★☆ ★☆

Primary Sidebar

Lindsay

Hi Friend!

I'm Lindsay I love sharing simple, better-for-you recipes. When I'm not in the kitchen, you can find me at the beach watching my kids boogie board and soaking in that warm Cali sun (with sunscreen, of course).

Read more...

Recipe Key

GF Gluten-Free DF Dairy-Free V Vegan VG Vegetarian EF Egg-Free NF Nut-Free P Paleo Browse All

Most Popular

This is a horizontal image of a hand with deep pink nail polish holding a chocolate quinoa crisp in between their thumb and pointer finger. More chocolate quinoa crisps are blurred in the background.

5-Min Crunchy Chocolate Quinoa Crisps

overhead image of a muffin tin filled with 12 raw eggs sprinkled with pepper

Perfect Oven-Baked Eggs in a Muffin Tin

This is a side view of a chocolate almond butter bar with a bite taken out of it. The bar sits on a white piece of parchment paper and is sprinkled with salt. More bars are blurred in the background.

No Bake Almond Butter Bars

Lemon & Avocado Kale Salad

Freebie alert!

Get My Free No Bake Desserts eBook!

Explore

More Candy

This is a vertical image looking from the side at a stack of 4 peanut butter fudge squares stacked. The stack sits on a deep pink surface with more squares blurred in the white background.

Rich & Creamy Microwave Peanut Butter Fudge (only 3 ingredients!)

This is a vertical image looking at a stack of chocolate bars from the side. The chocolate has tons of hazelnuts in it. The stack sits on a dark pink counter with more chocolate pieces and crumbs blurred in around the stack and in the background. The stack sits against a white background.

Quick & Easy Coffee Hazelnut Chocolate Bars (only 4 ingredients!)

This is an overhead view of a white plate with chocolate truffles coated in chopped nuts. One candy is cut in half and inside is a hazelnut. The white plate is on a light grey surface with some whole hazelnuts off to the top left of the image.
★★★★★

Rich & Decadent No Bake Vegan Ferrero Rocher Chocolates

This is a stack of four pretzel sandwiches. The pretzel sandwiches have peanut butter in the middle and dipped in chocolate. They are sprinkled with salt. The stack sits on a white counter with more pretzels blurred in the background.

20-Min Chocolate Covered Peanut Butter Pretzels with Flakey Salt

Browse All
15 No bake desserts

Download my FREE No Bake Dessert Ebook!

As seen on:

Food Network
Shape
Men's Health
NBC
Kitchn
Glamour
  • Browse by Diet
    • Gluten Free
    • Dairy Free
    • Vegan
    • Egg Free
    • Low Carb
    • Recipe Filter
  • Explore Resources
    • FAQ
    • My Baking Mixes
    • Cookbook
    • Shop Favorites
    • Web Stories
    • Meet Lindsay
Follow

@thetoastedpinenut

Accessibility

Privacy Policy

Disclaimer

Contact

© 2023 The Toasted Pine Nut
|
Site Credits Designed by Melissa Rose Design Developed by Once Coupled Support by Foodie Digital
Back to Top
20 shares