Orange garland must be trending this year because I’ve been seeing it everywhere! In my local bakery, as I scroll the internet, no matter where I turn I’m loving all the dried oranges!
I’ve had it in the back of my head that I’d give these a go this holiday season. I’m always looking for cute homemade holiday decor and I love the simple beauty of this dried orange garland.
As simple as this garland is to make, the only thing you really need is time. Do this on a day when you’re vegging out at home, working from home – a day that doesn’t require you to run out.
It’ll take four hours for your orange slices to dry out so keep that in mind before you start 🙂
Items You’ll Need for this Dried Orange Garland
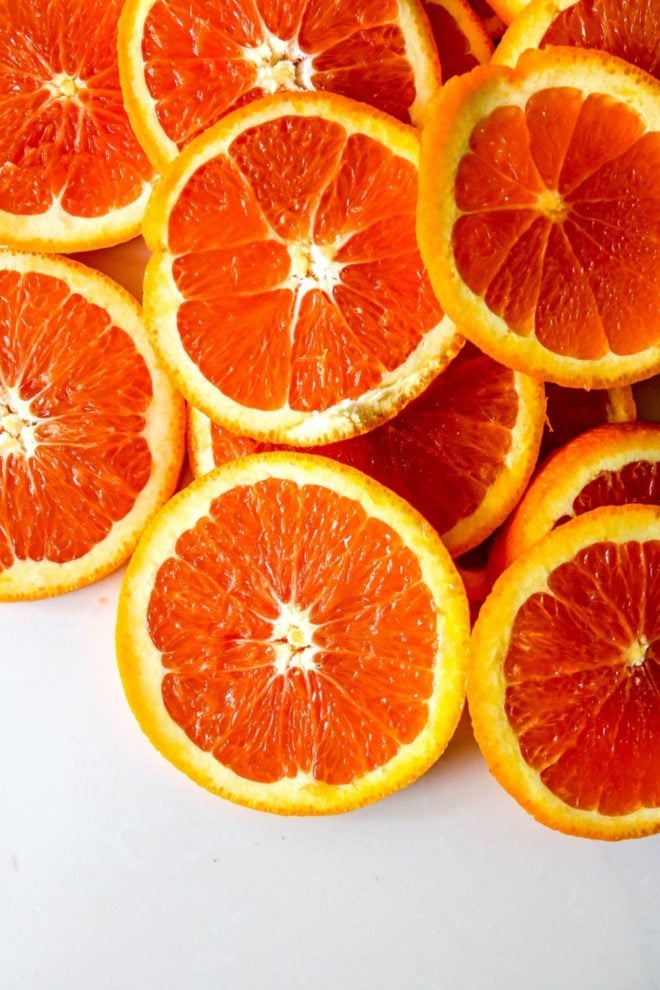
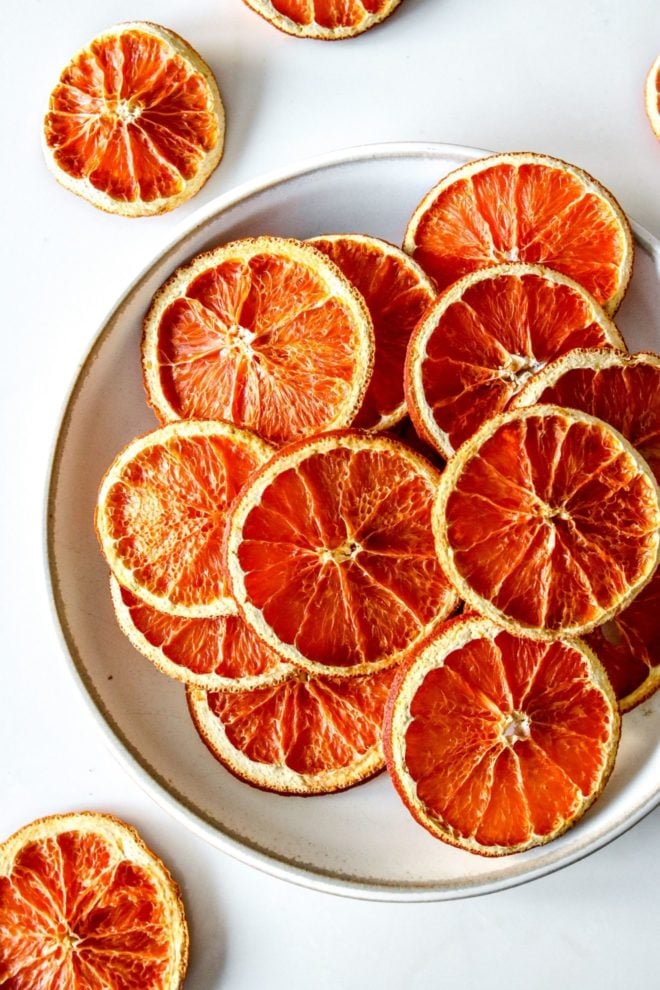
Oranges. I used 4 navel oranges. When you’re at the store, feel for oranges with a thicker skin. I think this makes for a prettier garland and
Mandolin or Sharp Knife. I love my mandolin and use it all the time for slicing veggies. If you don’t have one just use a sharp knife and do your best to slice them all evenly.
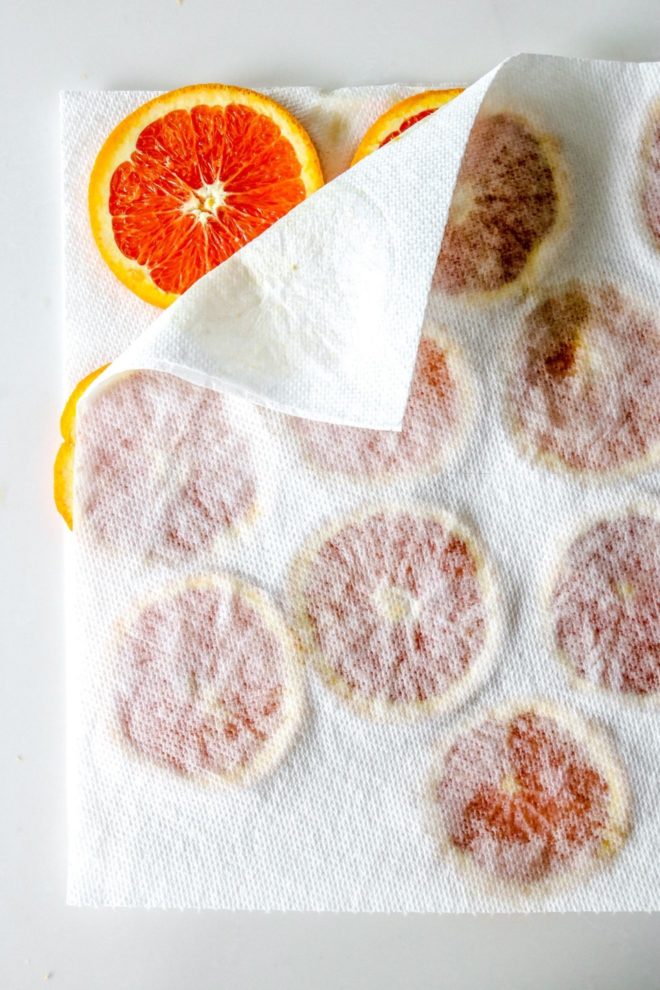
Paper Towel. You can also use a clean dish towel to press out the excess juice from the orange slices.
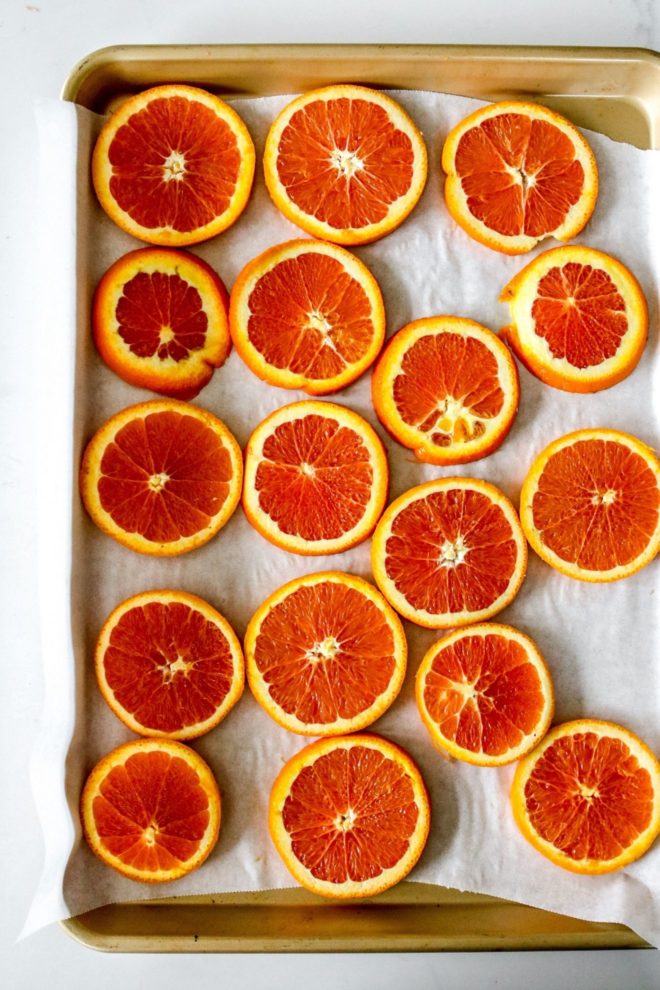
Baking Sheet. I used one large baking sheet and lined it with parchment paper. You want the orange slices to be in a single layer, not overlapping. It’s ok if the edges are touching, just try to make sure they aren’t overlapping or on top of each other.
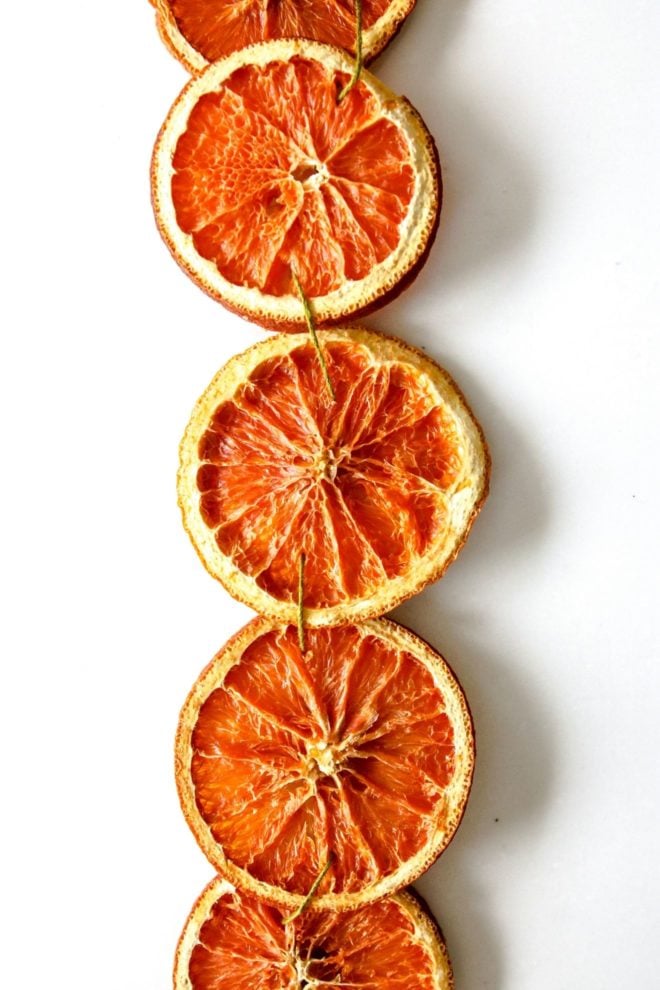
Toothpick. Once the orange slices are done baking, we’re going to use a toothpick or a skewer to poke holes in them so we can string them up! If you’re not using these dried orange slices for garland, you can just skip this part.
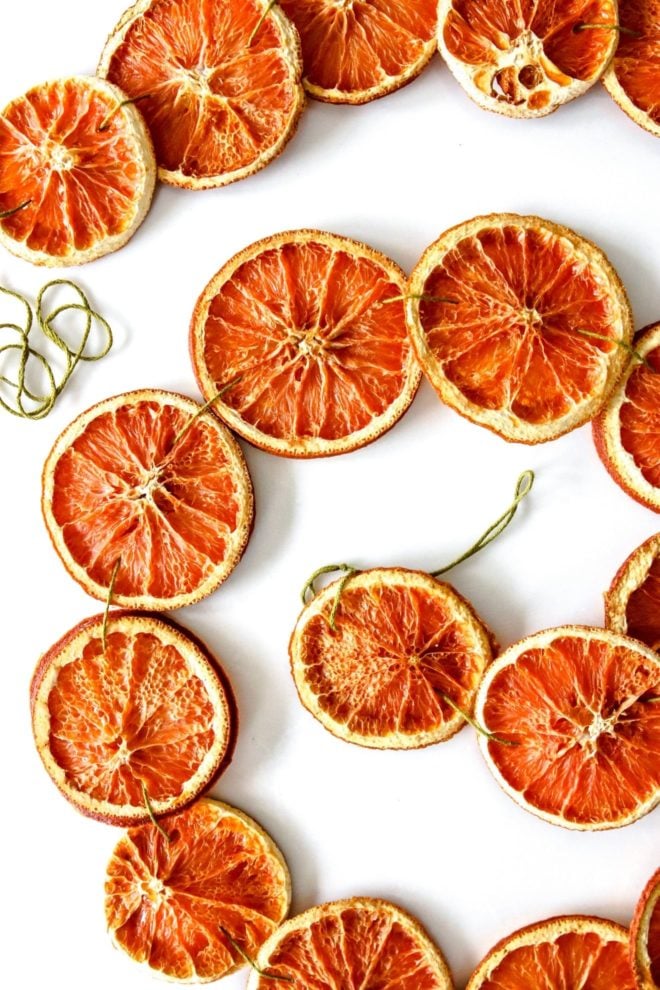
String. I love using a rustic twine to string this orange garland. But, if you prefer you can use a clear fishing line, yarn, or whatever string you have on hand!
How to Make Dried Orange Garland
Step 1: Preheat the oven.
We’re preheating the oven to 200F. You don’t want the oven to be too hot because then the orange slices with brown before the juice is evaporated from the fruit. You want that low and slow temperature for them to dehydrate properly.
Step 2: Slice the Oranges.
When I first made this garland, I made them 1/4th inch think but looking back I wish I did a thinner slice and went for 1/8th inch in thickness.
Step 3: Press out Excess Juice.
Lay out the orange slices on a paper towel or clean, thin tea towel and press out any extra juiciness. This will save you some time on the baking step because you’re already doing some of the work and getting out some juice.
Putting the orange slices in the oven straight from cutting will make for a super juicy slice and a longer bake time.
Step 4: Arrange on Baking Sheet.
Line a baking sheet with parchment paper and arrange them in a single, even layer. You don’t want any overlapping because then they won’t dehydrate evenly.
Step 5: Bake.
- 1/4th inch thickness = 4 hours, flipping halfway through.
- 1/8th inch thickness = 3 hours, flipping halfway through
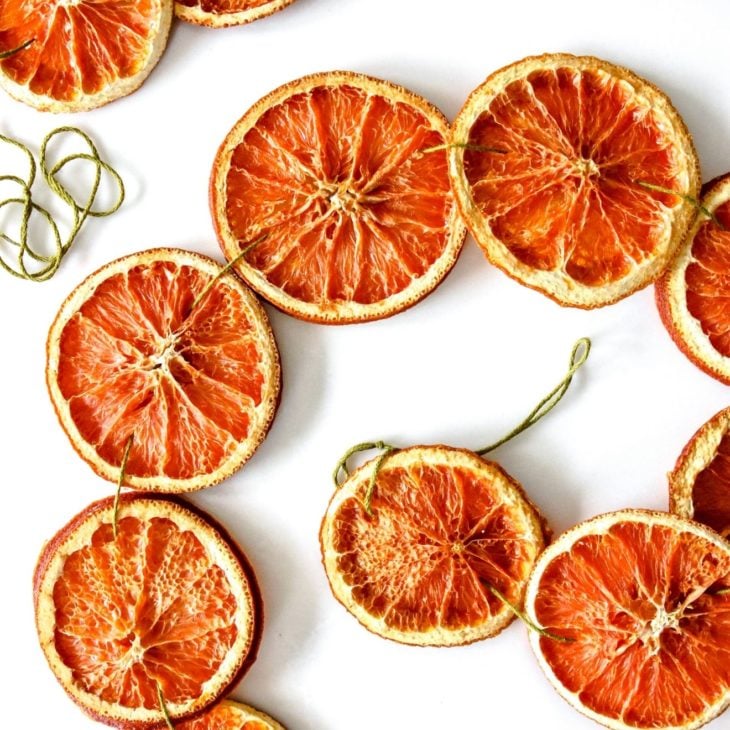
Step 6: Cool & Twine the Orange Garland!
Allow the orange slices to cool on the baking sheet.
Use a toothpick or skewer to poke two holes in either side of the slice. Use a piece of string or twine to string up the orange slices in a line. I like to tie a loop at each end so I can easily hang the garland by looping it on a nail or branch.
Ways to Customize this Garland!
I love the look of the solid dried orange garland but you can mix it up by stringing in some wooden beads, some small pine cones, or even some small branches of your Christmas tree.
What else can I do with Dried Oranges?
Lots of things! Place them in a little bowl in your bathroom for bright, cheery decor. Decorate an orange cake or these Orange Pie Bars with them!
You could attach them to presents or spruce up a gift card envelope.
What to Eat While You Make Dried Orange Garland
 Recipe
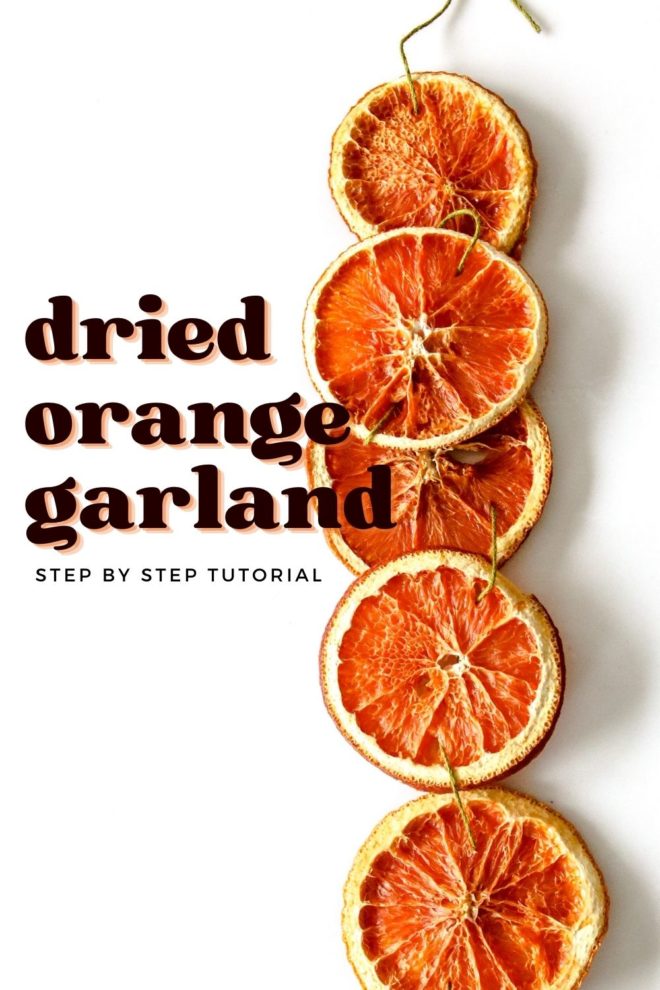
Homemade Dried Orange Garland
Orange garland is a simple and beautiful homemade holiday decoration. Follow my step-by-step tutorial for how to make your own!
Ingredients
- 4 navel oranges
- mandolin or sharp knife
-
paper towel or clean, thin dish towel
-
baking sheet
-
parchment paper
-
toothpick or skewer
-
string or twine
Instructions
- Preheat the oven to 200F.
- Use a mandolin or sharp knife to cut the oranges into 1/8 – 1/4th inch thick slices.
- Lay the orange slices on a paper towel or clean, thin tea towel and press out any extra juice. This will save you some time on the baking step because you’re already doing some of the work and getting out excess juice.
- Line a baking sheet with parchment paper and arrange them in a single, even layer. You don’t want any overlapping because then they won’t dehydrate evenly.
- Bake according to thickness. For 1/4th inch thickness, bake for 4 hours, flipping halfway through. For 1/8th inch thickness bake for 3 hours, flipping halfway through.
- Allow the orange slices to cool on the baking sheet.
- Use a toothpick or skewer to poke two holes in either side of the dried orange slice.
- Use a piece of string or twine to string up the orange slices in a line.
- I like to tie a loop at each end so I can easily hang the garland by looping it on a nail or branch.
- String up your garland on your mantle, on your tree, along a hanging picture or mirror, a door, the are so many fun ways to use your orange garland!


I’m in the process of making this now but after 3.5 hours (1 tray of 1/4 inch and 1 tray of 1/8 inch) my oranges are still slightly wet and sticky. What should the texture be when removed from oven? I’m worried I won’t bake them long enough and they’ll end up getting moldy or won’t last
Hi! How did they turn out? You could go for another round of drying them out. The thinner you cut them, the better! You can always turn off the oven and let them stay in so they dry out more. The should be dry and crisp feeling. Let me know how you turn out!
After about 5 hours, the 1/8 inch slices were dried completely- perhaps a tad bit brown. The 1/4 Inch stayed in an extra hour and were still a bit sticky this morning. They’re back in the oven. Fan forced 225f
These must be the juiciest oranges Florida had to offer lol
When stringing your oranges, what did the back look like? Did you just weave the twine in and out between the slices or did you tye knots?
You can do either! I just weaved it in and out but if you like the look of them dangling or want to make sure they don’t shift around, you can knot them.
I love doing dried citrus garlands! My daughter’s dehydrator broke last year, so I needed an oven recipe to get this year’s garlands ready. Thanks so much! It makes the house smell amazing!!
I love the way it fills the house with the most wonderful smell!! I’m so happy you got to make them again this year! 🙂