• Skip to primary navigation
  • Skip to main content
  • Skip to primary sidebar
  • About
  • Contact
Check out my new cookbook

The Toasted Pine Nut

fun. flavorful. feel-good recipes.

  • Check out my cookbook!
  • Recipes
    • Dessert
      • Cookies
      • Bars & Brownies
      • Breads & Muffins
      • Cakes & Cupcakes
      • Pies & Crumbles
      • Candy
      • No Bake
    • Meal
      • Breakfast
      • Main Dishes
      • Appetizers
      • Sides
      • Snacks
      • Drinks
      • Salads
      • Sauces & Dips
      • Dessert
    • Diet
      • Gluten Free
      • Dairy Free
      • Vegan
      • Vegetarian
      • Egg Free
      • Kid Friendly
      • Low Carb
      • Nut Free
    • Meat
      • Fish & Seafood
      • Chicken & Poultry
      • Beef & Pork
      • Meatless
    • Method
      • Air Fryer
      • Slow Cooker
      • Instant Pot
      • Oven
      • Grill
      • Stovetop
    • Season
      • Spring
      • Summer
      • Fall
      • Winter
    • Recipe Filter
  • Shop
    • My Baking Mixes
    • Kitchen Essentials
    • Pantry Items
    • Kid Favorites
    • Photography
  • Cookbook
  • Videos
Home Recipes Desserts Bars & Brownies
Leave a Review

Orange Pie Bars

3 hrs + 55 min
GF Gluten-Free VG Vegetarian
by: Lindsay Grimes
November 21, 2021 (Updated: November 1, 2022)
Jump to Recipe
Leave a Comment

This post may contain affiliate links. Please read our disclosure policy.

This is a side view of orange pie bars on a white piece of parchment paper. The orange bars are topped with candied oranges and powdered sugar.
Orange pie bars are loaded with citrus flavor and the perfect make-ahead dessert. The sweet & tangy orange custard sits on a shortbread base.

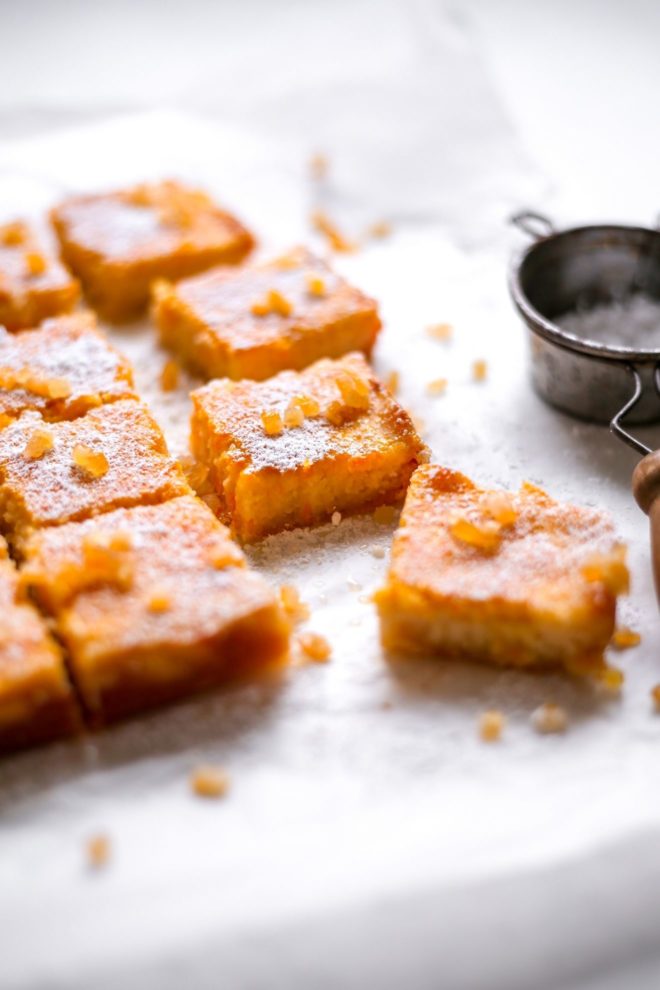
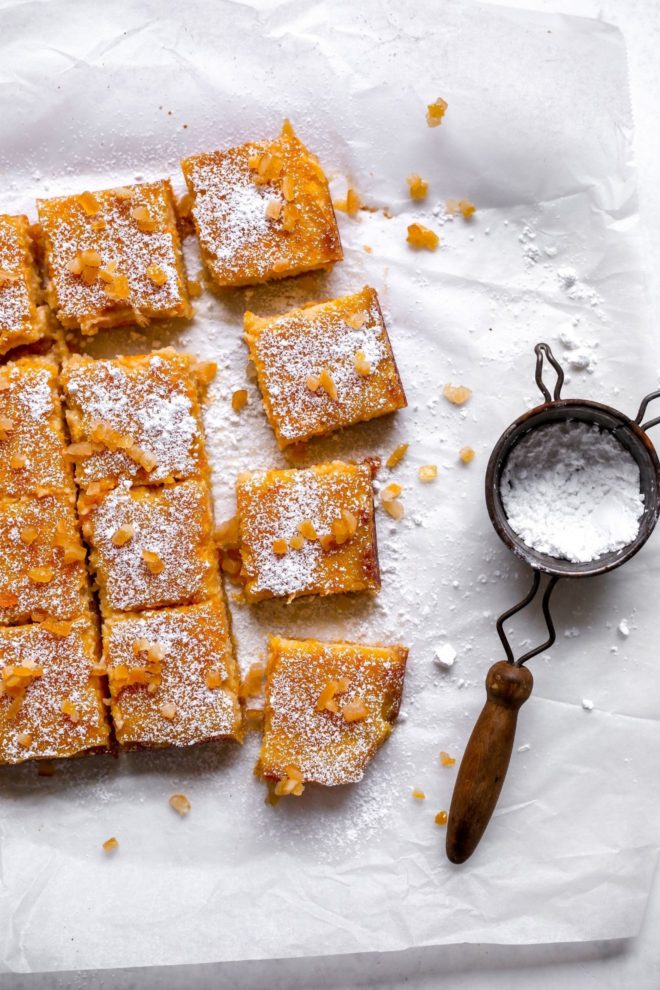
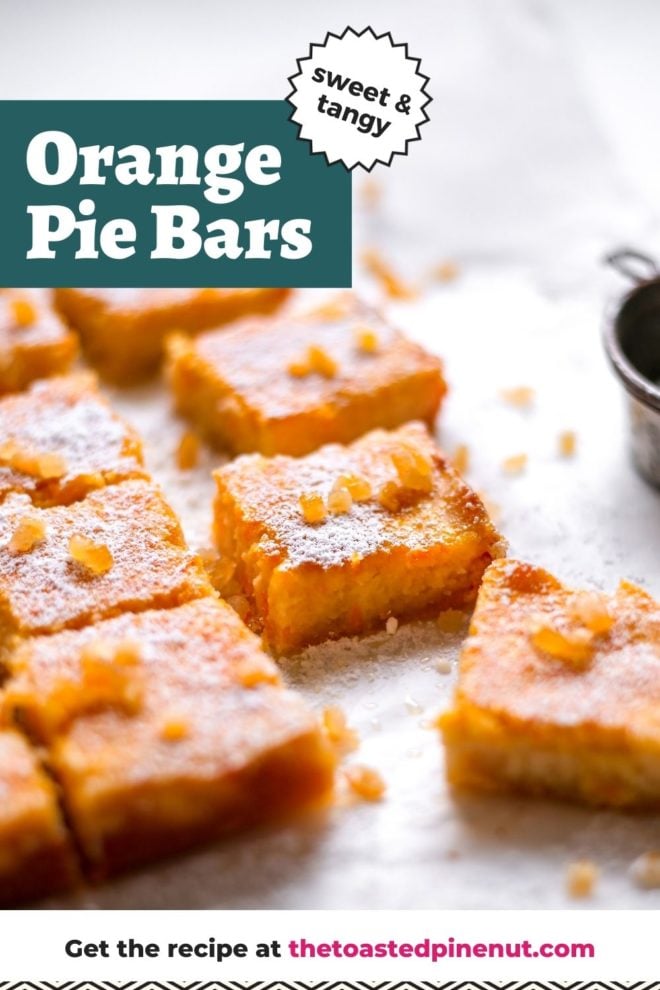
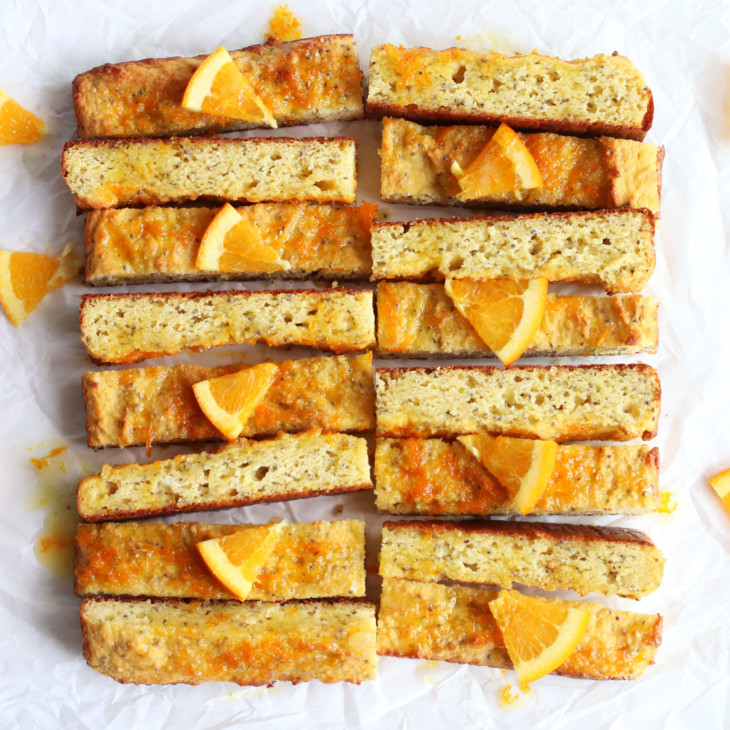
Orange Pie Bars are so fun to make because they are loaded with sweet citrus flavor and are the perfect make-ahead treat.

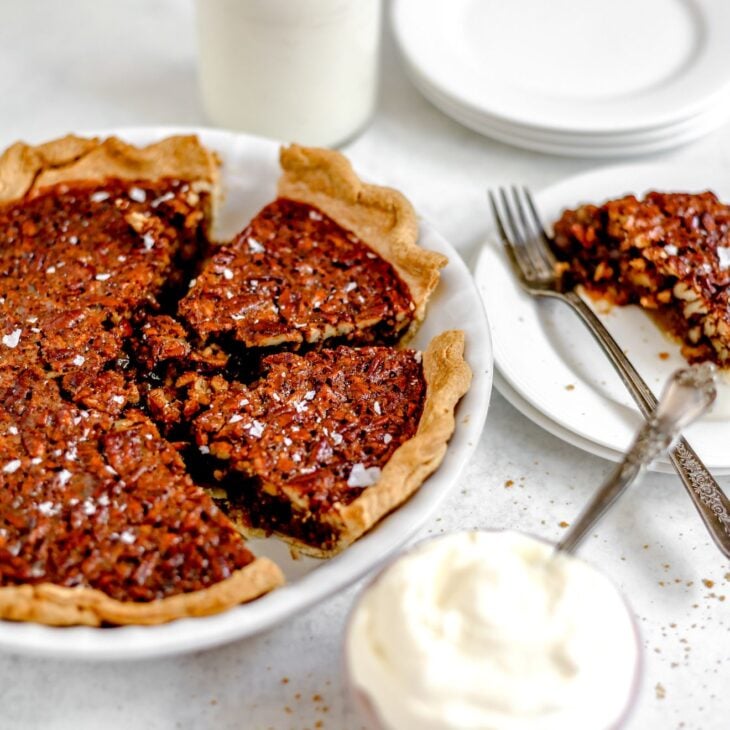
If you’re prepping a big dinner and want something sweet to finish off the night but don’t want to fuss around with it after the meal, these orange pie bars are the perfect addition to any chocolatey lineup.

They’re light and refreshing and perfect for all my fruity dessert loving people out there!

Personally I think they’re one of those desserts that feel kind fancy. They’re not an everyday run of the mill kind of dessert. Even though they feel kinda fancy, in actuality you can make them in just a few straightforward steps.

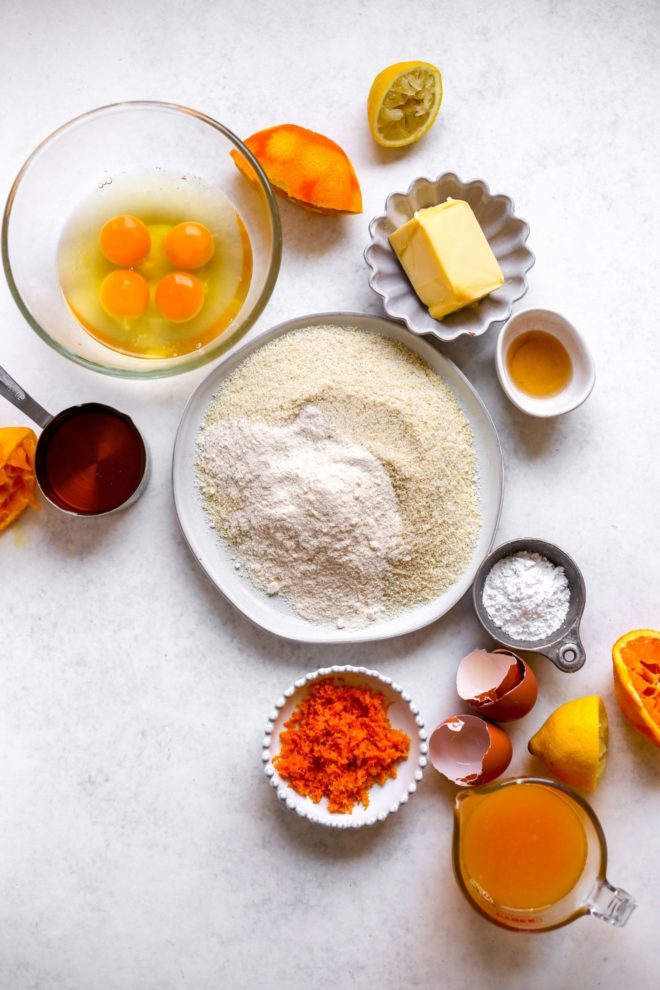
Ingredients for Orange Pie Bars

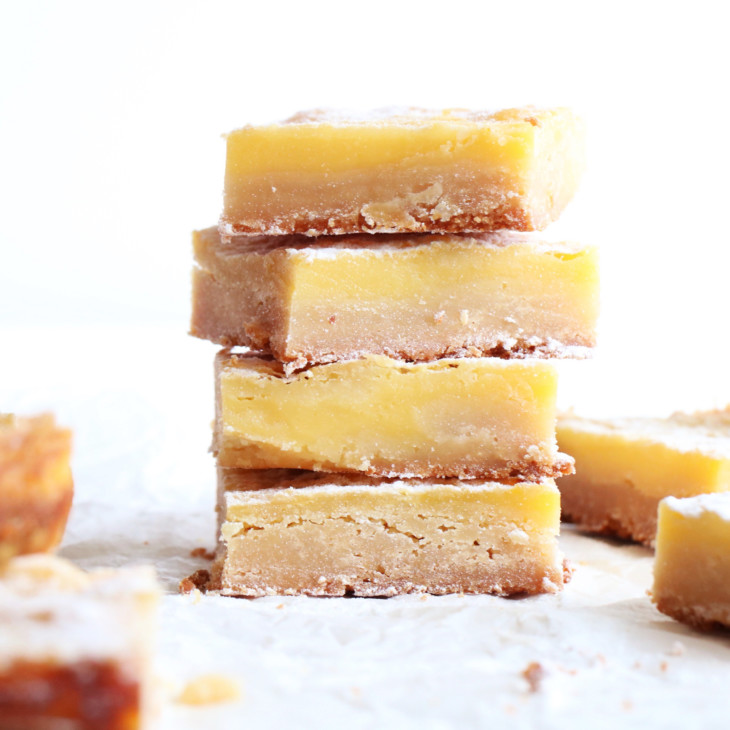
The Shortbread Crust

Unsalted Butter. You can also sub in vegan butter or refined coconut oil to make it dairy free if you prefer. Check out my favorite trick for How to Soften Butter!

Maple Syrup. It adds a delicious coziness to the flavor but you can also sub in honey or agave nectar if you prefer.

Vanilla Extract. Just a splash.

Almond Flour. I always go for blanched almond flour because it has a super fine texture compared to almond meal. Plus, it has more of a pastry color which makes for a gorgeous shortbread base.

Coconut Flour. This is going to give it a little extra shortbread texture.

Salt. To bring out the flavor!

The Orange Filling

  • Oranges. We’re going to be using the orange zest and juice. These are orange pie bars, so of course we need some oranges!
  • Lemons. Because we really want to bump up the citrus flavor we’re going to add some lemon juice to the mix.
  • Maple Syrup. You can also sub in honey, agave nectar, or another sticky sweetener.
  • Eggs. They really bind everything together so I wouldn’t recommend subbing anything else here. I don’t know how vegan eggs or an egg replacer would work so if you do any experimenting, be warned, and let me know how it goes!
  • Vanilla Extract. For some more cozy pie flavors.
  • Arrowroot. This is called arrowroot flour, arrowroot starch. It’s going to help hold together and bind the orange custard pie filling.
This is an overhead image of all the ingredients to make orange bars won a white surface.
This is a side view looking into a glass bowl with an orange juice mixture with arrowroot flour. The bowl sits on a white surface with squeezed orange halves blurred in the background.
This is an overhead image of a square pan lined with parchment paper. The shortbread crust is halfway pressed into the bottom of the pan. The pan sits on a white surface.

Can I Make these Orange Pie Bars Nut-Free?

Sure! All you have to do is sub out the almond flour in the crust. I think tigernut flour is a perfect 1:1 substitution and is technically nut-free. If you can’t do coconut flour either you can do all tigernut.

How to Make Orange Pie Bars

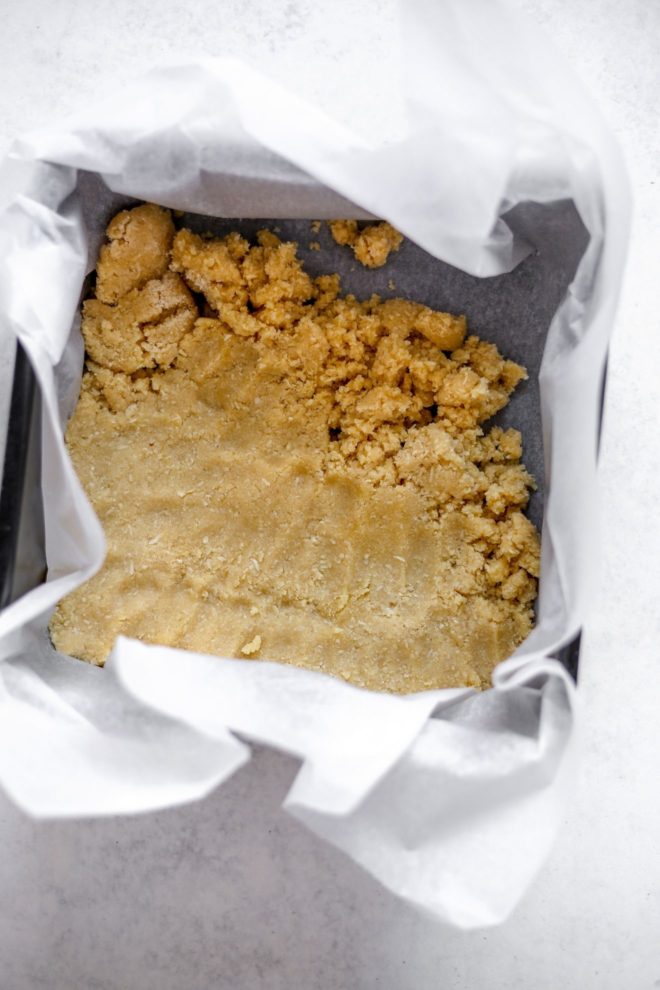
Step 1: Make the Crust

Preheat the oven to 350 degrees and line an 8×8 or 9×9 baking pan with parchment paper.

In a bowl, mix together the crust ingredients. Once a crumbly dough forms, dump into the lined pan and press into an even layer with your hands. Bake for 15 minutes.

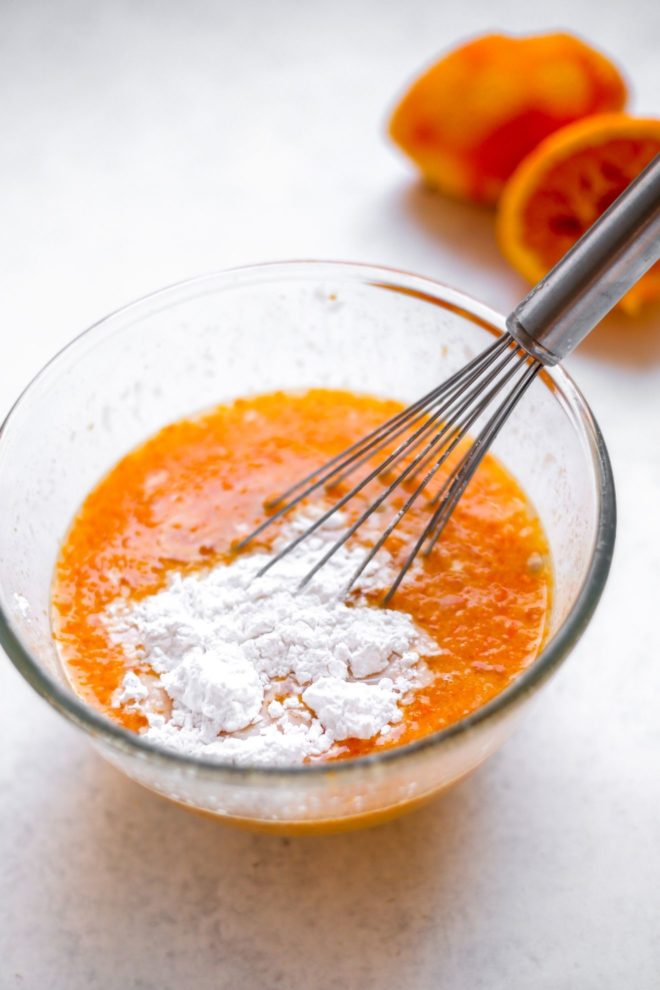
Step 2: Make the Filling

While the crust is baking, add the eggs, orange juice, lemon juice, orange zest, maple syrup and vanilla to another bowl. Whisk until there are no streaks of egg white.

Add the arrowroot powder to the orange and egg mixture. Whisk until smooth.

Step 3: Bake

Once the crust is done baking, pour the liquid filling mixture onto the crust and put back into the oven for 23-25 more minutes.

Step 4: Chill

Once the bars are done baking, allow them to come to room temperature before cooling in the fridge for 1-4 hours (according to your preference). The longer you allow them to chill, the more set the orange custard will be.

Step 5: Serve & Enjoy!

Once chilled, sprinkle with powdered sugar and candied orange peel (if desired), slice and serve!

How to Store These Orange Pie Bars

These bars should be stored in the fridge in an airtight container. They are best if eaten within 5 days of baking.

This is an overhead image of orange bars cut into squares on a white piece of parchment paper. The bars are topped with powdered sugar and candied oranges. An antique sifter is off to the right with powdered sugar in it.

Fun Topping Ideas for these Orange Pie Bars!

Meringue. I love this recipe for Italian meringue. Dollop it on top and spread it out into a luscious layer, or pipe it into cute little clouds in a fun pattern.

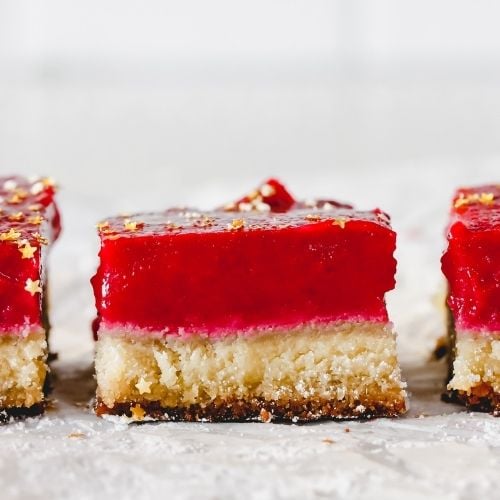
Sprinkles. I have these golden star sprinkles and I think a non-traditional sprinkle like that that could add a festive decoration would be gorgeous!

Beyond the Bar

I love how easy bars and squares are to make and grab when serving, but you can have fun with the form. You can use the same crust and filling recipe to make small tarts or a large pie.

More Bars to Try

Gluten Free Lemon Bars

Cranberry Lemon Bars

Apple Crumble Bars

No Bake Almond Butter Bars

Did you make this? Leave a review below and tag me on Instagram, Facebook, or Pinterest!

This is an overhead image of orange bars cut into squares on a white piece of parchment paper. The bars are topped with powdered sugar and candied oranges. An antique sifter is off to the right with powdered sugar in it. Recipe
GF Gluten-Free VG Vegetarian

Orange Pie Bars

Orange pie bars are loaded with citrus flavor and the perfect make-ahead dessert. The sweet & tangy orange custard sits on a shortbread base.

Recipe by:Lindsay Grimes
5 Stars 4 Stars 3 Stars 2 Stars 1 Star No reviews
Prep: 3 hours + 15 minCook: 40 minTotal: 3 hours + 55 min
Print recipe Rate recipe Pin Save recipe
Servings: 16 bars 1x

Ingredients

Crust

  • 1/2 cup melted unsalted butter
  • 2 tbsp maple syrup, honey or agave nectar
  • 1 teaspoon vanilla extract
  • 1 1/2 cups almond flour (How to Make Almond Flour)
  • 1/3 cup coconut flour
  • 1/4 tsp salt

Filling

  • Zest from 2 oranges
  • 1/2 cup freshly squeezed orange juice (from about 2 large oranges)
  • 1/3 cup fresh lemon juice (roughly 2 lemons)
  • 1/2 cup pure maple syrup, honey or agave nectar
  • 4 large eggs
  • 1 tsp vanilla
  • 2 tbsp arrowroot

Topping

  • Powdered sugar
  • Candied orange slices or orange peel

Instructions

  1. Preheat the oven to 350F and line an 8×8 or 9×9 baking pan with parchment paper.
  2. In a bowl, mix together the crust ingredients.
  3. Once a crumbly dough forms, dump into the pan and press into an even layer with your hands.
  4. Bake for 15 minutes.
  5. While the crust is baking, add the eggs, orange juice, lemon juice, orange zest, maple syrup and vanilla to another bowl. Whisk until there are no streaks of egg white.
  6. Add the arrowroot powder to the orange and egg mixture. Whisk until smooth.
  7. Once the crust is done baking, immediately add pour the liquid filling mixture onto the crust and put back into the oven for 23-25 more minutes.
  8. Once the bars are done baking, allow to come to room temperature before cooling in the fridge for 1-4 hours (according to your preference). 
  9. Once chilled, sprinkle with powdered sugar and candied orange peel (if desired), slice and serve!

Tips

Recipe Development + Food Photography by Jessica Reynolds-Corden
from Jessica Eats.

**These bars should be stored in the fridge in an airtight container and consumed within 5 days!

© The Toasted Pine Nut

Did you make this?

I love seeing what you made! Tag me on social @thetoastedpinenut

Rate recipe Tag me on Instagram
This is an overhead image of orange bars cut into squares on a white piece of parchment paper. The bars are topped with powdered sugar and candied oranges. Text overlay reads "sweet & tangy orange pie bars."
This is a side view of orange pie bars on a white piece of parchment paper. The orange bars are topped with candied oranges and powdered sugar. Text overlay reads "sweet & tangy orange pie bars."
74 shares
  • Share
  • Tweet
  • Email
overhead image of a gluten free sprinkle cookie with a bite taken out on a white counter

Never miss a recipe!

Join our pine nut family and get recipes delivered right to your inbox.

Join now!
15 no bake desserts

You May Also Like...

  • Orange Chia Seed Bars
  • This is a vertical image looking at a white pie dish with sliced pecan pie in it from the left side. The pie dish is to the left side of the image on a light grey surface with a small bowl of whipped cream with a spoon in it is in the bottom right corner of the image. To the right of the pie dish are a stack of two plates with a slice of pecan pie on it. To the top of the image are small white plates and a glass jar of milk is in the top left corner of it.
    Sweet Caramelized Gluten Free Pecan Pie
  • overhead image of a peanut butter bar leaning against another cookie bar with a bite taken out of it. both bars sit on a wrinkled piece of parchment paper.
    Oatmeal Peanut Butter Cookie Bars (gluten free + dairy free)

Reader Interactions

Leave a Comment & Rate this Recipe Cancel reply

If you love this recipe it would mean SO MUCH to me if you give it a star rating and leave a comment about it. Not only do I love basking in the glory of your recipe love, but (perhaps more importantly 😋) it helps other readers find my recipes online. Thanks so much for your feedback!!

Have a question? Submit your question or comment below. Your email address will not be published. Required fields are marked *

Recipe rating 5 Stars 4 Stars 3 Stars 2 Stars 1 Star

Primary Sidebar

Lindsay

Nice to Meet You!

I’m Lindsay - cookbook author, blogger and chocolate lover! If gluten-free desserts are your jam, you’re in the right place! I live in south Jersey with my family and new puppy Roxie! Some of my favorite things are oat milk lattes, sunny days and warm, gooey chocolate chip cookies.

Read more...

Recipe Key

GF Gluten-Free DF Dairy-Free V Vegan VG Vegetarian EF Egg-Free NF Nut-Free P Paleo Browse All

Most Popular

This is a horizontal image of a hand with deep pink nail polish holding a chocolate quinoa crisp in between their thumb and pointer finger. More chocolate quinoa crisps are blurred in the background.

5-Minute Crunchy Chocolate Quinoa Crisps

overhead image of a muffin tin filled with 12 raw eggs sprinkled with pepper

Perfect Oven-Baked Eggs in a Muffin Tin

This is a side view of a chocolate almond butter bar with a bite taken out of it. The bar sits on a white piece of parchment paper and is sprinkled with salt. More bars are blurred in the background.

No Bake Almond Butter Bars

Lemon & Avocado Kale Salad

Freebie alert!

Get My Free No Bake Desserts eBook!

Explore

More Bars & Brownies

This is an overhead vertical image looking down onto small circle shaped brownies. The brownies are on a cooling rack on a pink surface and dusted with powdered sugar. One brownie is in the top left corner of the image, right side and bottom right corner. In the middle is a brownie with a bite taken out turned on its side to reveal its fudgey center.

Bite-Sized Chocolate Brownies in a Muffin Tin

This is a vertical image at a 3/4 view looking down into a small white ramekin with a brownie in it. The brownie is topped with a scoop of vanilla ice cream. The white ramekin sits on a white plate with a silver spoon with some brownie on it leaning on the plate. the plate sits on a light grey surface with single chocolate chip and the bottom of a milk glass blurred at the top of the image.

1-Min Fudgey Vegan Mug Brownie

This is a side view of a brownie with a pecan pie topping and a bite taken out of it. The brownie sits on a white piece of parchment paper with more brownies blurred in the background.

Deliciously Decadent Pecan Pie Brownies (in 30 minutes!)

This is an overhead image looking down onto gooey chocolate brownies cut into squares and topped with pecans, chocolate and flakey salt. The brownies sit on a white piece of parchment paper.

Ultra Fudgey Almond Butter Brownies (in 30 minutes!!)

Browse All
15 No bake desserts

Download my FREE No Bake Dessert Ebook!

As seen on:

Food Network
Shape
Men's Health
NBC
Kitchn
Glamour
  • Reader Faves: Gluten-Free Desserts
    • Gluten free macarons
    • Banana mug cake
    • Almond butter bars
    • Peanut butter Cheerio bars
    • Chia seed cookies
    • More gluten-free desserts
  • Top Chocolate Desserts
    • Chocolate quinoa crisps
    • Microwave baked oats
    • Hot chocolate bombs
    • Chocolate banana bread
    • Peanut butter brownies
    • All chocolate recipes
  • DIY & How To
    • Dried orange garland
    • How to melt chocolate chips
    • DIY face oil
    • Oven-baked eggs in a muffin tin
    • How to make taco seasoning
    • How to make oat milk in 5 minutes
  • Explore Resources
    • FAQ
    • My Baking Mixes
    • Cookbook
    • Shop Favorites
    • Web Stories
    • Meet Lindsay
Follow

@thetoastedpinenut

Accessibility

Privacy Policy

Disclaimer

Contact

© 2025 The Toasted Pine Nut
|
Site Credits Designed by Melissa Rose Design Developed by Once Coupled Support by Foodie Digital
Back to Top
74 shares
This is an overhead image of orange bars cut into squares on a white piece of parchment paper. The bars are topped with powdered sugar and candied oranges. Text overlay reads "sweet & tangy orange pie bars."
This is a side view of orange pie bars on a white piece of parchment paper. The orange bars are topped with candied oranges and powdered sugar. Text overlay reads "sweet & tangy orange pie bars."