• Skip to primary navigation
  • Skip to main content
  • Skip to primary sidebar
  • About
  • Contact
Check out my new cookbook

The Toasted Pine Nut

fun. flavorful. feel-good recipes.

  • Check out my cookbook!
  • Recipes
    • Dessert
      • Cookies
      • Bars & Brownies
      • Breads & Muffins
      • Cakes & Cupcakes
      • Pies & Crumbles
      • Candy
      • No Bake
    • Meal
      • Breakfast
      • Main Dishes
      • Appetizers
      • Sides
      • Snacks
      • Drinks
      • Salads
      • Sauces & Dips
      • Dessert
    • Diet
      • Gluten Free
      • Dairy Free
      • Vegan
      • Vegetarian
      • Egg Free
      • Kid Friendly
      • Low Carb
      • Nut Free
    • Meat
      • Fish & Seafood
      • Chicken & Poultry
      • Beef & Pork
      • Meatless
    • Method
      • Air Fryer
      • Slow Cooker
      • Instant Pot
      • Oven
      • Grill
      • Stovetop
    • Season
      • Spring
      • Summer
      • Fall
      • Winter
    • Recipe Filter
  • Shop
    • My Baking Mixes
    • Kitchen Essentials
    • Pantry Items
    • Kid Favorites
    • Photography
  • Cookbook
  • Videos
Home Recipes Snacks
5 from 1 review

How to Make Super Creamy Almond Butter (Just 1 Ingredient!!)

25 min
by: Lindsay Grimes
March 5, 2018 (Updated: September 20, 2024)
Jump to Recipe
Leave a Comment

This post may contain affiliate links. Please read our disclosure policy.

This is an angled view looking into a food processor with creamy nut butter in it. The food processor sits on a white surface.
Learn how to make almond butter at home with just 1 ingredient – almonds! It’s super creamy, drippy, and so simple to whip up in 10 minutes!

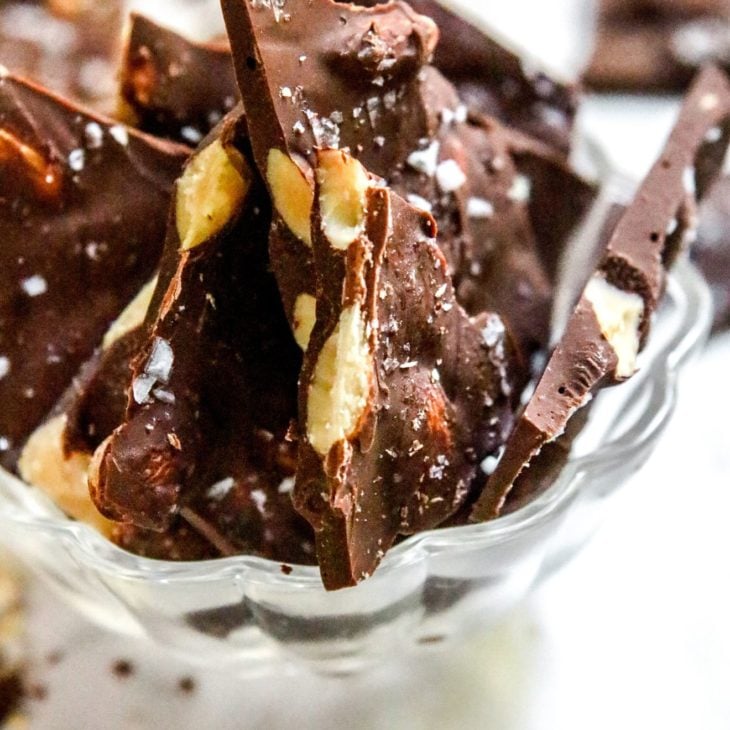
Raise your hand if you love almond butter 🙋🏼‍♀️🙋🏼‍♀️ Raise your hand if you spend like 10 dollars too many on the perfect jar? Anyone? Same.

I mean, there’s something to be said about the convenience…

If I’m already out and in buying mode, getting all the groceries I need, so it’s simple to just grab a jar of nut butter and put it in my cart.

It just jumps off the shelf and feels super easy. I get it.

But you know what else is super easy but doesn’t cross my mind nearly as much? Homemade almond butter. It turns out amazing every. damn. time.

One ingredient. Two steps. I need homemade almond butter to be a weekly occurrence.

If you love making your own nut butter, try Cinnamon Cashew Butter and Five-Ingredient Homemade Nutella!

how to make almond butter

Is Making Almond Butter at Home Cheaper?

You betcha! It can be wildly expensive. I mean sure, you can get good deals for store-brand almond butter but I’ve seen some almond butter upwards of $20 a jar!

I did a quick math for you which shows you how committed I am to writing this section because I’m not really a math person, but here we go.

Costco (Kirkland) almond butter goes for $0.59 per oz where Costco (Kirkland) raw almonds go for around $0.39 per oz.

There you have it, making almond butter at home is for sure cheaper! Not to mention really fun to customize to your own tastebuds.

This is a vertical image looking at a glass jar filled with almond butter. A spoon is scooping almond butter and laying across the top opening of the jar. The jar sits on a white surface with almonds scattered around it.

What Kind of Almonds to Use

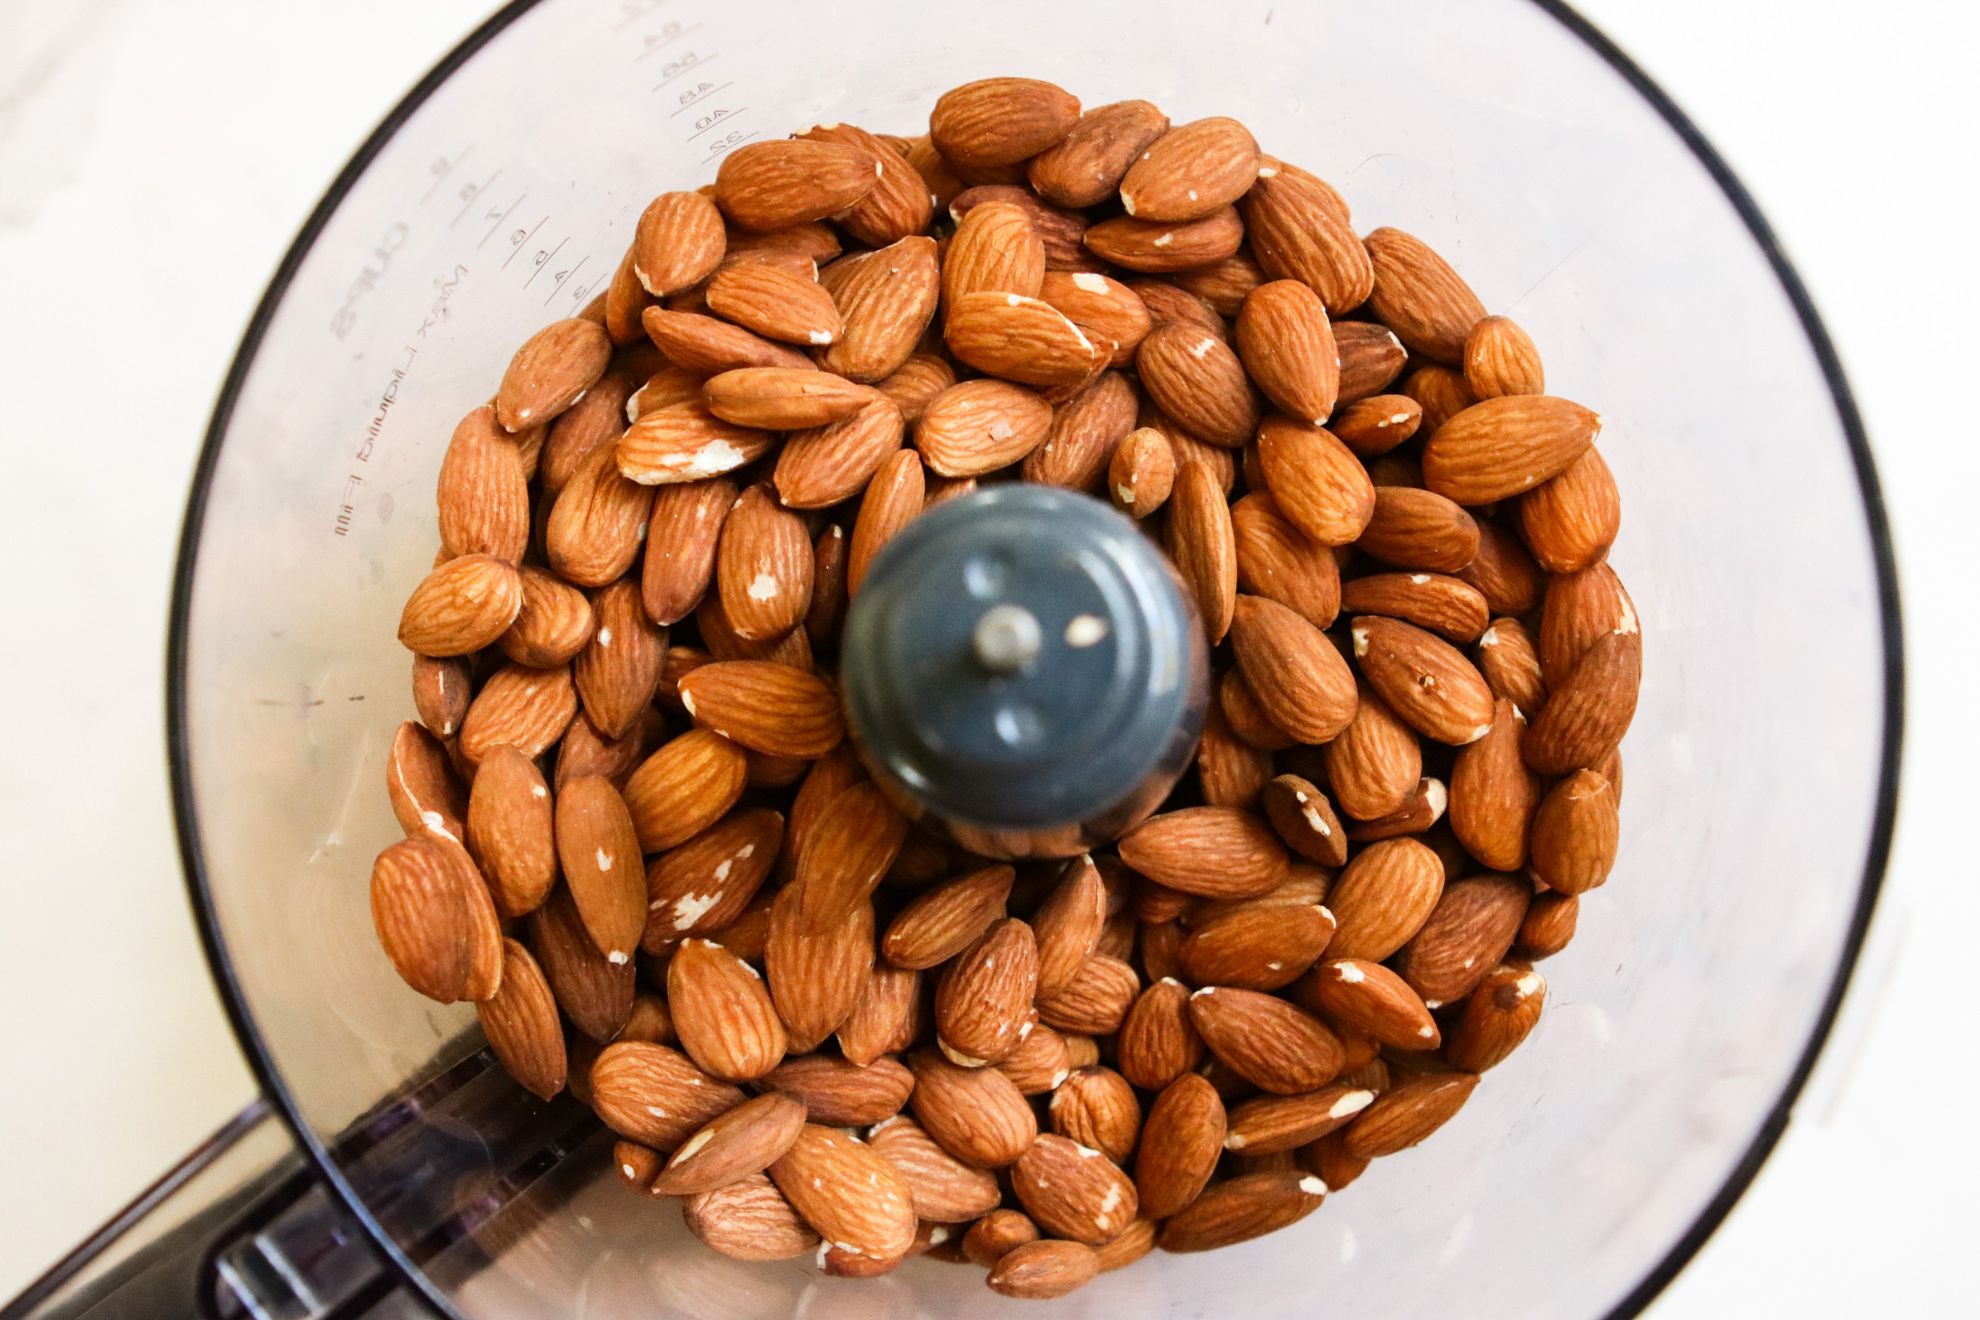
Go for raw almonds! I tend to get raw almonds with the skin on because those tend to be the cheapest. But, feel free to use whatever almonds you have on hand. If all you have laying around are blanched or slivered, those work too!

Equipment You’ll Need

Food processor. I use a food processor because it’s always out and easy for me to use. You press a button and let it roll!

Blender. High powered blenders will absolutely work too! You may need to take breaks to scrape down the sides and break up any nut ball that forms, but if your blender has a tamper to agitate it as it blends, using that is ideal!

This is an overhead image of almonds spread out on a rimmed baking sheet. The baking sheet sits on a white marble counter.
This is an overhead horizontal image of almonds in a food processor. The food processor sits on a white marble surface.

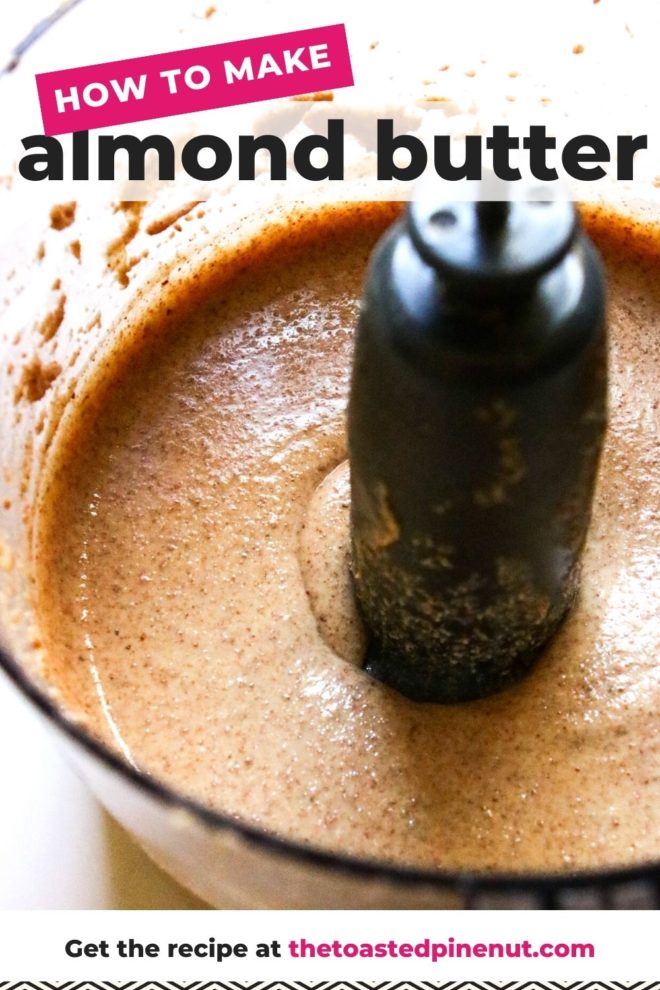
How to make almond butter

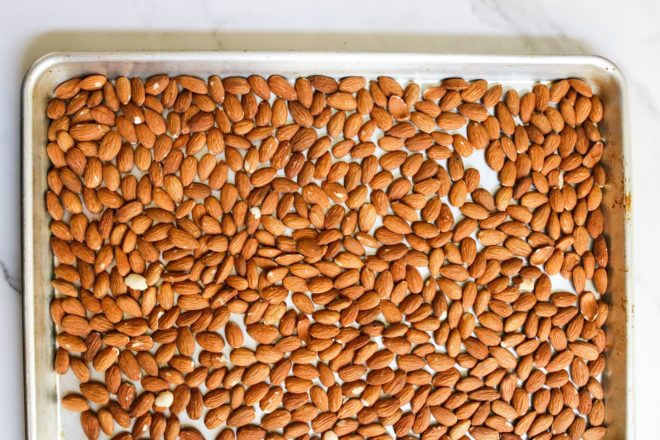
Roast. Spread your raw almonds out on a baking sheet. Roast them for 10 minutes and then allow them to cool on the pan.

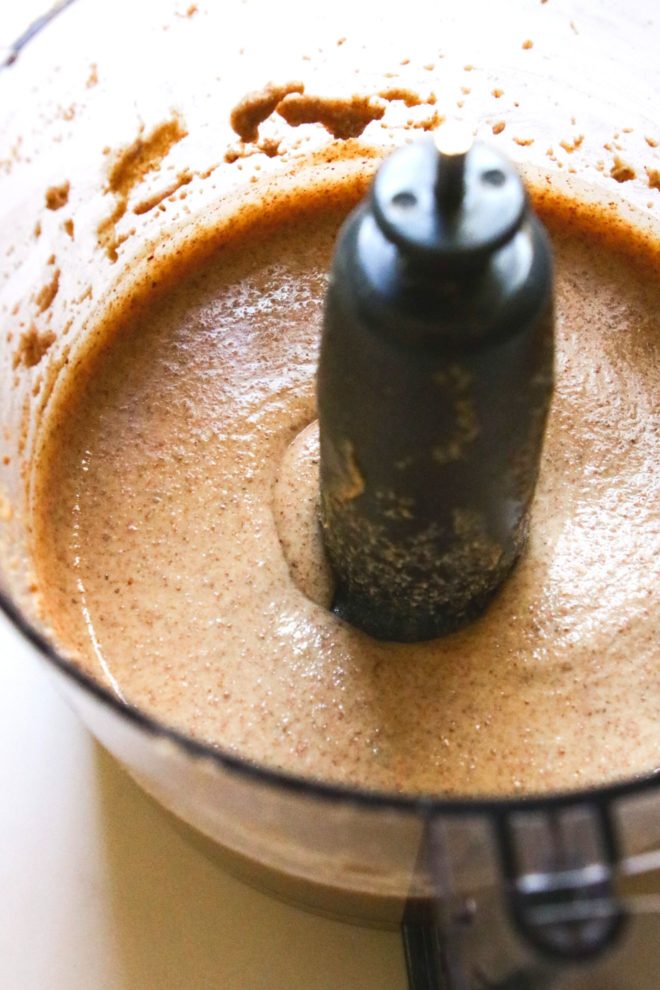
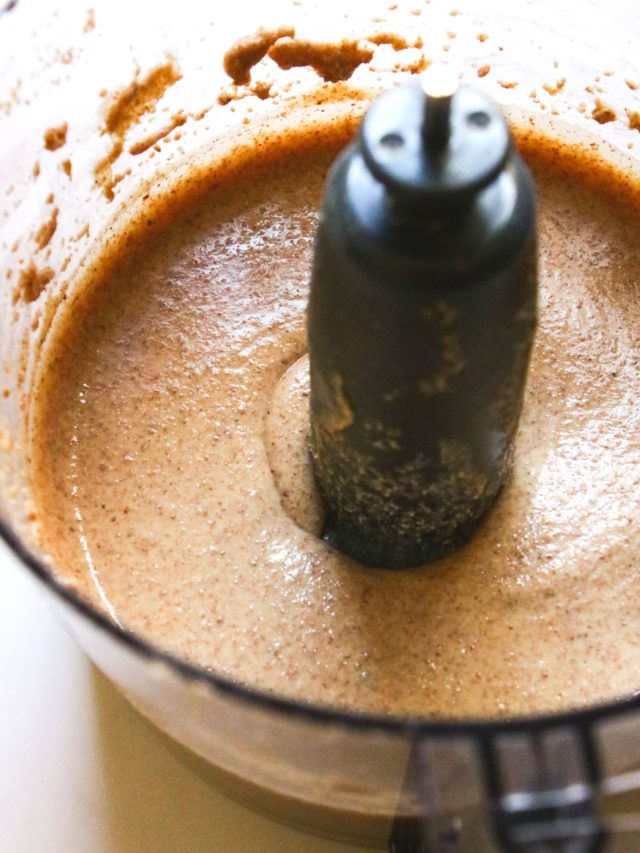
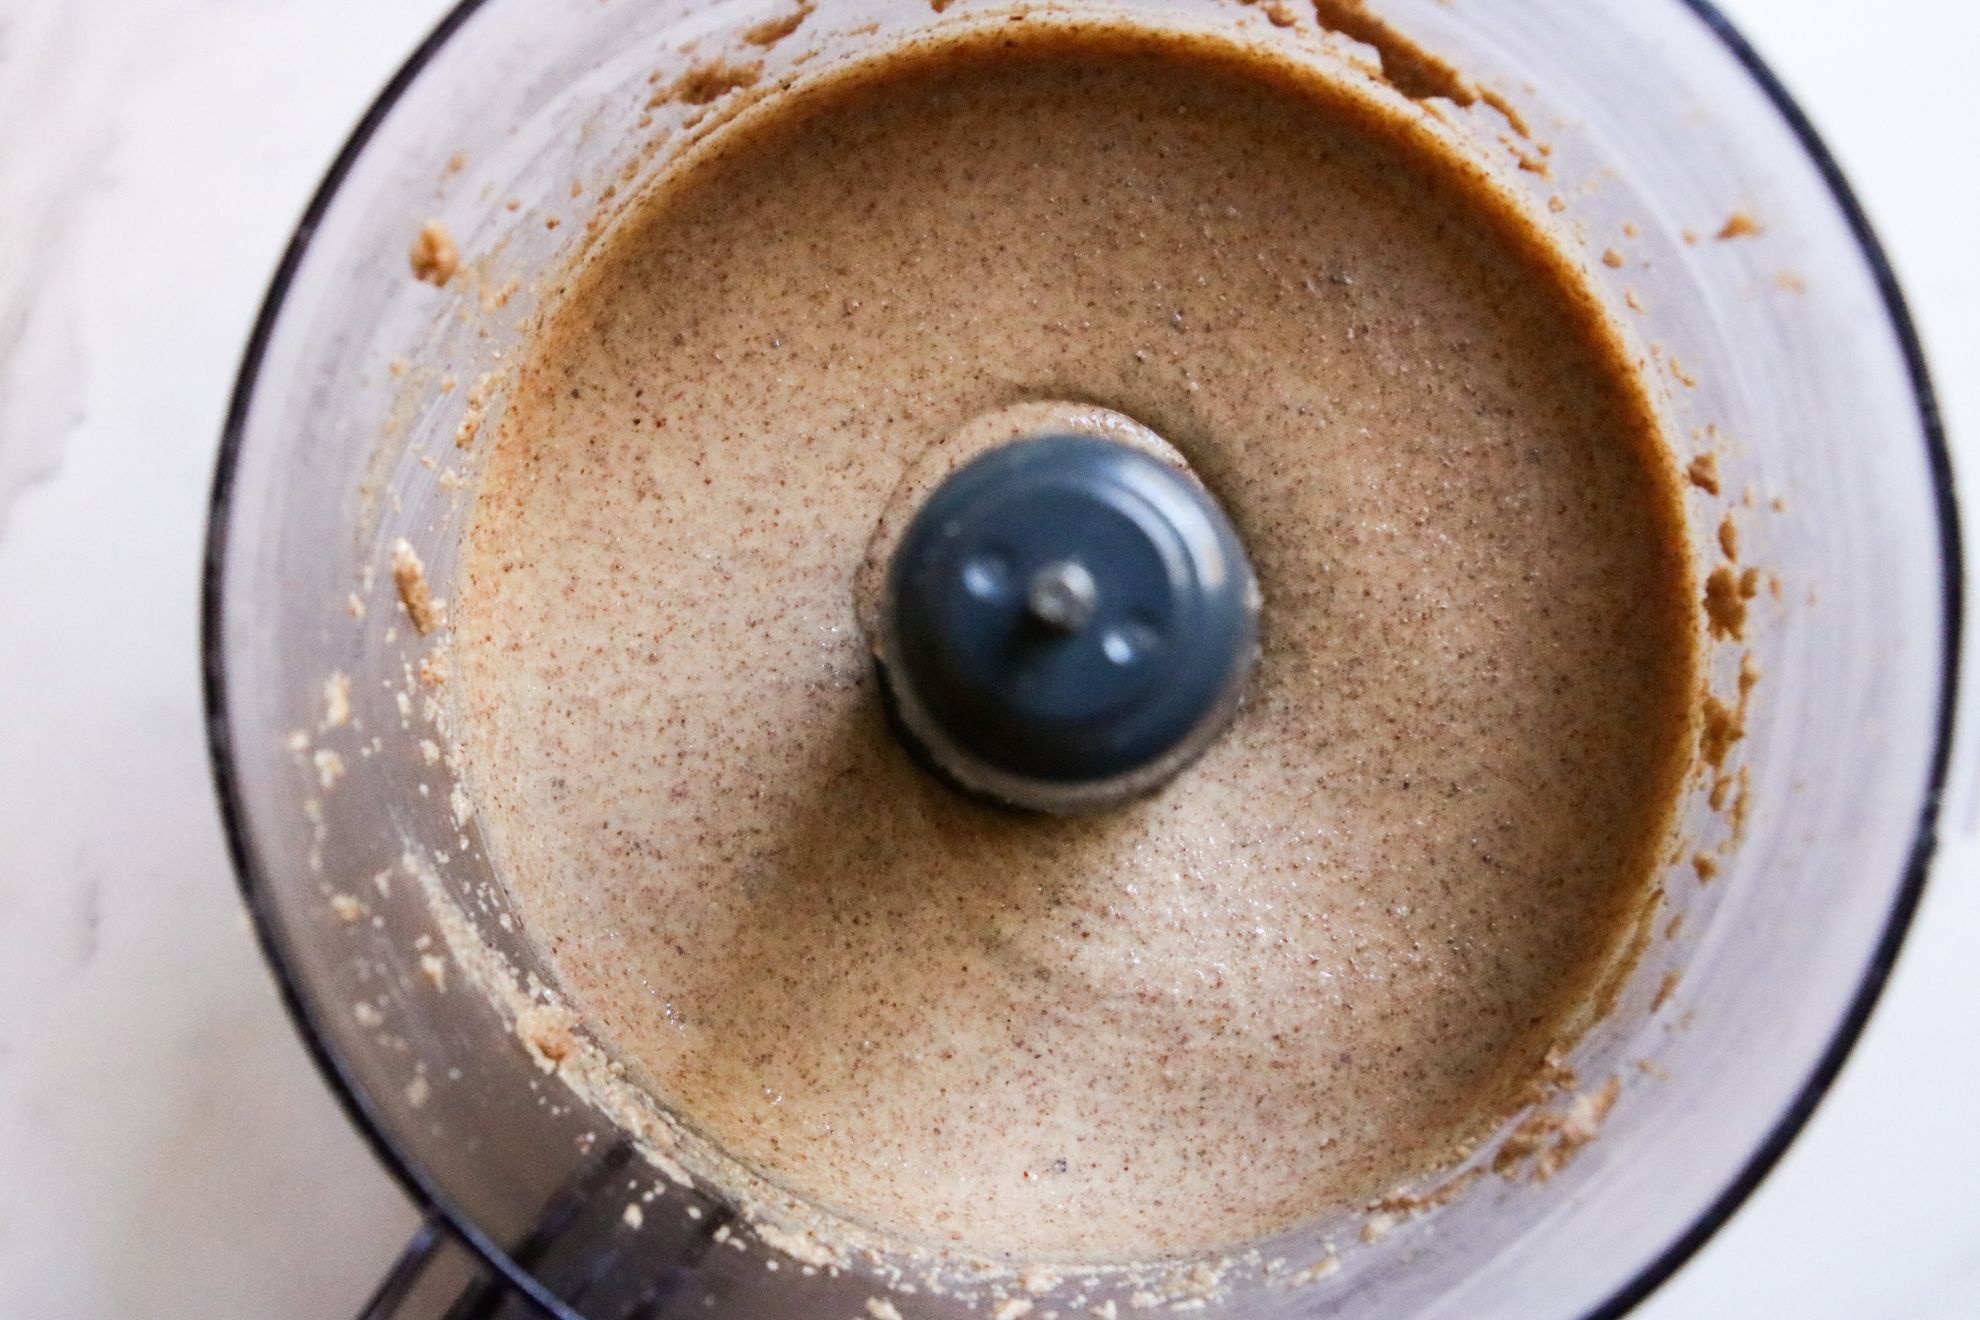
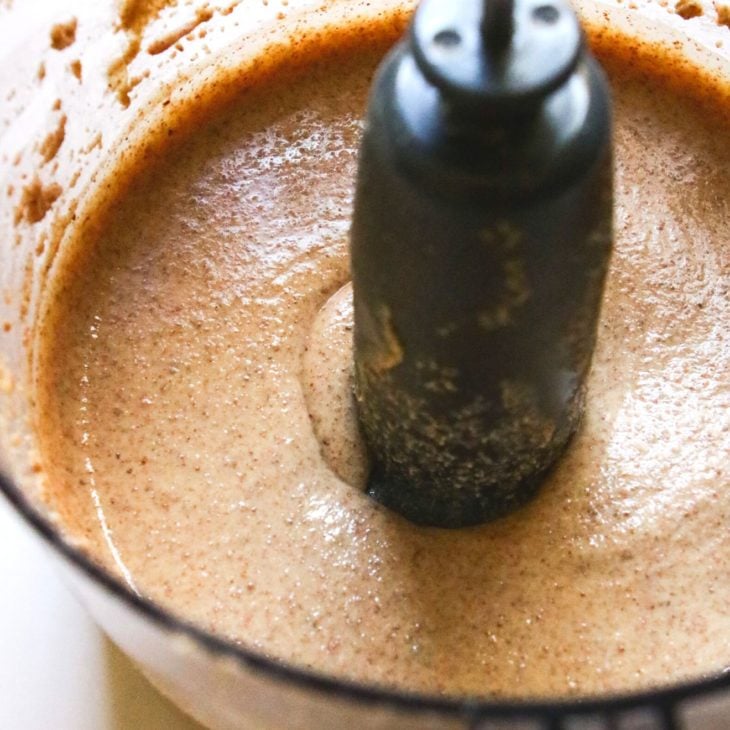
Process. Transfer the roasted almonds to your blender or food processor, and turn it on. Let it run for about 5 – 7 minutes. Use a rubber spatula to mix it up and scrape down the sides. Let it run for another few minutes until it gets super smooth and drippy.

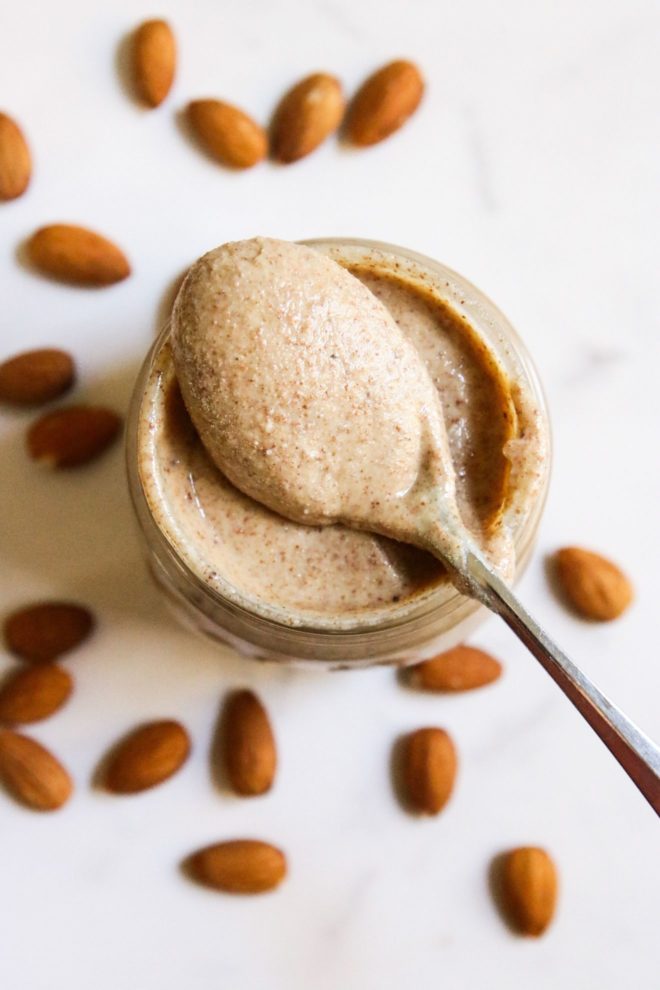
Jar it! Store in an air tight container in your pantry and enjoy!!

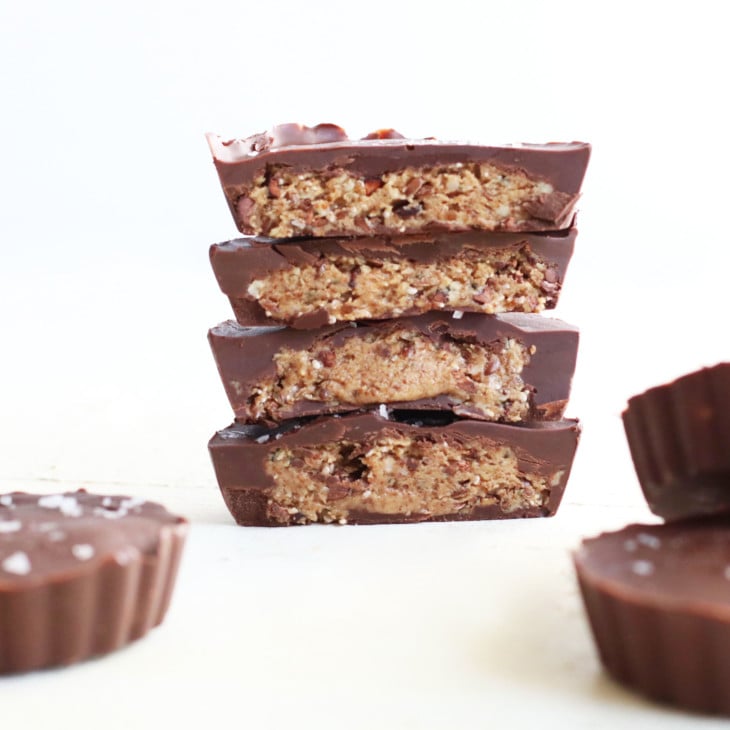
Ways to Customize it:

Salt. I recommend adding some salt in this recipe. I always use unsalted almonds and then add my own salt because then you can control how salty your almond butter is. Salt to taste 🙂

Add spice! Cinnamon is always a good idea in my opinion but if you want something more seasonal, try a gingerbread mix or pumpkin spice!

Sweetness. Add a couple dates or a few tablespoons of agave nectar, honey or maple syrup to add some sweetness to this almond butter.

Troubleshooting

There’s going to come a moment where there’s a ball of nut butter just rolling around in your food processor and you’re about to give up. I’m here to encourage you to keep it going.

Be patient and let it do its thing until its nice and creamy, drippy and drizzly!

This is an overhead image looking down into a glass jar filled with nut butter. A spoon filled with the nut butter is leaning across the top of the jar opening. The jar sits on a white marble counter with almonds scattered around it.

Did you make this? Leave a review below and tag me on Instagram, Facebook, or Pinterest!

This is an angled view looking into a food processor with creamy nut butter in it. The food processor sits on a white surface. Recipe

How to Make Super Creamy Almond Butter (Just 1 Ingredient!!)

Learn how to make almond butter at home with just 1 ingredient – almonds! It’s super creamy, drippy, and so simple to whip up in 10 minutes!

Recipe by:Lindsay Grimes
5 Stars 4 Stars 3 Stars 2 Stars 1 Star 5 from 1 review
Prep: 15 minCook: 10 minTotal: 25 min
Print recipe Rate recipe Pin Save recipe
Servings: 3 cups 1x

Ingredients

  • 4 cups raw almonds

Instructions

  1. Preheat oven to 400F.
  2. First, spread your raw almonds out on a baking sheet.
  3. Roast them for 10 minutes and then allow them to cool on the pan for 5 minutes.
  4. Transfer them to your blender or food processor and turn it on.
  5. I agitate it a lot with the blender wand as it’s blending. If you’re using a food processor, you can process it and take breaks to scrape down the sides with a rubber spatula if it needs some help.
  6. You want to let it run for about 5 – 7 minutes.
  7. Here’s the key. Right when you think, “Ok it’s as far as it can go” and the almond butter is buttery but still stiff, you want to let it run for another few minutes until it gets crazy amazing smooth and drippy.
  8. Store in an air tight container in your pantry and enjoy!!
© The Toasted Pine Nut

Did you make this?

I love seeing what you made! Tag me on social @thetoastedpinenut

Rate recipe Tag me on Instagram

Enjoy!! xo

This is an angled view looking into a food processor with creamy nut butter in it. The food processor sits on a white surface. Text overlay reads "how to make almond butter."
398 shares
  • Share
  • Tweet
  • Email
overhead image of a gluten free sprinkle cookie with a bite taken out on a white counter

Never miss a recipe!

Join our pine nut family and get recipes delivered right to your inbox.

Join now!
15 no bake desserts

You May Also Like...

  • Chocolate Peanut Butter Almond Milk
  • This is a side view of a small glass bowl filled with chocolate bark. The bark has almonds and flakey salt on top. More pieces of bark and crumbs on the white counter around the bowl.
    Sweet & Salty 3-Ingredient Chocolate Almond Bark
  • 10-Min Crunchy Chocolate Almond Butter Cups

Reader Interactions

Leave a Comment & Rate this Recipe Cancel reply

If you love this recipe it would mean SO MUCH to me if you give it a star rating and leave a comment about it. Not only do I love basking in the glory of your recipe love, but (perhaps more importantly 😋) it helps other readers find my recipes online. Thanks so much for your feedback!!

Have a question? Submit your question or comment below. Your email address will not be published. Required fields are marked *

Recipe rating 5 Stars 4 Stars 3 Stars 2 Stars 1 Star

  1. AvatarAydrea says

    Posted on 3/7/18 at 10:51 am

    What size food processor/blender would you recommend? Any specific brands? I have a small Cuisinart food processor that cannot handle making nut butter.

    Reply
    • Lindsay says

      Posted on 3/25/18 at 8:08 am

      Hi Aydrea!

      I have both a food processor and a vitamix! I’ll include the links below to the ones I have. Sometimes I feel like a high powered blender is better for making nut butters. xo

      Food processor – http://amzn.to/2vCffq9
      vitamix – http://amzn.to/2gbMviF

      Reply
      • AvatarVicki says

        Posted on 4/25/18 at 7:05 pm

        I just got a Vitamix last Friday! I’m so excited to try almond butter. I like your version….you don’t have to keep it in the refrigerator. Thank you!

        Reply
        • Lindsay says

          Posted on 4/30/18 at 11:38 am

          Ah so fun!! I hope you love it!! xo

          Reply
  2. Yanness Lai says

    Posted on 2/5/19 at 3:22 am

    It’s my first time trying the homemade almond butter, and it tastes fantastic! 🤤 Mine is so thick (too good for my liking) and just like those in supermarkets, but much healthier! Love this recipe! ❤️❤️

    Reply
    • Lindsay Grimes Freedman says

      Posted on 10/14/20 at 3:10 pm

      Yay! I’m so happy you made your own! It’s so good!! xo

      Reply
  3. Yanness Lai says

    Posted on 2/5/19 at 3:26 am

    Its my first time trying the homemade almond butter, and it tastes fantastic! 🤤 Mine is so thick (too good for my liking), just like those in supermarkets, but so much healthier! Love this recipe ❤️ Yum! 👍🏻

    Reply
    • Lindsay Grimes Freedman says

      Posted on 10/14/20 at 3:09 pm

      Yay! I’m so happy you made your own! It’s sooo good!! xo

      Reply
  4. AvatarErin says

    Posted on 2/23/19 at 11:55 am

    I cannot seem to get my vitamix to make nut butters! I don’t know if I’m not roasting the nuts long enough or what but it starts to struggle hard and then gets too hot and freezes up. Thoughts?

    Reply
    • Lindsay Grimes Freedman says

      Posted on 10/14/20 at 3:05 pm

      Ugh yes it can be tough! I think making sure your nuts are completely cooled before you put them in the vitamix and also giving your vitamix breaks to cool down, when it’s off scrape down the sides of the blender to help it along. Those are probably my best tips. I know some people have more success with a food processor, so if your vitamix isn’t working maybe give a food processor a shot! Let me know how it goes!!

      Reply

Primary Sidebar

Lindsay

Nice to Meet You!

I’m Lindsay - cookbook author, blogger and chocolate lover! If gluten-free desserts are your jam, you’re in the right place! I live in south Jersey with my family and new puppy Roxie! Some of my favorite things are oat milk lattes, sunny days and warm, gooey chocolate chip cookies.

Read more...

Recipe Key

GF Gluten-Free DF Dairy-Free V Vegan VG Vegetarian EF Egg-Free NF Nut-Free P Paleo Browse All

Most Popular

This is a horizontal image of a hand with deep pink nail polish holding a chocolate quinoa crisp in between their thumb and pointer finger. More chocolate quinoa crisps are blurred in the background.

5-Minute Crunchy Chocolate Quinoa Crisps

overhead image of a muffin tin filled with 12 raw eggs sprinkled with pepper

Perfect Oven-Baked Eggs in a Muffin Tin

This is a side view of a chocolate almond butter bar with a bite taken out of it. The bar sits on a white piece of parchment paper and is sprinkled with salt. More bars are blurred in the background.

No Bake Almond Butter Bars

Lemon & Avocado Kale Salad

Freebie alert!

Get My Free No Bake Desserts eBook!

Explore

More Snacks

This is an overhead vertical image of a white ceramic scalloped pie dish on a deep pink surface. In the pie dish is a melty, gooey chocolate topped with toasted marshmallows. Nilla wafers are scattered on the pink surface and a few are dipped into the chocolate dip.

10 Minute Warm & Gooey Hot Chocolate Dip

This is an overhead vertical image of small muffins on a silver cooling rack. The muffins are studded with one or two blueberries and sprinkled with turbinado sugar. Some sugar has fallen down onto the white surface. The image is closeup on three lines of muffins on the rack.

25-Min Sweet Mini Blueberry Muffins (Made with Almond Flour)

This is an overhead vertical image of a chocolate muffin with a teal muffin liner. The muffin is topped with crushed oreos. The muffin sits on a white surface with crushed oreos on the whit surface above the muffin.

20-Min Double Chocolate Oreo Muffins

This is an overhead vertical image of a drippy fried egg on a slice of toast. The egg is topped with cilantro and everything bagel seasoning. The toast is on a white plate with more cilantro leaves surrounding the toast and a silver fork leaning against the side to the bottom left of the image. The toast and egg is cut in half with a drippy yellow yolk on the plate. The plate sits on a bright yellow surface.

1-Min Drippy Microwave Fried Eggs

Browse All
15 No bake desserts

Download my FREE No Bake Dessert Ebook!

As seen on:

Food Network
Shape
Men's Health
NBC
Kitchn
Glamour
  • Reader Faves: Gluten-Free Desserts
    • Gluten free macarons
    • Banana mug cake
    • Almond butter bars
    • Peanut butter Cheerio bars
    • Chia seed cookies
    • More gluten-free desserts
  • Top Chocolate Desserts
    • Chocolate quinoa crisps
    • Microwave baked oats
    • Hot chocolate bombs
    • Chocolate banana bread
    • Peanut butter brownies
    • All chocolate recipes
  • DIY & How To
    • Dried orange garland
    • How to melt chocolate chips
    • DIY face oil
    • Oven-baked eggs in a muffin tin
    • How to make taco seasoning
    • How to make oat milk in 5 minutes
  • Explore Resources
    • FAQ
    • My Baking Mixes
    • Cookbook
    • Shop Favorites
    • Web Stories
    • Meet Lindsay
Follow

@thetoastedpinenut

Accessibility

Privacy Policy

Disclaimer

Contact

© 2025 The Toasted Pine Nut
|
Site Credits Designed by Melissa Rose Design Developed by Once Coupled Support by Foodie Digital
Back to Top
398 shares