
I’m always looking for a quick and easy dessert that you can make in minutes. This 2-minute quickie microwave lemon mug cake is checking a lot of boxes for me. It’s sweet, it’s tangy, it’s juicy, and best of all – minimal time and effort!
It’s made with simple ingredients and can be whipped up in no time using just a microwave. Want a sweet treat after dinner? A simple dessert to satisfy your sweet and tangy tooth? This lemon mug cake is sure to hit the spot.
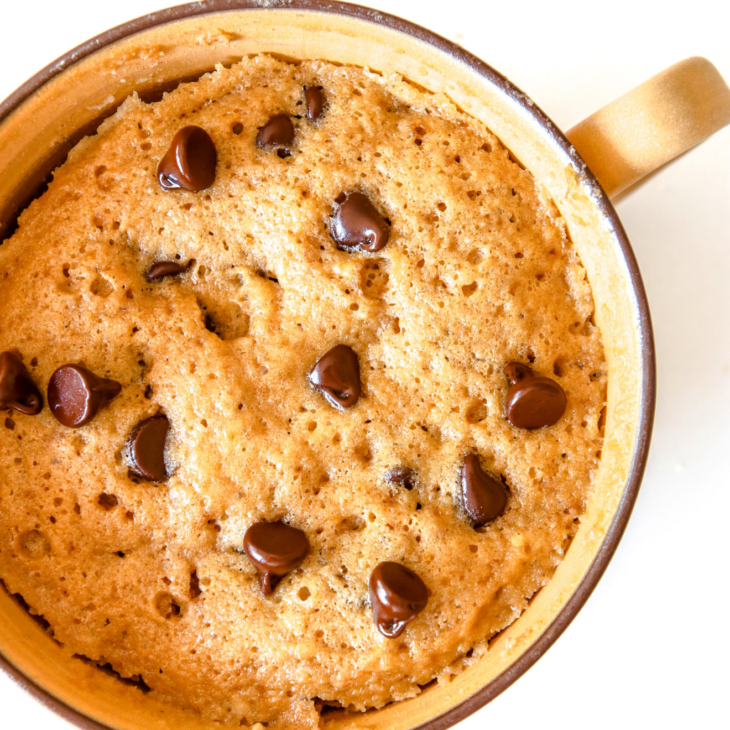
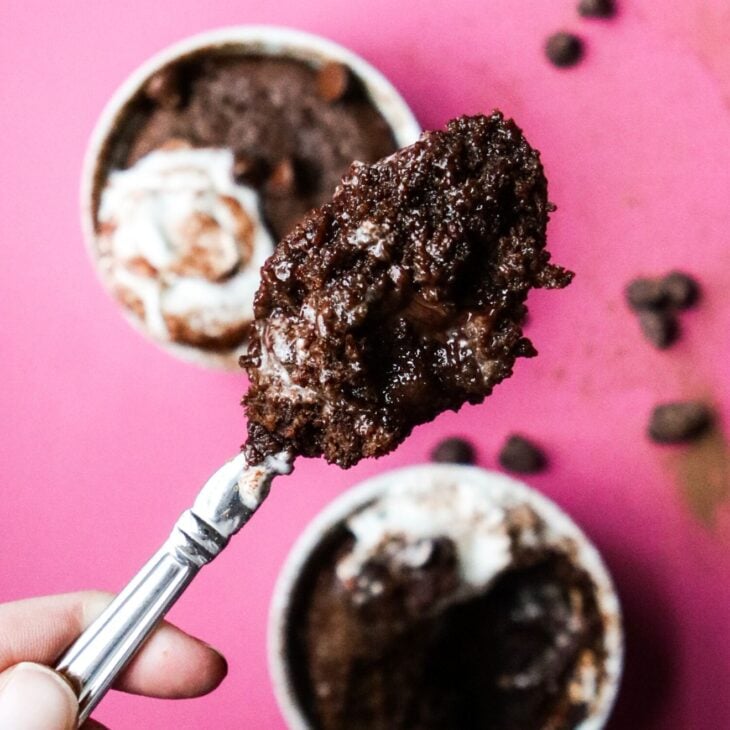
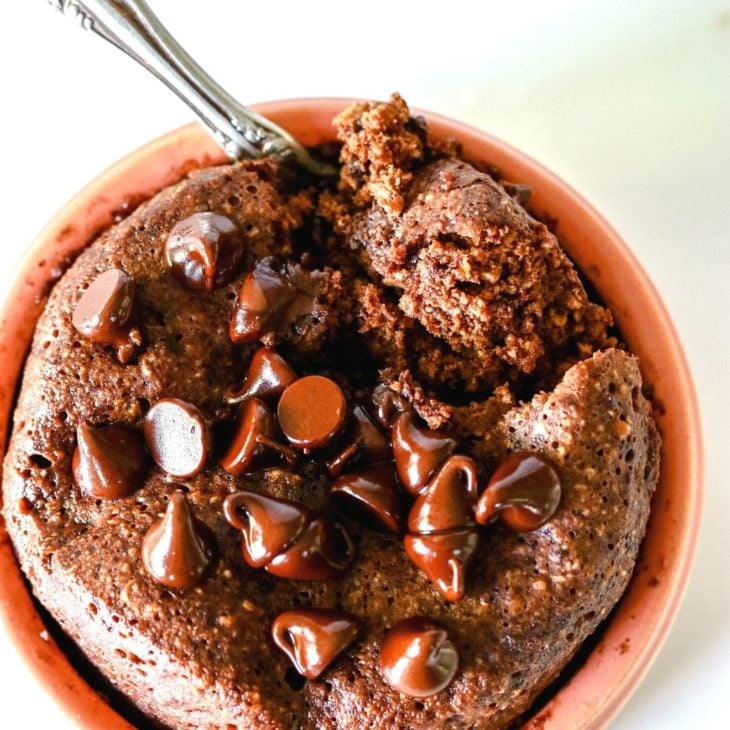
Love mug cakes? You have to try my 3-Min Moist & Fluffy Microwave Banana Mug Cake and my 1-Min Quickie Gooey Chocolate Mug Cake!
Why You’ll Love this Recipe
Convenience: It only takes 1 minute to make this! That means that it’s incredibly convenient, especially for those who don’t have a lot of time to spare. It’s a quick and easy dessert option that can be whipped up in no time.
Flavor: The lemon flavor in the cake can be tangy twist from the usual chocolate or vanilla flavors. It can be a great option for those who enjoy tangy and citrusy desserts.
Minimal Ingredients: Meaning, you probably already have most in your pantry!
Easy Cleanup: Since the cake is made in a mug, cleanup is a breeze. Simply wash the mug and you’re done. There are no baking dishes or utensils to clean up after making the cake.
Ingredients You’ll Need
Butter: It will add richness and flavor to the finished cake and keep it moist and tender. You can sub in vegan/dairy free butter or vegetable/olive oil if you prefer!
Egg: They will help to bind the ingredients together and provide structure to the cake. I haven’t tested this recipe with vegan eggs or flax eggs, so if you do any experimenting, let me know how it goes!
Coconut Sugar: Coconut sugar is a natural sweetener that is lower on the glycemic index than traditional sugar. It has a caramel-like flavor that can add depth and complexity to the cake. Want to sub in another sugar? Go for a granular sugar to make sure not to add too much liquid to the batter.
Lemon Juice and Zest: Lemon juice and zest add a bright, tangy flavor to the cake. They can also help to balance out the sweetness of the other ingredients.
Blanched Almond Flour: I love using blanched almond flour because it’s super fine and soft. Almond meal is fine to use but keep in mind it will add a different (more mealy) texture to the cake.
Oat Flour: Adds a slightly sweet flavor to the cake and gives it some extra fluffiness!
Baking Powder: You need this to help the cake to rise and become light and fluffy.
Salt: This will enhance the flavor and bring out the sweetness of the cake.


How to Make Microwave Lemon Mug Cake
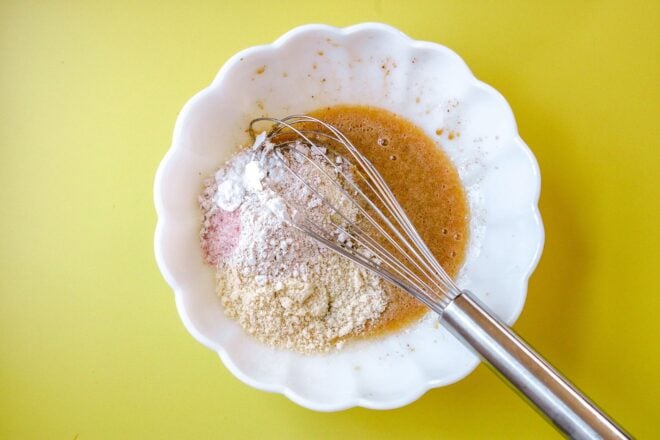
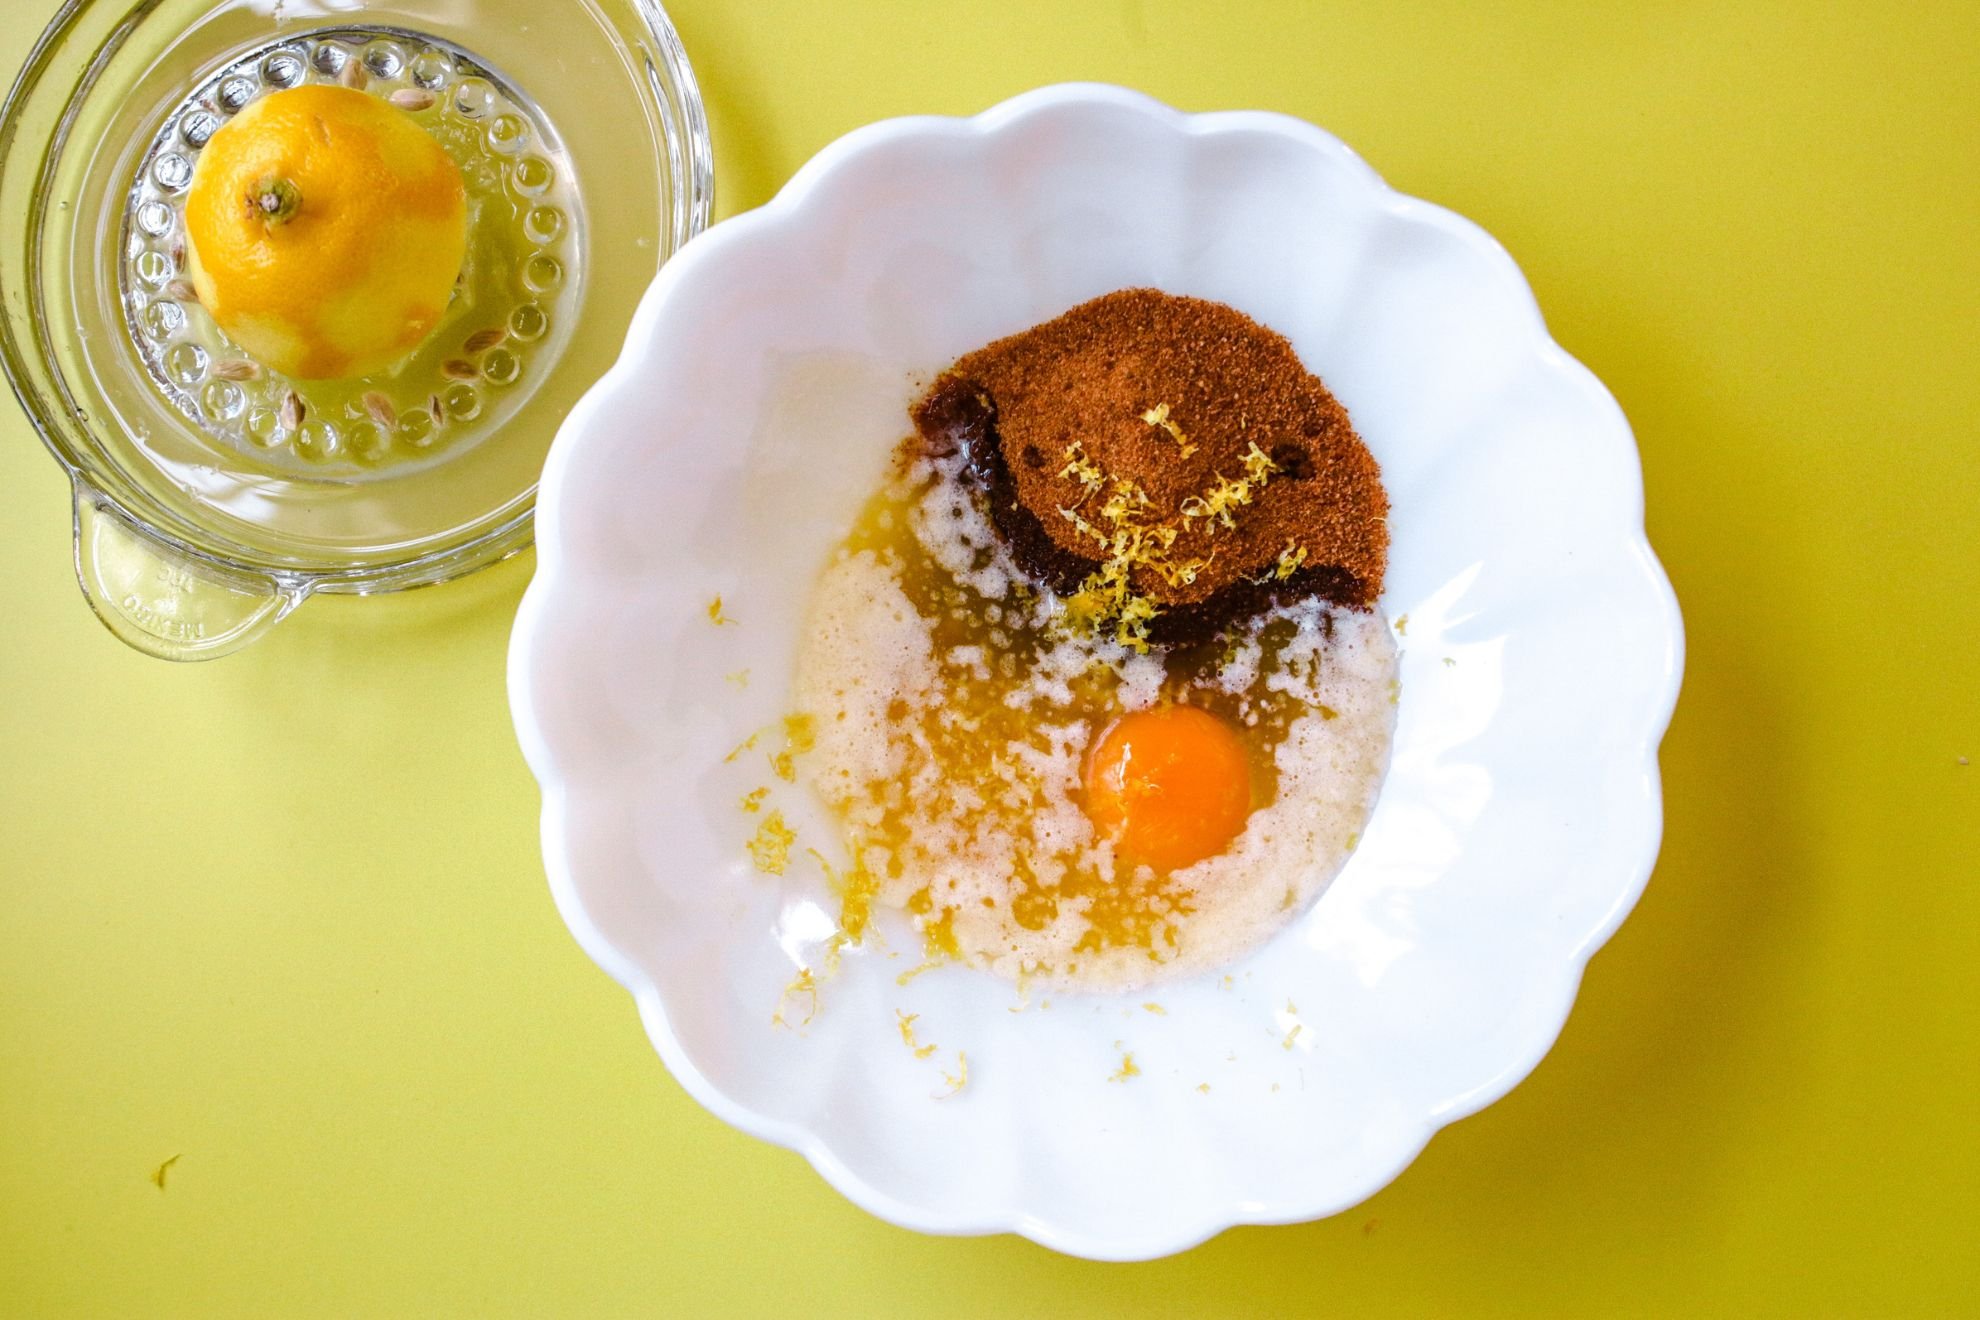
- Whisk the wet ingredients: In a medium bowl, whisk together the butter or oil, egg, coconut sugar, lemon zest, and lemon juice. Make sure the ingredients are well combined.
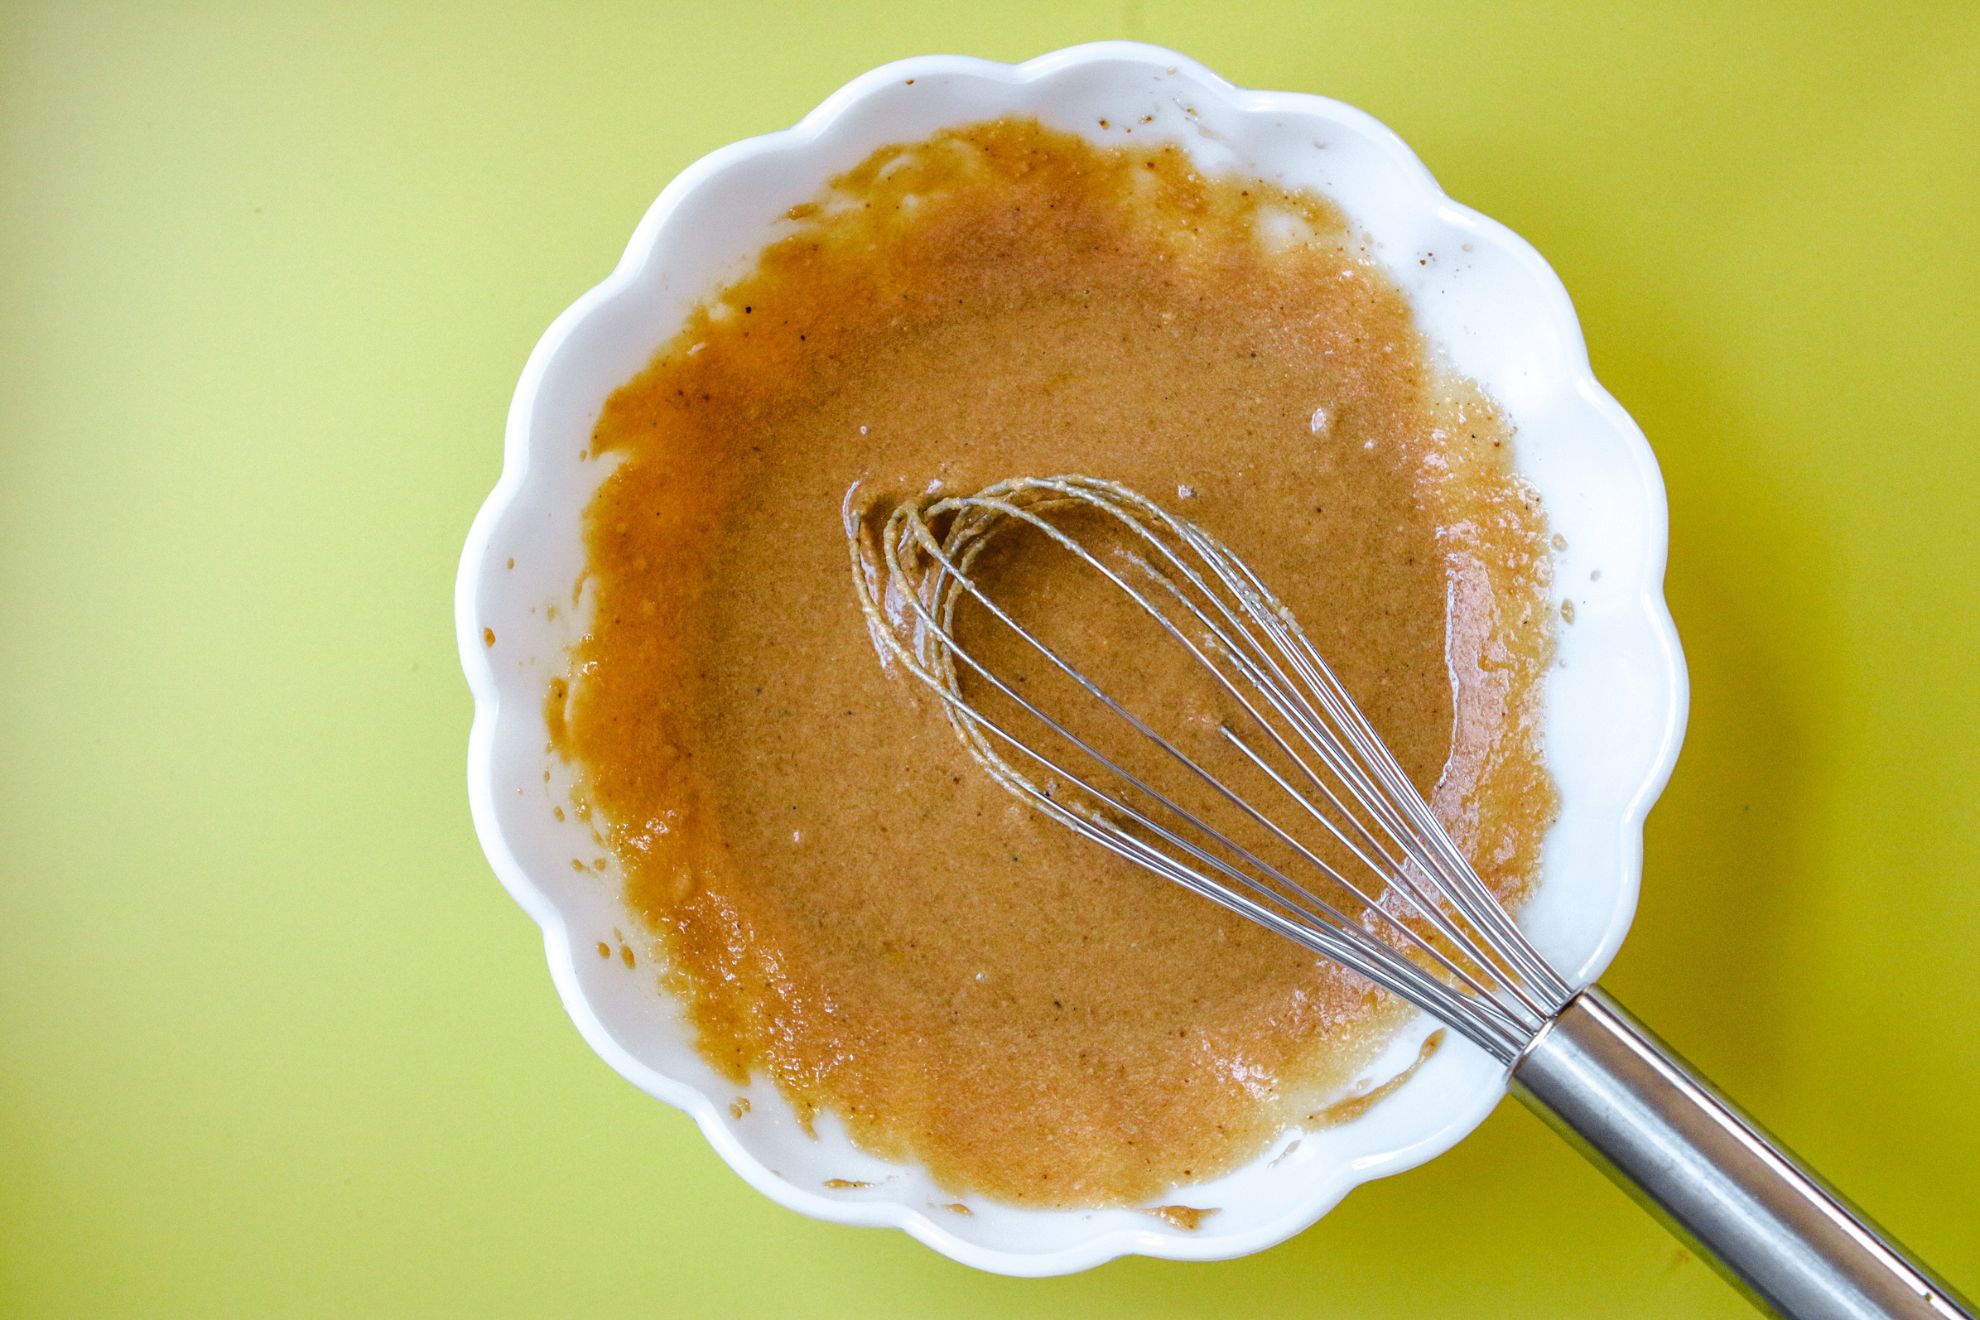
- Add the dry ingredients: Add the almond flour, oat flour, baking powder, and salt to the bowl with the wet ingredients. Whisk again until everything is well combined and there are no lumps.
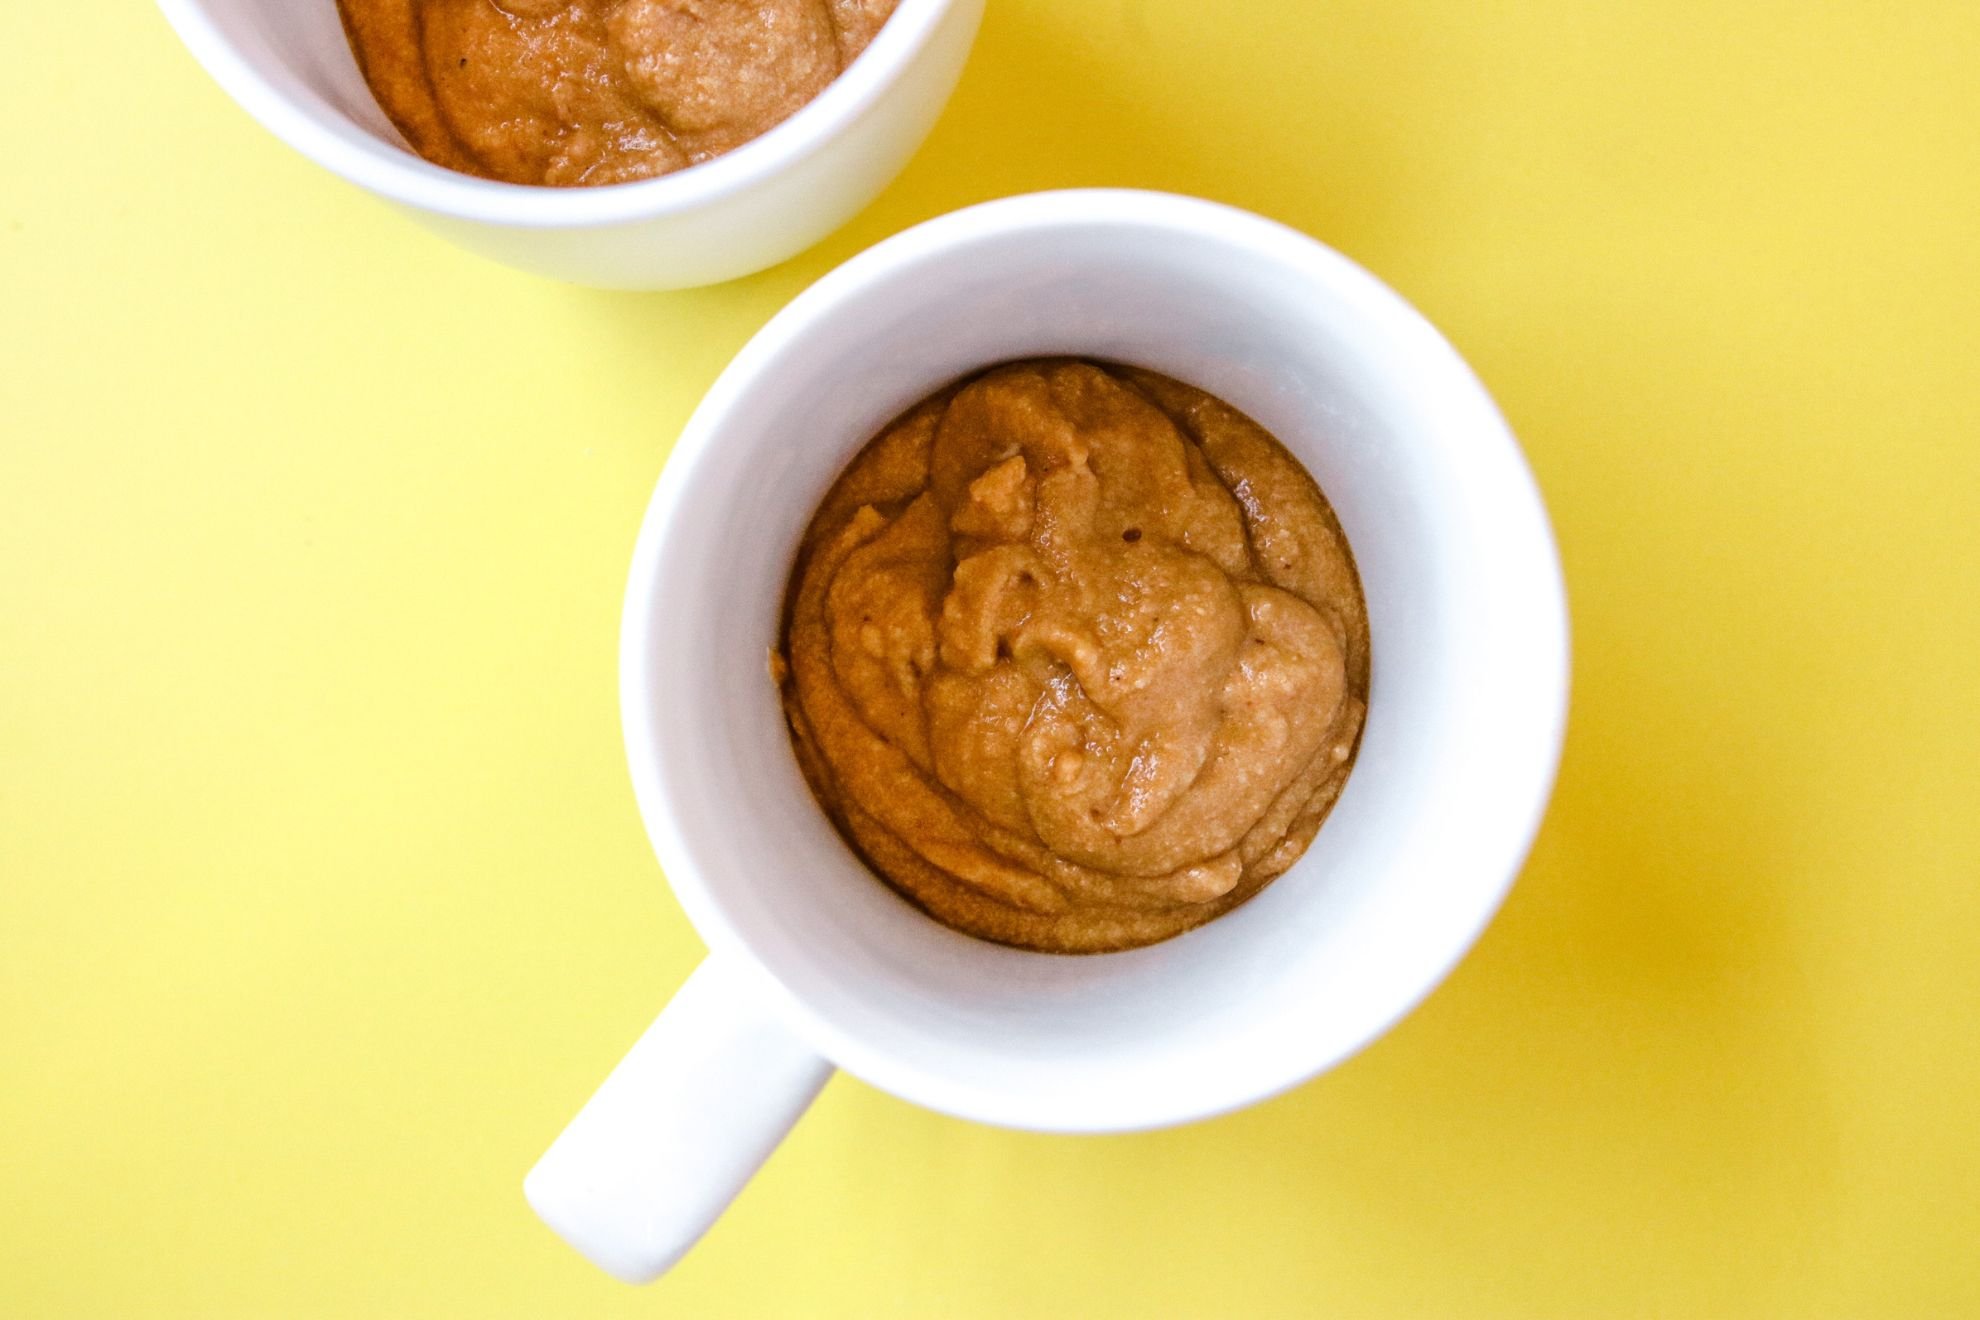
- Divide the batter: Pour the batter evenly into two mugs or ramekins. You want each mug to be about half full, to allow room for the cake to rise as it cooks.
- Microwave the cake: Place one mug at a time in the microwave and cook for 1 minute on high power. Keep a close eye on the cake as it cooks, as microwave times can vary depending on the wattage of your microwave. The cake should rise up and the center should be set, but still slightly moist.
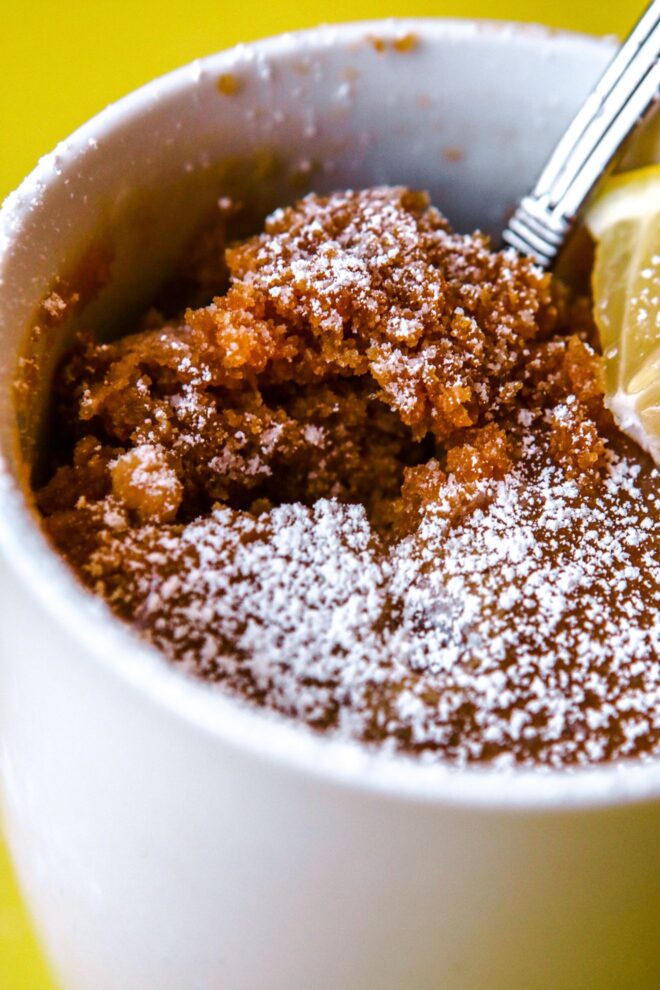
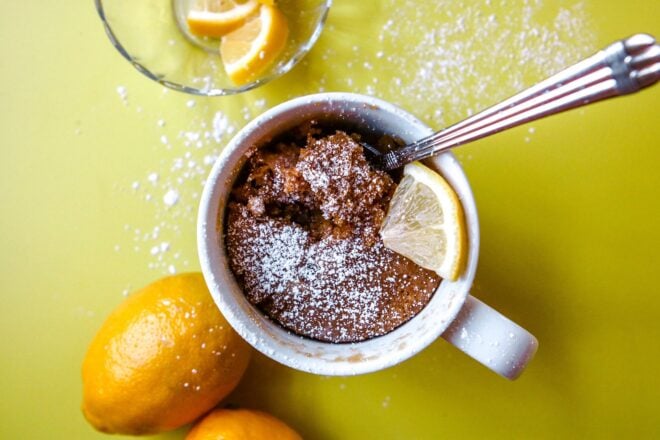
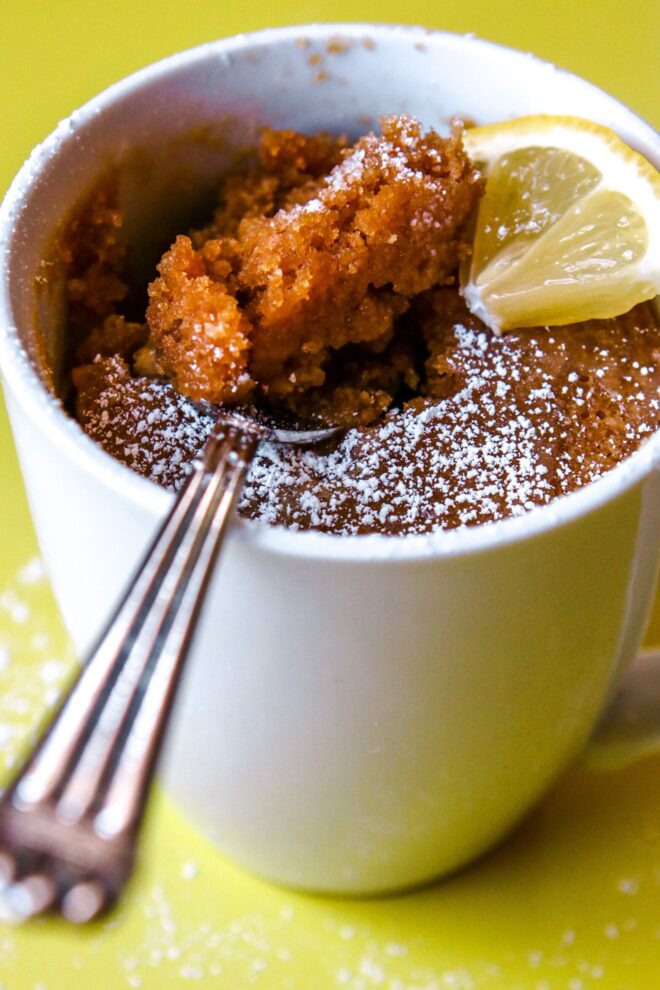
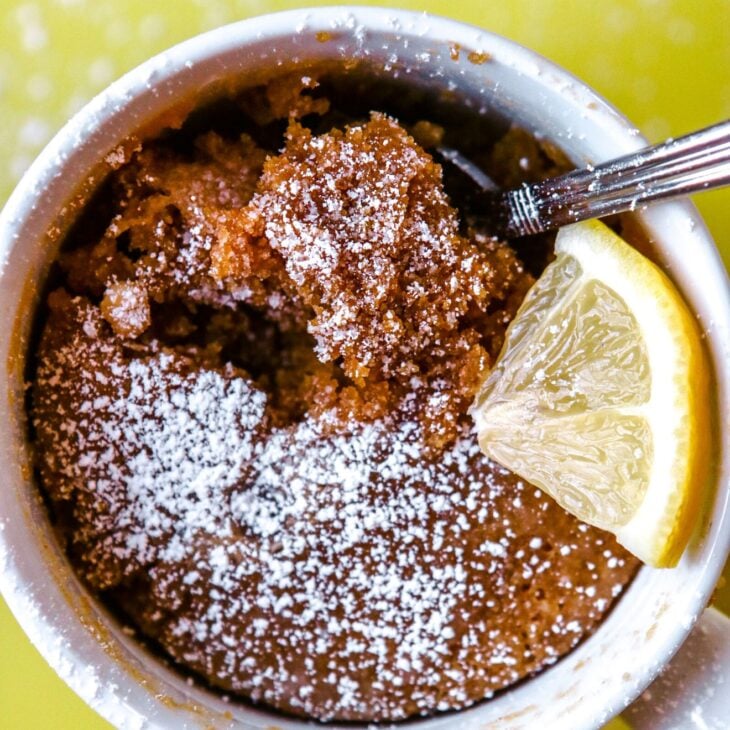
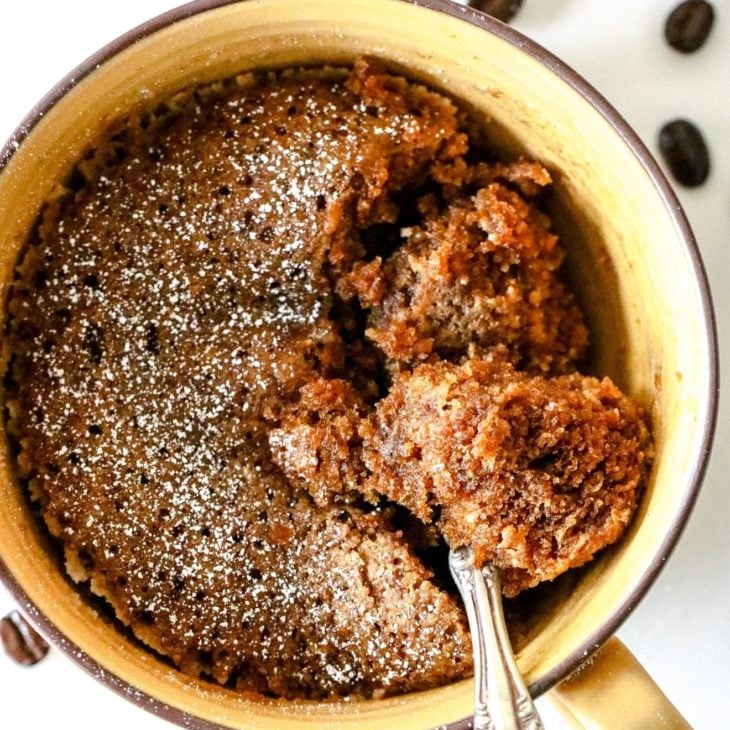
- Add glaze and enjoy: Once the cake has cooled a bit, you can add a glaze or frosting if you like. I sprinkled mine with some powdered sugar and dug right in!
Tips for Success
Use a microwave-safe mug: Make sure that the mug you use is microwave-safe and won’t crack or shatter in the microwave. It’s best to use a microwave-safe ceramic or glass mug.
Adjust cooking time based on your microwave and mug size: Microwave cooking times can vary, so it’s important to adjust the cooking time based on your microwave’s wattage. If you’re using a shallow mug or ramekin, start with 1 minute and add 30-second increments if needed. Watch the cake as it bakes to avoid overcooking. Visually, you want the cake to fluff up and spring back when you gently press the center.
Let the cake cool for a few minutes: Once the cake is finished cooking, let it cool for a few minutes before eating. This will help it to set up and prevent it from being too hot to handle.
Top with a glaze or frosting: A simple glaze or frosting made from powdered sugar and lemon juice can add an extra layer of flavor to the cake.
Variations to Try
Blueberry: Add a handful of fresh blueberries to the batter before cooking for a burst of sweet-tart flavor.
Poppy: Add a tablespoon of poppy seeds to the batter for a nutty crunch.
Coconut: Add a tablespoon of shredded coconut to the batter for a tropical twist on the classic lemon flavor.
Raspberry: Add a handful of fresh raspberries to the batter before cooking for a burst of sweet-tart flavor and a beautiful pop of color.
Ginger: Add a teaspoon of freshly grated ginger to the batter for a spicy kick that pairs well with the tangy lemon flavor.
Lavender: Add a teaspoon of dried lavender buds to the batter for a floral twist on the classic lemon flavor.
Cheesecake: Add a dollop of cream cheese to the center of the batter before cooking for a creamy ribbon with each bite.
Chia: Add a tablespoon of chia seeds to the batter for a boost of fun texture.
How to Store u0026 Reheat
To store a mug cake, let it cool completely and then transfer it to an airtight container. You can store it at room temperature for up to 2 days, or in the refrigerator for up to 5 days.
To reheat a mug cake, simply microwave it for 10-15 seconds until it’s warmed through. Be careful not to overheat the cake, as this can cause it to become dry and tough. Alternatively, you can reheat it in a preheated oven at 350°F (175°C) for 5-10 minutes, or until it’s warmed through.
To be honest, mug cakes are best eaten fresh and warm, as they tend to dry out quickly once they’ve cooled. If you’re making a mug cake ahead of time, it’s best to store it in an airtight container and reheat it just before serving.
 Recipe
2-Min Tangy Lemon Mug Cake
2-Min microwave lemon mug cake is a quick and simple recipe to make when you want a sweet and tangy dessert with minimal effort!
Ingredients
- 1/3 cup coconut sugar
- 1/4 cup unsalted butter (melted and cooled) or vegetable oil
- 1 lemon (zest + 1/4 cup juice)
- 1 egg
- 2/3 cup blanched almond flour
- 2 tablespoons oat flour
- 1 teaspoon baking powder
- 1/4 teaspoon salt
- sprinkle of powdered sugar
Instructions
- Whisk the wet ingredients: In a medium bowl, whisk together the butter or oil, egg, coconut sugar, lemon zest, and lemon juice. Make sure the ingredients are well combined.

- Add the dry ingredients: Add the almond flour, oat flour, baking powder, and salt to the bowl with the wet ingredients. Whisk again until everything is well combined and there are no lumps.
- Divide the batter: Pour the batter evenly into two shallow mugs or ramekins. You want each mug to be about half to 3/4 full, to allow room for the cake to rise as it cooks. You can use a taller mug for one big serving, just make sure to cook it for longer (see below).
- Microwave the cake: Place one mug at a time in the microwave and cook for 1 – 2 minutes on high power. Keep a close eye on the cake as it cooks, as microwave times can vary depending on your mug. If you’re using a shallow mug or ramekin, cook time will be closer to 1 minute. If you’re using a taller mug with all of the batter, cook time will be closer to 2 minutes. The cake should rise up and the center should be set, but still slightly moist.
- Sprinkle and enjoy: Once the cake has cooled a bit, you can add a glaze or frosting if you like. I sprinkled mine with some powdered sugar and a fresh lemon wedge for garnish.

Nutrition Info:
- Serving Size: 1 mug
- Calories: 443
- Sugar: 32.8g
- Sodium: 497mg
- Fat: 30.3g
- Saturated Fat: 15.9g
- Unsaturated Fat: 0g
- Trans Fat: 0g
- Carbohydrates: 39.9g
- Fiber: 1.7g
- Protein: 6g
- Cholesterol: 143mg

Leave a Comment & Rate this Recipe