• Skip to primary navigation
  • Skip to main content
  • Skip to primary sidebar
  • About
  • Contact
Check out my new cookbook

The Toasted Pine Nut

fun. flavorful. feel-good recipes.

  • Check out my cookbook!
  • Recipes
    • Dessert
      • Cookies
      • Bars & Brownies
      • Breads & Muffins
      • Cakes & Cupcakes
      • Pies & Crumbles
      • Candy
      • No Bake
    • Meal
      • Breakfast
      • Main Dishes
      • Appetizers
      • Sides
      • Snacks
      • Drinks
      • Salads
      • Sauces & Dips
      • Dessert
    • Diet
      • Gluten Free
      • Dairy Free
      • Vegan
      • Vegetarian
      • Egg Free
      • Kid Friendly
      • Low Carb
      • Nut Free
    • Meat
      • Fish & Seafood
      • Chicken & Poultry
      • Beef & Pork
      • Meatless
    • Method
      • Air Fryer
      • Slow Cooker
      • Instant Pot
      • Oven
      • Grill
      • Stovetop
    • Season
      • Spring
      • Summer
      • Fall
      • Winter
    • Recipe Filter
  • Shop
    • My Baking Mixes
    • Kitchen Essentials
    • Pantry Items
    • Kid Favorites
    • Photography
  • Cookbook
  • Videos
Home Recipes Appetizers
5 from 1 review

Beet Pickled Avocado Deviled Eggs

24 hrs 10 min
by: Lindsay Grimes
March 29, 2018 (Updated: February 27, 2020)
Jump to Recipe
Leave a Comment

This post may contain affiliate links. Please read our disclosure policy.

Beet Pickled Avocado Deviled Eggs
I am in LOVE with these Beet Pickled Avocado Deviled Eggs! They’re such a fun combo of tangy and creamy! And, they make for a perfect party appetizer, guaranteed to bring the smiles!

I might have a new obsession with pickling things. Please refer to these pickled red onions if you’re not sure what I’m talking about. Pickling is… kinda fun.

Beet Pickled Avocado Deviled Eggs

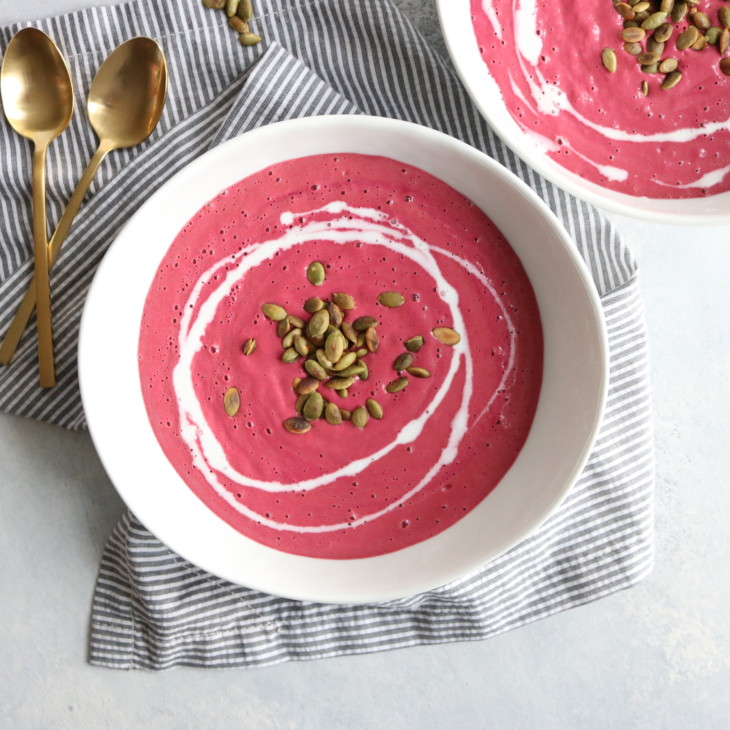
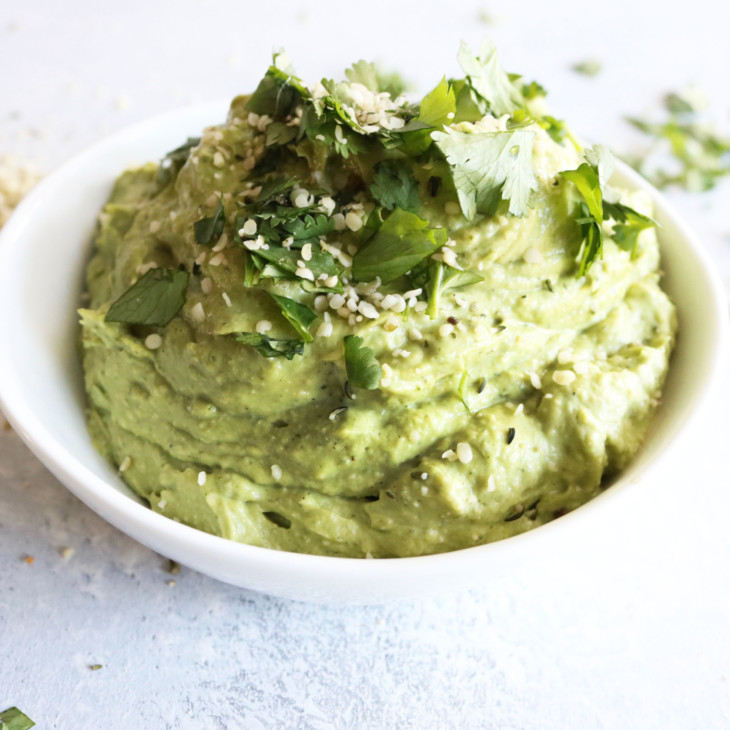
So after I made this delicious beet dip, I had all this extra pretty water from boiling the beets so I decided well hey. What if I make some pretty boiled pickled beet eggs. I’ve seen this technique around various corners of the interwebs and I cannot get over how gorgeous the eggs turn out!

Basically, you let hard boiled eggs sit in beet juice and forget about it for a day or two. The longer they sit, the more infused with beet color they get. I personally love just the edge ombre because it’s just so delicate and beautiful.

But, we’re taking it one step further because not only are we beet infusing it, we’re pickling them so they have this fun tart/tangy taste.

Beet Pickled Avocado Deviled Eggs

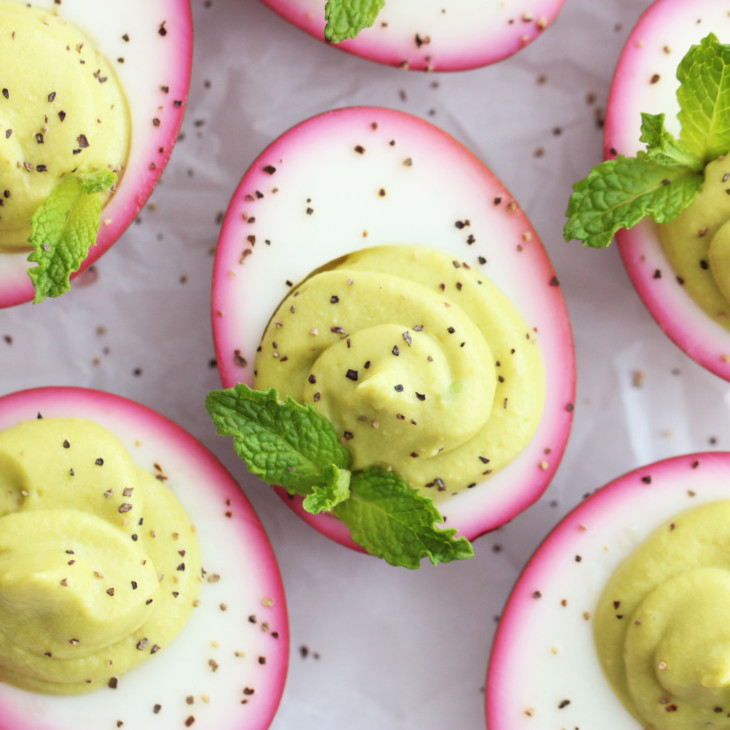
We’re also switching up the center by adding some creamy avocado to give it a bit of a different vibe. You guys, these Beet Pickled Avocado Deviled Eggs are so fun. They make for a great appetizer for Easter, baby shower, bridal shower, or really any party. I mean, how can you not SMILE when you see these?!

So here’s how you make these fun Beet Pickled Avocado Deviled Eggs! I can’t wait for you guys to try them for yourself, I know you’ll love them!!

First, hard boil your eggs. I made mine in my new Instant pot and I am obsessed with how perfectly they turn out. Quick breakdown on how you can hard boil your eggs below! If you just can’t be bothered with hard boiling your own eggs, I’ve seen hard boiled sold in grocery stores which is kinda cool.

beet pickled avocado deviled eggs

Hard boil your eggs on the stovetop: Place your eggs in a pot filled with water. Bring the water to a boil and then remove from heat. Once the water comes down to room temperature, transfer the eggs to an ice bath (a bowl of water filled with ice) and allow them to soak until you’re ready to use them (or store in the fridge until you’re ready to use them).

Hard boil your eggs in your Instant Pot: Place your eggs on top of the rack in your instant pot. Pour one cup of water into the bottom. Press the egg button and once the lid is on (and valve sealed) it will take about 5 minutes for the pot to come up to temperature. Once it is at temperature, it will begin a 5 minute countdown. Once the countdown is done, you can release the valve to let the steam out (may be hot so use a dish towel to push  the valve off to the side). When all the steam is released (another 5 minutes or so), use tongs to transfer the eggs to an ice bath (a bowl of water filled with ice) and allow them to soak until you’re ready to use them (or store in the fridge until you’re ready to use them).

beet pickled avocado deviled eggs

Place the beet juice, apple cider vinegar, coconut sugar, salt and pepper in a large bowl or container with a lid. Whisk everything together. Peel the shell off the hard boiled eggs and place them in the bowl too. Cover and place in your fridge for 12 – 48 hours. I soaked mine for about 24 hours.

Remove the eggs from the bowl and discard the liquid. Rinse the eggs and cut in half lengthwise. Remove the yolks and rinse again to gently clean the yolks out from the center.

Place three egg yolks in your food processor with 1/2 avocado, avocado oil, mayo, and mustard. Process until smooth, taking breaks to scrape down the sides and get everything combined.

Transfer the avocado mixture to a plastic baggie and cut off one corner. Plate the egg halves on your serving platter. Squeeze the avocado mixture into the center of each egg. Sprinkle with fresh ground pepper and garnish with mint, dill, cilantro, chives, whatever your prefer.

beet pickled avocado deviled eggs

Did you make this? Leave a review below and tag me on Instagram, Facebook, or Pinterest!

Recipe

Beet Pickled Avocado Deviled Eggs

I am in LOVE with these Beet Pickled Avocado Deviled Eggs! They’re such a fun combo of tangy and creamy! They make for a perfect party appetizer, guaranteed to bring the smiles!

Recipe by:Lindsay Grimes
5 Stars 4 Stars 3 Stars 2 Stars 1 Star 5 from 1 review
Prep: 24 hoursCook: 10 minTotal: 24 hours 10 min
Print recipe Rate recipe Pin Save recipe
Servings: 12 1x

Ingredients

  • 6 eggs
  • 2 cups beet juice (or 2 cups water with 2 tablespoons beet powder mixed in)
  • 1 cup apple cider vinegar
  • 1/3 cup coconut sugar
  • 1/2 teaspoon sea salt
  • 1/4 teaspoon ground pepper
  • 1/2 ripe avocado
  • 2 tablespoons avocado oil
  • 1 tablespoon mayonnaise
  • 1/2 teaspoon dijon mustard
  • fresh ground pepper
  • fresh herbs (I used mint)

Instructions

  1. First, hard boil your eggs. See two ways to do it below!
  2. Place the beet juice, apple cider vinegar, coconut sugar, salt and pepper in a large bowl or container with a lid.
  3. Whisk everything together.
  4. Peel the shell off the hard boiled eggs and place them in the bowl too.
  5. Cover and place in your fridge for 12 – 48 hours. I soaked mine for about 24 hours.
  6. Remove the eggs from the bowl and discard the liquid.
  7. Rinse the eggs and cut in half lengthwise.
  8. Remove the yolks and rinse again to gently clean the yolks out from the center.
  9. Place three of the cooked egg yolks in your food processor with 1/2 avocado, avocado oil, mayo, and mustard.
  10. Process until smooth, taking breaks to scrape down the sides and get everything combined.
  11. Transfer the avocado mixture to a plastic baggie and cut off one corner.
  12. Plate the egg halves on your serving platter.
  13. Squeeze the avocado mixture into the center of each egg.
  14. Sprinkle with fresh ground pepper and garnish with mint, dill, cilantro, chives, whatever your prefer.

Tips

Hard boil your eggs on the stovetop: Place your eggs in a pot filled with water. Bring the water to a boil and then remove from heat. Once the water comes down to room temperature, transfer the eggs to an ice bath (a bowl of water filled with ice) and allow them to soak until you’re ready to use them (or store in the fridge until you’re ready to use them).

Hard boil your eggs in your Instant Pot: Place your eggs on top of the rack in your instant pot. Pour one cup of water into the bottom. Press the egg button and once the lid is on (and valve sealed) it will take about 5 minutes for the pot to come up to temperature. Once it is at temperature, it will begin a 5 minute countdown. Once the countdown is done, you can release the valve to let the steam out (may be hot so use a dish towel to push it off to the side). When all the steam is released (another 5 minutes or so), use tongs to transfer the eggs to an ice bath (a bowl of water filled with ice) and allow them to soak until you’re ready to use them (or store in the fridge until you’re ready to use them).

© The Toasted Pine Nut

Did you make this?

I love seeing what you made! Tag me on social @thetoastedpinenut

Rate recipe Tag me on Instagram

Enjoy!! xo

I am in LOVE with these Beet Pickled Avocado Deviled Eggs! They're such a fun combo of tangy and creamy! They make for a perfect party appetizer, guaranteed to bring the smiles! thetoastedpinenut.com #thetoastedpinenut #beet #pickled #avocado #deviledeggs #lowcarb #glutenfree #party #appetizer #easter

315 shares
  • Share
  • Tweet
  • Email
overhead image of a gluten free sprinkle cookie with a bite taken out on a white counter

Never miss a recipe!

Join our pine nut family and get recipes delivered right to your inbox.

Join now!
15 no bake desserts

You May Also Like...

  • Easy Instant Pot Deviled Eggs
  • Beet + Leek Soup
  • Avocado Cilantro Sauce

Reader Interactions

Leave a Comment & Rate this Recipe Cancel reply

If you love this recipe it would mean SO MUCH to me if you give it a star rating and leave a comment about it. Not only do I love basking in the glory of your recipe love, but (perhaps more importantly 😋) it helps other readers find my recipes online. Thanks so much for your feedback!!

Have a question? Submit your question or comment below. Your email address will not be published. Required fields are marked *

Recipe rating 5 Stars 4 Stars 3 Stars 2 Stars 1 Star

  1. AvatarCAROL says

    Posted on 4/11/18 at 1:03 pm

    I assume that the other three yolks are supposed to be used for another application. However, only three yolks aren’t enough volume, even with the other ingredients, to fill the halves of six eggs.

    Reply
    • Lindsay says

      Posted on 4/20/18 at 11:27 am

      Hi Carol!

      The three egg yolks along with the other ingredients like avocado are more than enough to fill the inside of the eggs! You can use the other three yolk for something else, or feel free to add them into the avocado filling mixture for some extra yolkiness! Enjoy!! xo

      Reply
  2. AvatarShiva says

    Posted on 10/9/18 at 2:47 pm

    I just finished these and they are wonderful! The 3 yolks plus the other ingredients make the perfect amount of filling.

    Reply
    • Lindsay says

      Posted on 10/27/18 at 3:33 pm

      Yay!! I’m so glad you enjoyed them!! xo

      Reply
  3. AvatarKathryn says

    Posted on 4/13/19 at 1:12 pm

    Hi, can you use organic sugar instead? 

    Reply
    • Lindsay says

      Posted on 4/15/19 at 8:51 pm

      hi!! yes, any sugar you prefer is fine 🙂

      Reply

Primary Sidebar

Lindsay

Nice to Meet You!

I’m Lindsay - cookbook author, blogger and chocolate lover! If gluten-free desserts are your jam, you’re in the right place! I live in south Jersey with my family and new puppy Roxie! Some of my favorite things are oat milk lattes, sunny days and warm, gooey chocolate chip cookies.

Read more...

Recipe Key

GF Gluten-Free DF Dairy-Free V Vegan VG Vegetarian EF Egg-Free NF Nut-Free P Paleo Browse All

Most Popular

This is a horizontal image of a hand with deep pink nail polish holding a chocolate quinoa crisp in between their thumb and pointer finger. More chocolate quinoa crisps are blurred in the background.

5-Minute Crunchy Chocolate Quinoa Crisps

overhead image of a muffin tin filled with 12 raw eggs sprinkled with pepper

Perfect Oven-Baked Eggs in a Muffin Tin

This is a side view of a chocolate almond butter bar with a bite taken out of it. The bar sits on a white piece of parchment paper and is sprinkled with salt. More bars are blurred in the background.

No Bake Almond Butter Bars

Lemon & Avocado Kale Salad

Freebie alert!

Get My Free No Bake Desserts eBook!

Explore

More Appetizers

This is a vertical image focusing on a crispy roasted smashed potatoes on a white plate. The vantage point is from the side. The center potato is topped with sour cream, caramelized onions, and a small bit of fresh dill. More crispy potatoes with the same toppings are on the plate blurred around the center potato in focus.

Crispy Smashed Potatoes with Sour Cream and Jammy Caramelized Onions

This is an overhead horizontal image of a beveled glass plate with a block of feta on it. The feta is crusted with toasted pine nuts and topped with a sprig of rosemary. Blistered grapes are on the feta and around it. The plate sits on a white and tan terrazzo surface.

Pan Fried Feta with Honey & Blistered Grapes

This is a side view of a glass jar filled with oil. A fork is piercing three garlic cloves and leaning against the side of the jar. The background of the image is white.

Rosemary Garlic Confit

This is a side view closeup image of a red plastic basket lined with white parchment paper with halloumi fries in them. The fries are topped with grated cheese and dried oregano. A small silver metal bowl has marinara sauce in it and is blurred in the background. The basket sits on a white counter.

Crispy Halloumi Fries

Browse All
15 No bake desserts

Download my FREE No Bake Dessert Ebook!

As seen on:

Food Network
Shape
Men's Health
NBC
Kitchn
Glamour
  • Reader Faves: Gluten-Free Desserts
    • Gluten free macarons
    • Banana mug cake
    • Almond butter bars
    • Peanut butter Cheerio bars
    • Chia seed cookies
    • More gluten-free desserts
  • Top Chocolate Desserts
    • Chocolate quinoa crisps
    • Microwave baked oats
    • Hot chocolate bombs
    • Chocolate banana bread
    • Peanut butter brownies
    • All chocolate recipes
  • DIY & How To
    • Dried orange garland
    • How to melt chocolate chips
    • DIY face oil
    • Oven-baked eggs in a muffin tin
    • How to make taco seasoning
    • How to make oat milk in 5 minutes
  • Explore Resources
    • FAQ
    • My Baking Mixes
    • Cookbook
    • Shop Favorites
    • Web Stories
    • Meet Lindsay
Follow

@thetoastedpinenut

Accessibility

Privacy Policy

Disclaimer

Contact

© 2025 The Toasted Pine Nut
|
Site Credits Designed by Melissa Rose Design Developed by Once Coupled Support by Foodie Digital
Back to Top
315 shares