GUYS!! Take your computer to the kitchen right now and MAKE THESE BABIES!! I can’t tell you how excited I am about these, although you can probably tell by the caps and exclamation points. So, let me elaborate a bit more…

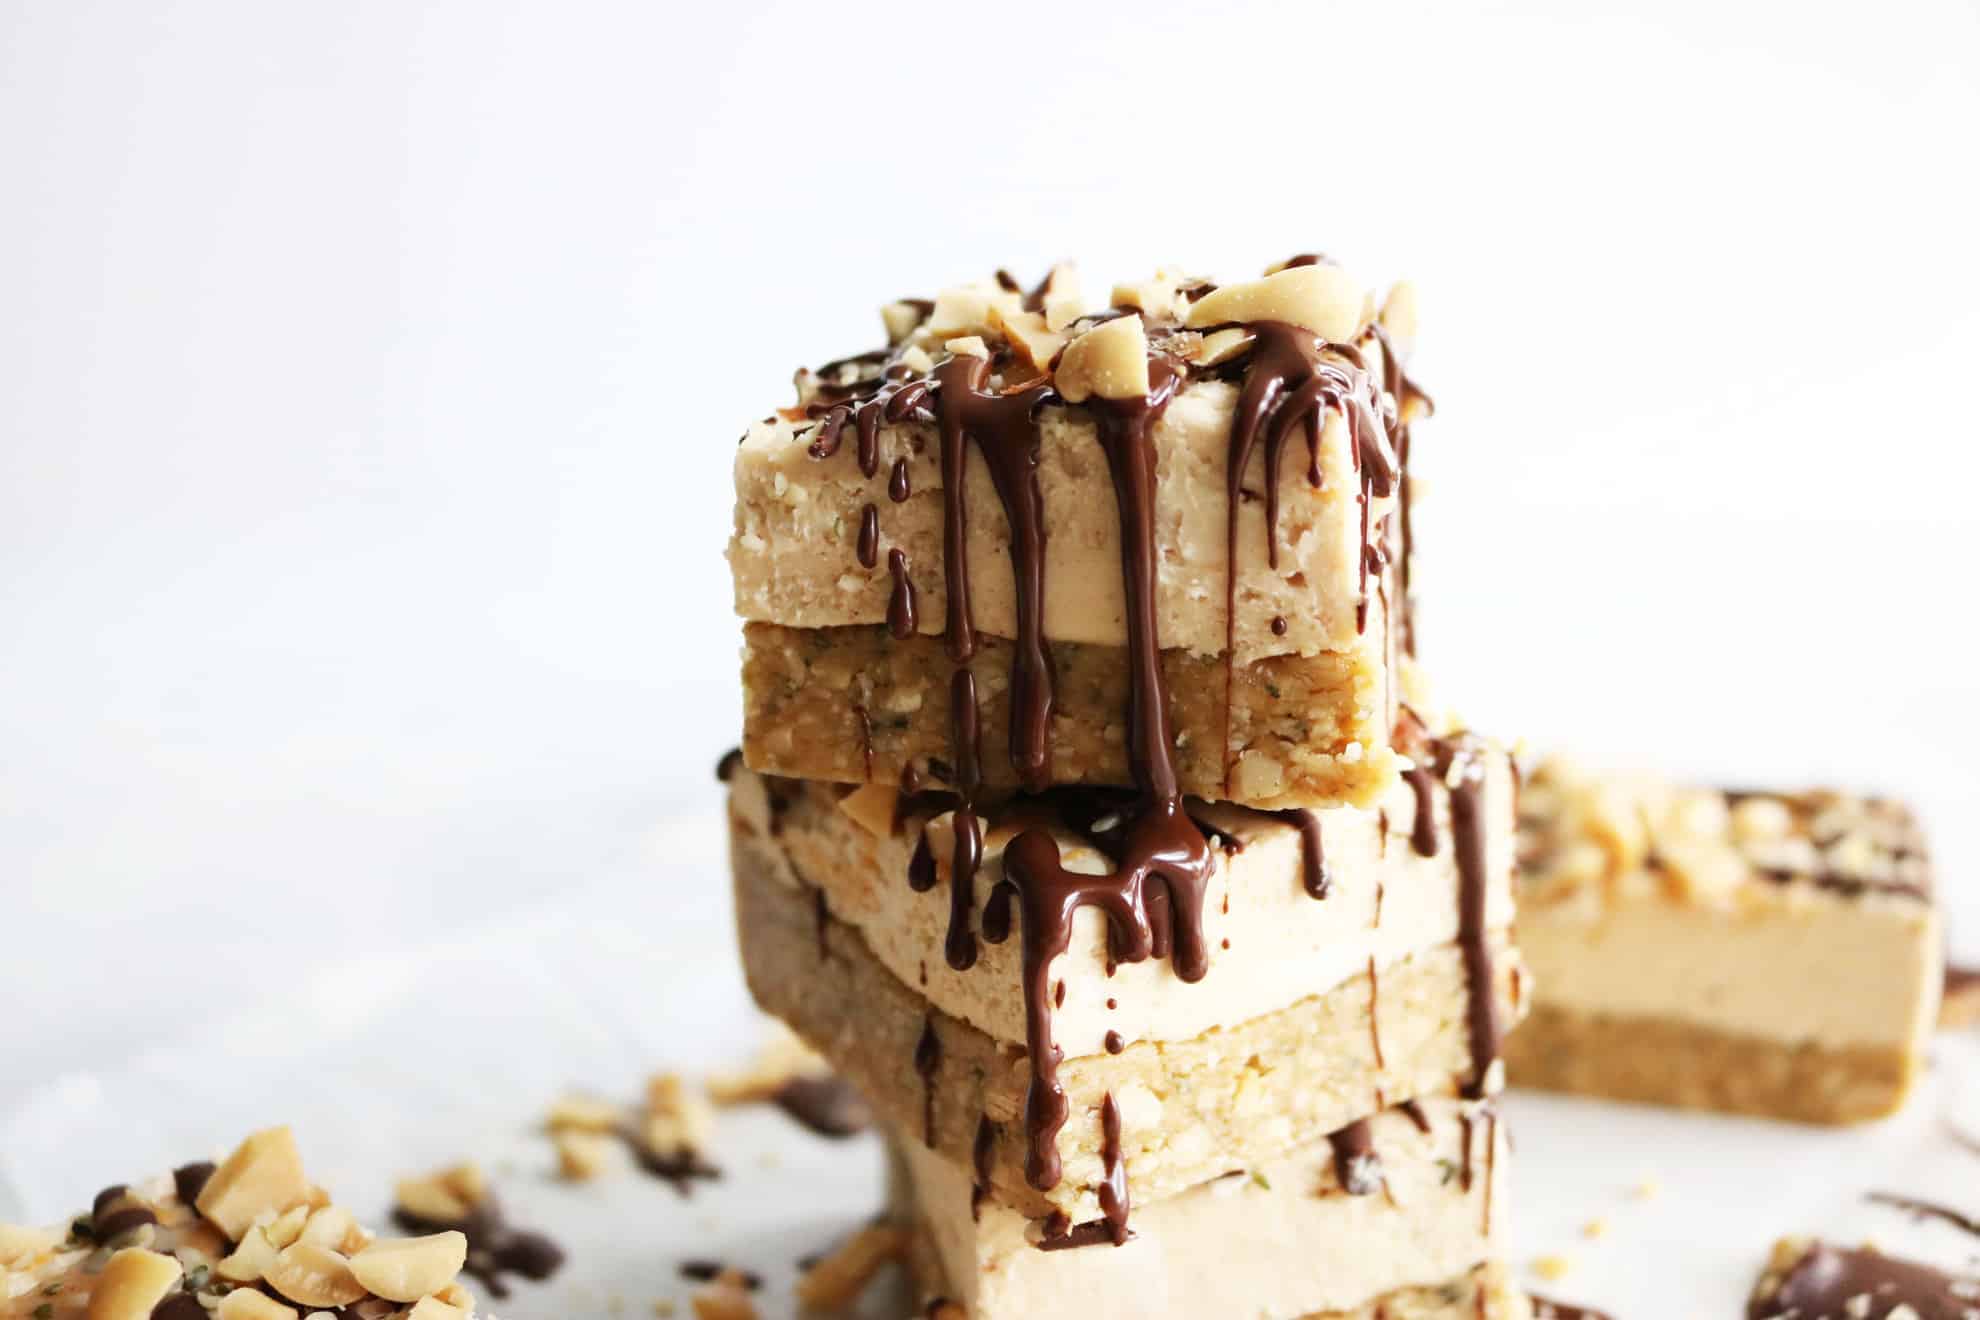
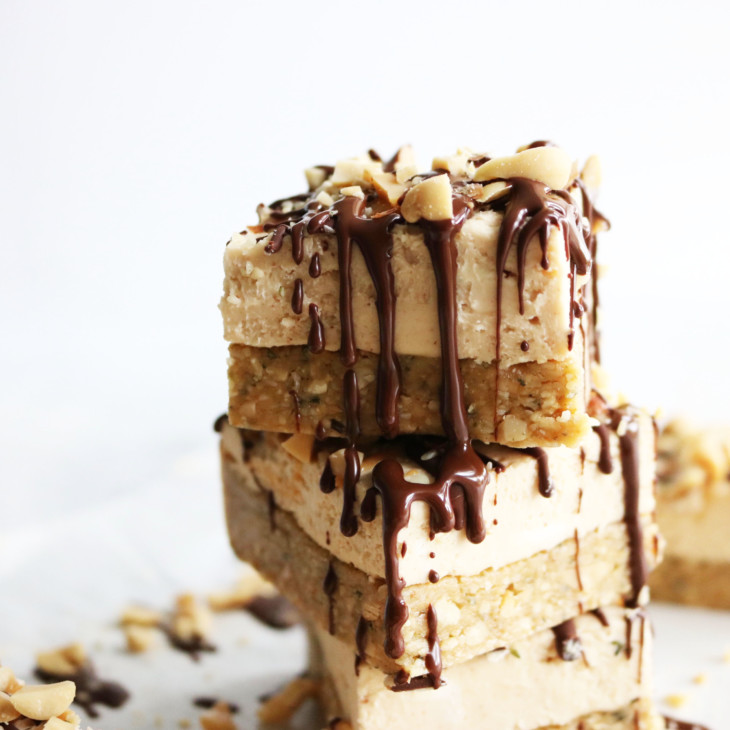
These are such a creamy dreamy, indulgent treat. They’re no-bake, come together SO quickly, and are only a handful of ingredients! These are like a peanut butter Snickers cheesecake treat. That’s a lot, I know, but that exactly what this tastes like. In other words, HEAVEN.

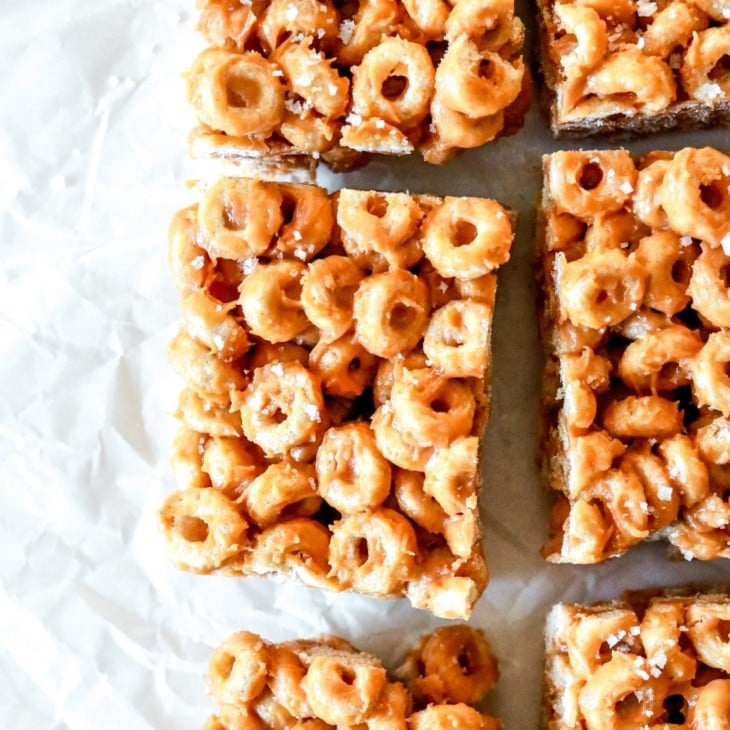
I also love the crunchy crust because it has hemp hearts! I immediately feel better about whatever I’m eating if it has hemp hearts in it. Super decadent desserts are suddenly healthified (yes I made up that word) in my eyes because the hemp hearts are such a nutritional powerhouse!


Since I know you’re here for the juicy deets, let’s make some Peanut Butter Cheesecake Bars!!
First, in your food processor, place the peanuts and hemp hearts. Process until all chopped up but still chunky.

Next, add the peanut butter and agave nectar. Process again until the mixture balls up. Use a rubber spatula t scrape down the sides and process again until it balls up.


Line a bread pan with parchment paper (easier to pull out when all done) and transfer the mixture into the pan. Use an additional piece of parchment paper to press the nutty crust mixture evenly throughout the pan.

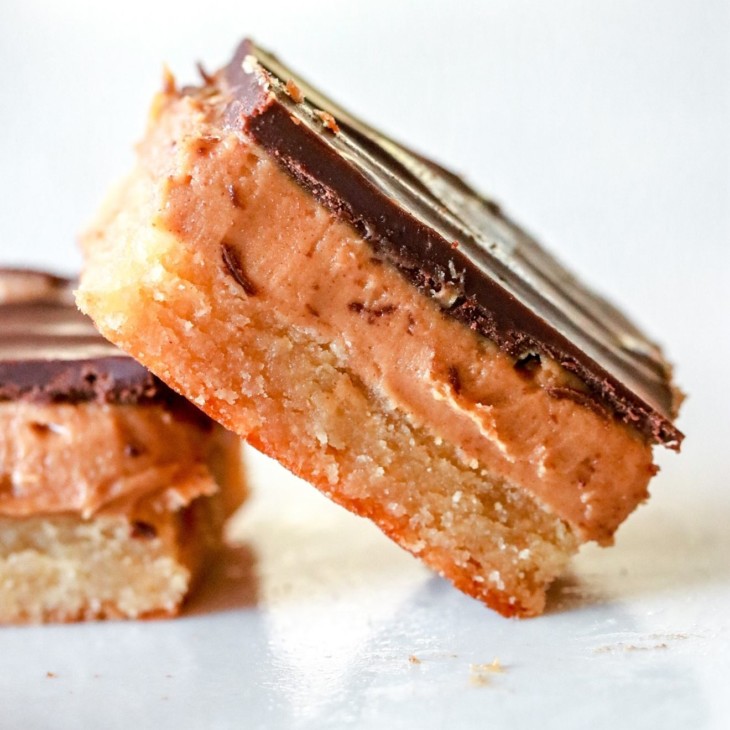
Next, place your room-temp cream cheese in your electric mixer. Turn on the mixer and add the peanut butter and agave nectar. Whip on high until super fluffy.
Pour the cream cheese mixture on top of the crust and spread it out evenly with your spatula.


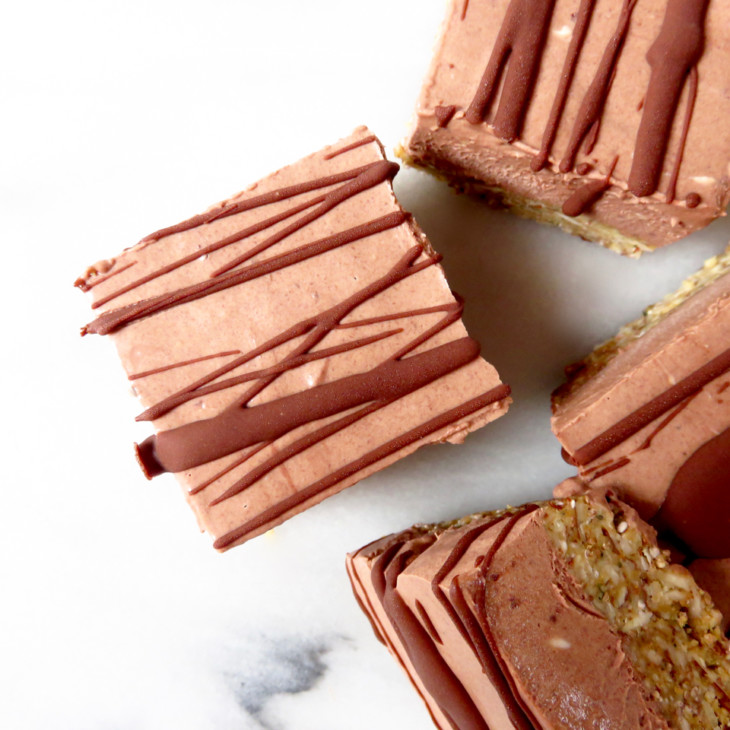
Place it in the freezer for 30 minutes – 1 hour. You want the bars to set but not to freeze through. When the bars are set, remove them from the pan and cut them into 8 squares.

Melt the chocolate and 1/2 tablespoon coconut oil in one bowl and mix until smooth. Heat the peanut butter and 1/2 tablespoon coconut oil in the microwave for 30 seconds and mix until smooth.
Drizzle the bars with the chocolate and peanut butter. Sprinkle with additional chopped peanuts and hemp hearts.


 Recipe
Peanut Butter Cheesecake Bars
These peanut butter cheesecake bars are the most delicious dessert! They’re crunchy, infused with peanut butter, and super easy because they’re no bake!!
Ingredients
- Crust:
- 1 cup roasted lightly salted peanuts
- 1/2 cup Manitoba Harvest hemp hearts
- 1/4 cup natural peanut butter
- 3 tablespoons agave nectar
- Cheesecake:
- 8 oz. cream cheese, room-temperature (can sub in non-dairy cream cheese)
- 1/4 cup natural peanut butter
- 2 tablespoons agave nectar
- Toppings:
- 1/4 cup 60% cacao dark chocolate chips
- 1/4 cup natural peanut butter
- 1 tablespoon refined coconut oil
- 1/8 cup roasted lightly salted peanuts, chopped
- 1 teaspoon hemp hearts
Instructions
- First, in your food processor, place the peanuts and hemp hearts.
- Process until all chopped up but still chunky.
- Add the peanut butter and agave nectar.
- Process again until the mixture balls up.
- Use a rubber spatula to scrape down the sides and process until it balls up again.
- Line a bread pan with parchment paper (easier to pull out when all done) and transfer the crust mixture into the pan.
- Use an additional piece of parchment paper to press the nutty crust mixture evenly throughout the bottom of the pan.
- Place your room-temp cream cheese in your electric mixer.
- Turn on the mixer and add the peanut butter and agave nectar.
- Whip on high until fluffy, about 2 minutes.
- Pour the cream cheese mixture on top of the crust and spread it out evenly with your spatula.
- Place it in the freezer for 30 minutes – 1 hour. You want the bars to set but not to freeze through.
- When the bars are set, pull the edges of the parchment paper to remove the bars from the bread pan, and place them onto a cutting board.
- Cut them into 8 squares.
- Melt the chocolate and 1/2 tablespoon coconut oil in one bowl and mix until smooth.
- Heat the peanut butter and 1/2 tablespoon coconut oil in the microwave for 30 seconds and mix until smooth.
- Drizzle the bars with the chocolate and peanut butter.
- Sprinkle with additional chopped peanuts and hemp hearts.
- Store in the fridge.
Tips
Serving (1 bar): Calories 226; Fat 14.5g (Sat 3.5g); Protein 7.4g; Carb 15.6g (net carb 13.3); Fiber 2.3g; Sodium 56mg
Enjoy!! xo

Thank you so much to Manitoba Harvest for sponsoring this blog post! I love working with my favorite brands and couldn’t be more excited they support The Toasted Pine Nut!
These look amazing!
I love peanut butter so much. x
Izzy |http://www.pinchofdelight.com